Category: FrugalMac

Free, open-source, and low-cost Mac tools for people who want a capable setup without overspending.

  • FrugalMac: Three Productivity Apps That Made the Cut

    FrugalMac: Three Productivity Apps That Made the Cut

    My FrugalMac build continues with the installation of three macOS productivity applications that I use regularly.

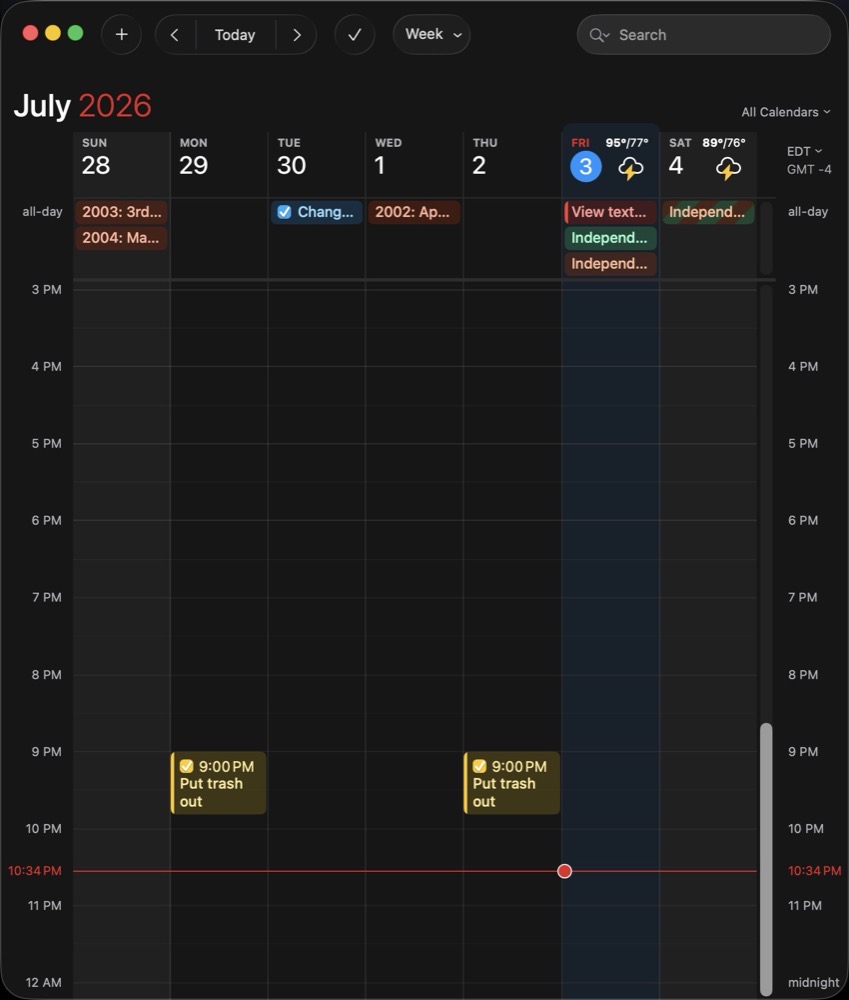
    First up is Fantastical, my calendaring tool of choice for both personal and work related scheduling. I’ve used Fantastical for nearly a decade; it offers many conveniences over Apple’s included Calendar.app. Chief among them is natural language parsing. I can easily add items to my calendar, by typing (or dictating) phrases like:

    Meet Bob next Wednesday at 1PM at Panera Bread.

    Set up Office Hours every Monday from 2 – 3PM from August 17th to December 19th.

    Fantastical also links with my Reminders.app, allowing me to track and complete upcoming tasks directly within my calendar. It’s extremely convenient. 

    Fantastical includes built-in scheduling, which allows me to share openings to let colleagues or students book time directly on my calendar. I plan to take full advantage of this new feature during the upcoming academic term.

    Fantastical includes a convenient menu bar item, where I can add an upcoming meeting or check my upcoming schedule at a glance.

    Fantastical menubar item.

    I do pay an annual subscription for Fantastical. In my view, it’s worth it, as useful features are added to the program throughout the year.

    I also use Notion Calendar, for the sole purpose of tracking project / assignment due dates

    Next up is Zoom. There’s no escape from this one, as we use it at work. Compared to its web counterpart, the dedicated Zoom app offers better performance and reliability when it comes microphones, web-cams and screen sharing

    Helium in action.

    Finally, to round things out, I’ve installed a Chrome-compatible browser called Helium. My browser of choice has always been Safari, but there are times where I find myself needing a Chrome-based browser. Helium is open-source, privacy focused and includes ad-blocking by default. I like Helium because it’s clean and fast. It does not come with a password manager or cloud-based sync, which is fine for my occasional use.

    -Krishna

  • Where to Find Indie Open Source Mac Apps

    Where to Find Indie Open Source Mac Apps

    There are many open source macOS applications available, but finding them online has been a bit hit or miss for me. Occasionally, I’ll discover an app from a Mac focused YouTube channel. Other times, I’ll run across a recommendation via my Mastodon feed. And, from time to time, I’ll come across something useful on one of the many independently run Mac blogs.

    Stumbling in the dark to find an open source Mac app is an option, but a better way is perusing IndieGoodies. Apps are categorized by tag, making it easy to find what you’re looking for. IndieGoodies is by no means a comprehensive list, but it’s a good start, and I like how it’s organized. 

    For native, open source macOS apps developed in Swift, check out Wang Ghujiang’s curated list. Apps are neatly organized by category, but what I really appreciate are the tags which identify when each app was last updated. This useful metric allows me to determine whether or not an app is actively being maintained. Be sure to check out the author’s apps while you’re at it.

    Another solid place to find open source Mac apps is Awesome Native MacOSX Apps on Git. The Mac apps in this list meet a specific criteria: they must be native and lightweight (no electron bloat). This list includes both free and paid software offerings. 

    Part of my FrugalMac experience is discovering high quality open source Mac apps that provide similar or improved features compared to their paid counterparts.

    It’s not that I object to paying for an app (I often do!), but there are some fantastic open source Mac apps that often fly under the radar. I want to make sure that these apps are given full consideration before opening my wallet.

    -Krishna

  • FrugalMac: The Bloom is Off the Finder

    FrugalMac: The Bloom is Off the Finder

    The Finder.

    It’s been around since the original Mac rolled off the assembly line in 1984. Ironically, my first exposure to the Finder was not on a Mac, but rather, on an Apple IIGS running GS/OS. (But that’s a story for another day…)

    While the Finder has evolved with the Mac over the years, it still feels inefficient to work with, especially when it involves movings files around

    Finder windows.

    Let’s assume you have to copy or move a file from one location on your Mac to another location on your external storage device. To perform the task within macOS, two Finder windows are needed. One which shows the location of the source file, the other showing the intended destination

    We’re still moving files around like this in the year 2026.

    Bananas. 

    While Apple seems content with making small, incremental features to the Finder, it’s not enough for me.

    That’s where Bloom comes in. I’ve been using Bloom for many months now, and it truly delivers on its promise of providing a “refined Finder experience”. 

    Why do I like Bloom so much?

    1) Flexibility.

    Bloom includes many multi-panel layouts so that I can easily view, arrange and copy files and folders within one Bloom window pane. (I particularly like the 3-vertical stack option.)

    2) Better Search.

    Hit Command Shift Return and Bloom will bring up its search bar. Type what you want and get results at blazing speed. I know Apple will be overhauling search in macOS Golden Gate (macOS 27), but I can have it right now.

    3) Convenience.

    Superman has X-Ray vision. Bloom lets me see the contents within a compressed .zip file within its inspector. Bloom also works with Cloud storage like iCloud Drive, DropBox or OneDrive.

    4) Customization.

    Unlike the Finder, Bloom gives me the ability to change its appearance, including the color of the window, the type face for the main window and side bar, and so much more. The side bar can be completely customized to show only what you want. There’s also a handy rename feature to quickly change one or more filenames. It even supports RegEx!

    Bloom is what the Finder wishes it could be when it grows up

    Boom isn’t free, but I think it’s well worth its reasonable purchase price ($16US). The alternative is to wait for Apple to make improvements. But I’m not holding my breath.

    -Krishna

  • FrugalMac: EasyDMG Fixes a 25 year macOS Issue

    FrugalMac: EasyDMG Fixes a 25 year macOS Issue

    There are three different methods of installing software on the Mac:

    1) Via the Mac App Store.

    2) Via homebrew.

    3) Via DMG file.

    The last option is, by far, the most popular delivery format for Mac applications that are available outside the Mac App Store.

    One must first download the DMG file, open it, drag the application into the Applications folder, eject the DMG container, and then delete the DMG file. That’s five separate steps to install a Mac app. And it’s been this way since 2001, when Mac OS X was first introduced.

    For an operating system that Apple touts as being easy to use, the aforementioned method is anything but.

    But now there’s a better way. 

    It’s EasyDMG

    After setting it as the default for opening DMG files, installing a new application becomes as simple as opening its DMG file. EasyDMG takes care of the rest. (And that hamster wizard mascot is downright adorable!)

    Not only will EasyDMG install the application, it will eject the DMG container and move the DMG file into the Trash

    EasyDMG setup.

    Users who want more control can perfom the setup manually. Given the problem EasyDMG is solving for me, I opted for the former

    As EasyDMG performs the install, it can display a progress bar or a notification. Or neither

    EasyDMG in action.

    EasyDMG is an excellent addition to my Mac setup because it works flawlessly while removing friction. It’s a completely native Mac app, written in Swift. And best of all, it’s free!

    EasyDMG settings.

    EasyDMG is what Apple should have included in macOS at least a decade ago. It’s baffling to me that nothing has been done on that front, even in macOS Golden Gate.

    -Krishna

  • FrugalMac: Apple Mail settings

    FrugalMac: Apple Mail settings

    In my last post, I prepared my G-mail accounts for use with Apple Mail. Today, as promised, I’m sharing my Apple Mail settings along with some accompanying rationale.

    In the General tab, I’ve made three changes.

    1) Fetch new email every 30 minutes from both G-mail accounts. For me, any value less than 30 minutes feels masochistic.

    2) Downloadable content will appear on my Desktop. This saves me a trip to the Downloads folder.

    3) Follow-up suggestions are checked ON so I can be reminded when I haven’t received a response.

    AppleMail general settings.

    Moving to the Junk Mail tab, I have Junk Mail filtering ON with all default settings. It seems to work OK.

    AppleMail JunkMail.

    For Fonts and Colors, I prefer Rubik Light Regular as my message list font. It’s a clean sans serif typeface that’s easy on my eyes. And speaking of eyes, I’ve bumped the point sizes to 18 to minimize eye strain. 

    Mail custom fonts.

    For Viewing, I prefer 3 preview lines for each email. I’ve also turned on Smart Addresses.

    AppleMail viewing.

    Below is a visual example of what the above settings look like when an email arrives in my InBox.

    Message preview.

    In the Composing tab, I’ve set the message format to Rich Text, keeping all other settings at their defaults.

    AppleMail composing settings.

    Within the Signatures tab, I have custom text signatures set for each of my accounts, and the signature is placed above the quoted text, because I’m not an animal. I have yet to configure the Rules tab with custom settings, but I did delete the Apple provided rule. 

    As a footnote, it took several hours to import my email into Apple Mail, even with the task utilizing five full cores of my laptop’s M5 Pro CPU.

    Processors running AppleMail.

    -Krishna

  • FrugalMac: Screenshots and Screen Recording

    FrugalMac: Screenshots and Screen Recording

    One of my main goals with setting up a new Mac is to be more intentional with my software selections. I want to choose the best software that suits my needs.

    This involves reevaluating what I currently use to see if my selections are still valid. Although what I have currently works – I’m always curious to know if better options are present, both in terms of features and value.

    Today we’ll look at two tasks that I perform on a daily basis: making and annotating screenshots and screen recording. My main go-to for both tasks has been CleanShot X. It’s a reliable and intuitive app that I’ve come to rely on for almost three years. My chief complaint is its expensive per Mac subscription fee. (I currently pay $49US for the privelege of running CleanShot X on two Macs.)

    To that end, I wanted to see if there were other, better options for screen capture and screen recording. It turns out there are!

    MacShot annotations.

    macShot has been my go to for screenshots over the past two weeks. Feature-wise, macShot appears to do almost everything CleanShot X does, and it’s free and open source. Like CleanShot X, macShot provides intuitive tools for annotating, redacting, and editing screenshots. It’s also a native Mac app that is highly performant and light on resource usage. (It takes up a mere 8MB of memory on idle). macShot also performs screen recording with a built-in trim editor.

    The only issue I have with macShot is key casting; a useful option to display keystrokes when screen recording. This feature is crucial for me when creating instructional demos.

    (For key casting, I am currently using the free and open source KeyCastr.)

    But, it turns out there’s an even better screen recording tool available, that blows both macShot and CleanShot X out of the water. It’s Recordly

    Recordly main screen.

    Recordly is a screen recorder on steroids, tailored specifically for folks like me. Recordly goes one step above other Mac screen recording apps by adding cursor animations, automatic zooms (with a dynamic webcam bubble overlay) and custom backgrounds. I used Recordly for my latest YouTube video and the results were impressive. Recordly has saved me so much editing time; it’s an absolute game-changer. With it, I no longer need to make multiple, tedious edits within Premiere. And did I mention that it’s also free and open source? Huzzah!

    Recordly is so close to perfect for my use case, but it’s not there just yet. Like macShot, Recordly does not include any option to key cast my keystrokes as I demo. I also wish there were granular options for audio control.

    I have a dedicated Rode microphone and an Insta360 Link 2 webcam with its own internal mic. It would be nice if I could tell Recordly to use the audio from the dedicated microphone, and mute the audio coming from the webcam mic. 

    Recordly and macShot are both excellent, well-designed  applications. With them, I no longer need CleanShot X.

    -Krishna

  • FrugalMac: Alfred is My Launcher of Choice

    FrugalMac: Alfred is My Launcher of Choice

    There is no shortage of Mac launcher apps available. But in the end, after carefully weighing my options, I’ve decided to stick with the venerable Alfred.

    How long have I been using Alfred?

    Since October 26, 2010. Almost a decade later, I purchased the Alfred PowerPack. Alfred is a launcher, and PowerPack is a set of powerful features that adds to and extends Alfred’s capabilities. 

    A few years ago, I purchased David Spark’s excellent Alfred Field Guide, which helped me immensely in understanding the capabilities and power of the combo.

    Alfred settings.

    Alfred is a very capable tool, but it’s showing its age in its overall user interface. Alfred has many options to configure it just as you’d like. But without any affordance of a Search bar, it can be daunting to find what I’m looking for. 

    Alfred workflows.

    The PowerPack extends Alfred by way of customized workflows. Conceptually, I understand what a workflow can do, but it still feels unintuitive for me to make one on my own.

    Alfred includes theming options to configure it’s appearance. Colors, type, margins and the like can be changed on a near granular level, but the interface to do so feels clunky

    Alfred battlebeast custom theme.

    For my M5 Pro MacBook Pro, I’ve intentionally crafted a custom theme for Alfred, called BattleBeast. It uses the Google Font ShareTechMono. I prefer a clean, minimal look, with tight margins – and I feel that the BattleBeast theme reflects those decisions.

    Alfred’s developers have teased the upcoming Alfred 6, which I’m eagerly anticipating. I’m hoping that Alfred’s Workflows receive an overhaul and that the UI complexity gets some much needed refinement. 

    -Krishna

  • FrugalMac: Two Macs, One Keyboard and Mouse

    FrugalMac: Two Macs, One Keyboard and Mouse

    This weekend, I rearranged my desk setup to accomodate both MacBook Pro laptops. On the left, in the image below is my M1 MacBook Pro connected to the left Dell 2515H display. On the right is my new M5 Pro MacBook Pro connected to the right Dell 2515H display. Two computers, with two separate keyboards and trackpads.

    The external Nuphy keyboard, numpad and mouse are connected to my M1 Pro MacBook Pro. Moving between each Mac requires switching keyboards. Not ideal.

    Synergy on both MBPs.

    And then I remembered Synergy, from Symless, which allows multiple computers to share the same keyboard and mouse. I’ve been using Synergy on and off since 2015. It’s been a solid tool, for the most part. Several years ago, I ponied up extra funds to support its development. Fast forward to today. Synergy still works across Mac, Windows and Linux platforms – and there’s even a specific Apple silicon optimized version. I downloaded the update and installed it on both Macs. 

    Synergy’s on-boarding has greatly improved. After installing the software on both Macs, Synergy automatically found them and paired them up. To make Synergy work between two computers, one computer must act as the server, while the other is the client. In my case, the M1 Pro (Prometheus) is the server (denoted by the keyboard and mouse icons below), while the M5 Pro (BattleBeast) is the client. This means that I can share Prometheus’s keyboard and mouse between both my Macs. 

    The screen layout below coincides with the physical layout of both Macs’ displays. And speaking of which, Synergy supports multi-monitor setups, making it easy and natural to move between both computers. I can even copy and paste text between both Macs, making it a real convenience.

    Synergy has come a long way since I started using it eleven years ago. It’s the perfect addition if you want to share your keyboard / mouse between two or more machines. 

    -Krishna

  • My Top Three Terminal Command Line Tools

    My Top Three Terminal Command Line Tools


    Using Ghostty has been a pleasant experience. It feels modern and clean, making the Terminal.app seem dated by comparison. Similarly, adding Homebrew has made the command line experience much more enjoyable. One big benefit with Homebrew is that I can quickly install and remove apps right from the shell.

    Some of my favorite command line apps are:

    1) eza. (This command is a modern replacement for ls.) My favorite command is eza’s built-in tree command, which lets me view the structure of my folder hierarchy. 

    Eza command in the Terminal

    2) btop is a more modern and visually parsable implementation of the classic top command. Invoking btop lets me glance at Mac’s memory, CPU usage, battery charge level and more.

    Btop command in the terminal.


    3) bat is a modern spin on the venerable cat command. I use bat for quickly viewing the contents of a text file from the command line. Below is the output when running cat.

    Cat command in the terminal

    And now, the same result when running bat. The information appears in a much clearer format, complete with line numbers and color coding.


    Bat command in the terminal.

    With Homebrew installed, these apps were all easily added by typing:

     brew install <app> 

    This go around, I’m reallly focusing on keeping an organized, annotated and manageable .zshrc file.

    -Krishna

  • FrugalMac: Essential Mac Apps for Productivity

    FrugalMac: Essential Mac Apps for Productivity

    Working within the confines of macOS’s first party offerings has been frustrating. In an earlier post, I lamented about window management inconsistencies that lead me to install Rectangle. 

    MarsEdit – this application has become essential to my blogging workflow. Blogging with MarsEdit is easy, and if it’s easy, I can do it more often. 

    NetNewsWire – with my new Mac, I’ve limited the number of RSS feeds I follow. This isn’t to say I won’t add any new feeds at some point in the future. With NetNewsWire, I can easily keep up with my favorite blogs. It’s fast and free. It also offers iCloud syncing, but I’m not ready for that just yet.

    1password screenshot

    1Password – I haven’t found a better password management application, so I’m sticking with this Electron app for now. Apple’s Password app, while serviceable, doesn’t have a key feature I really need (saving attachments). There was a time when 1Password was best in class as a native Mac app.

    MacShot settings.

    macShot – a powerful, free screenshot and screen recording utility that competes quite favorably against the subscription-based CleanShot X. I haven’t spent too much time using this app, save for making the screenshots that accompany this post. I plan to test its screen recording capabilities soon. If it succeeds on that front, I may be able to ditch CleanShot X once and for all. 

    Remember to turn off Screenshot keyboard shortcuts if you plan to use them with macShot.

    Turn off default screenshot shortcuts.

    Hyperkey settings

    Hyperkey – a simple, free app that turns the (rarely used) Caps Lock key into a Hyper key. Pressing Caps Lock with Hyperkey is like pressing Shift Option Command Control simultaneously, without the awkward finger gymnastics.

    Ghostty – My post on Apple’s Terminal software led to a suggestion on Mastodon to check out this advanced terminal application. So far, in my very brief usage, it feels modern and fast. Without my current command line utilities, I really can’t gauge how it will perform over time. (On this new laptop, I have also installed Homebrew because I need a proper package manager.)

    BBEdit – a proper text editor that blows the doors off of TextEdit. I have paid for earlier versions of BBEdit, but I want to see if the free version will suffice for my usage.

    Still left to install: a proper Mac launcher app. I’m leaning towards Alfred, but I want to examine other options before committing. 

    -Krishna