The Finder.
It’s been around since the original Mac rolled off the assembly line in 1984. Ironically, my first exposure to the Finder was not on a Mac, but rather, on an Apple IIGS running GS/OS. (But that’s a story for another day…)
While the Finder has evolved with the Mac over the years, it still feels inefficient to work with, especially when it involves movings files around.

Let’s assume you have to copy or move a file from one location on your Mac to another location on your external storage device. To perform the task within macOS, two Finder windows are needed. One which shows the location of the source file, the other showing the intended destination.
We’re still moving files around like this in the year 2026.
Bananas.
While Apple seems content with making small, incremental features to the Finder, it’s not enough for me.
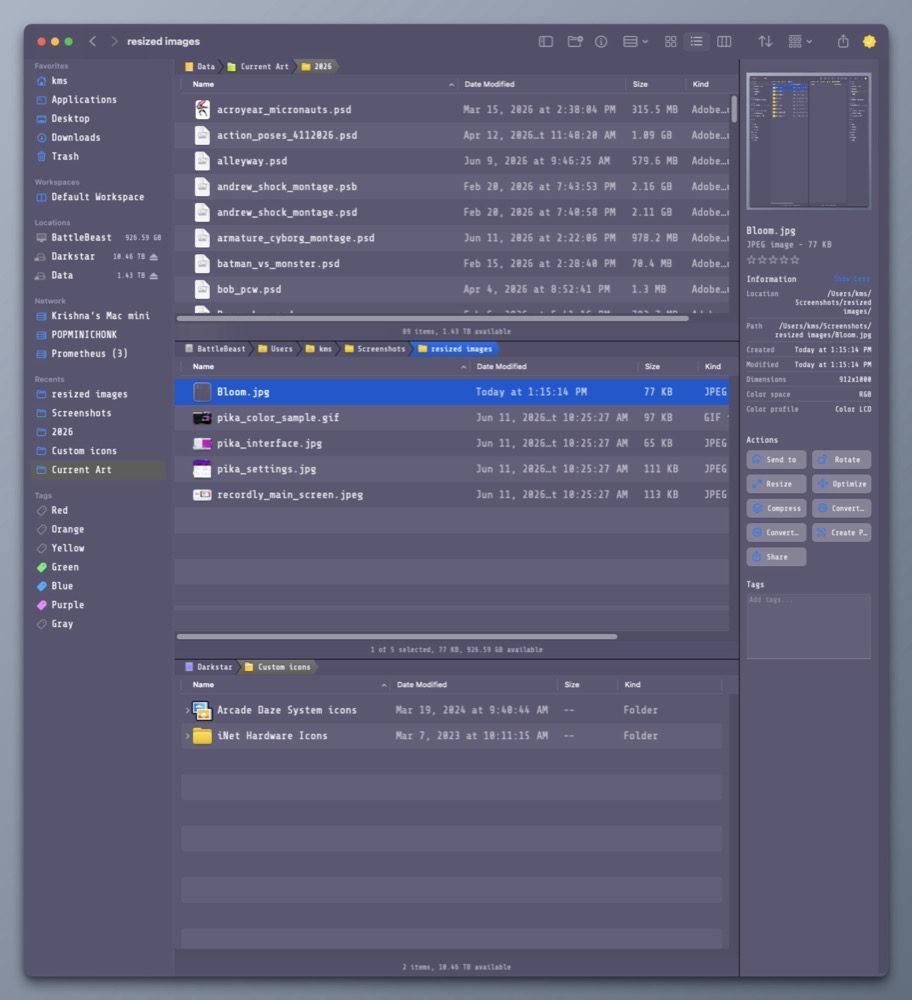
That’s where Bloom comes in. I’ve been using Bloom for many months now, and it truly delivers on its promise of providing a “refined Finder experience”.

Why do I like Bloom so much?
1) Flexibility.
Bloom includes many multi-panel layouts so that I can easily view, arrange and copy files and folders within one Bloom window pane. (I particularly like the 3-vertical stack option.)
2) Better Search.
Hit Command Shift Return and Bloom will bring up its search bar. Type what you want and get results at blazing speed. I know Apple will be overhauling search in macOS Golden Gate (macOS 27), but I can have it right now.
3) Convenience.
Superman has X-Ray vision. Bloom lets me see the contents within a compressed .zip file within its inspector. Bloom also works with Cloud storage like iCloud Drive, DropBox or OneDrive.
4) Customization.
Unlike the Finder, Bloom gives me the ability to change its appearance, including the color of the window, the type face for the main window and side bar, and so much more. The side bar can be completely customized to show only what you want. There’s also a handy rename feature to quickly change one or more filenames. It even supports RegEx!
Bloom is what the Finder wishes it could be when it grows up.
Boom isn’t free, but I think it’s well worth its reasonable purchase price ($16US). The alternative is to wait for Apple to make improvements. But I’m not holding my breath.
-Krishna