When publishing content online, whether it’s for this blog or social media channels, I prefer to work with an image that’s no wider than 1000px. (Smaller images load faster.)
Before this automation, the process involved several manual steps:
1) Select the image.
2) Right-click on the image to see the context menu.
3) Choose Quick Actions > Convert Image.
4) Interact with the following modal dialog to perform the conversion.

Automation is the chief reason I prefer macOS over other platforms. The Mac has a wide range of third party automation tools, but it also includes a few of its own that ship with the OS that often go overlooked.
Chief among them is Automator. With it, I have created a simple automation that will resize any image to the preferred size I’m after. (No programming required.)
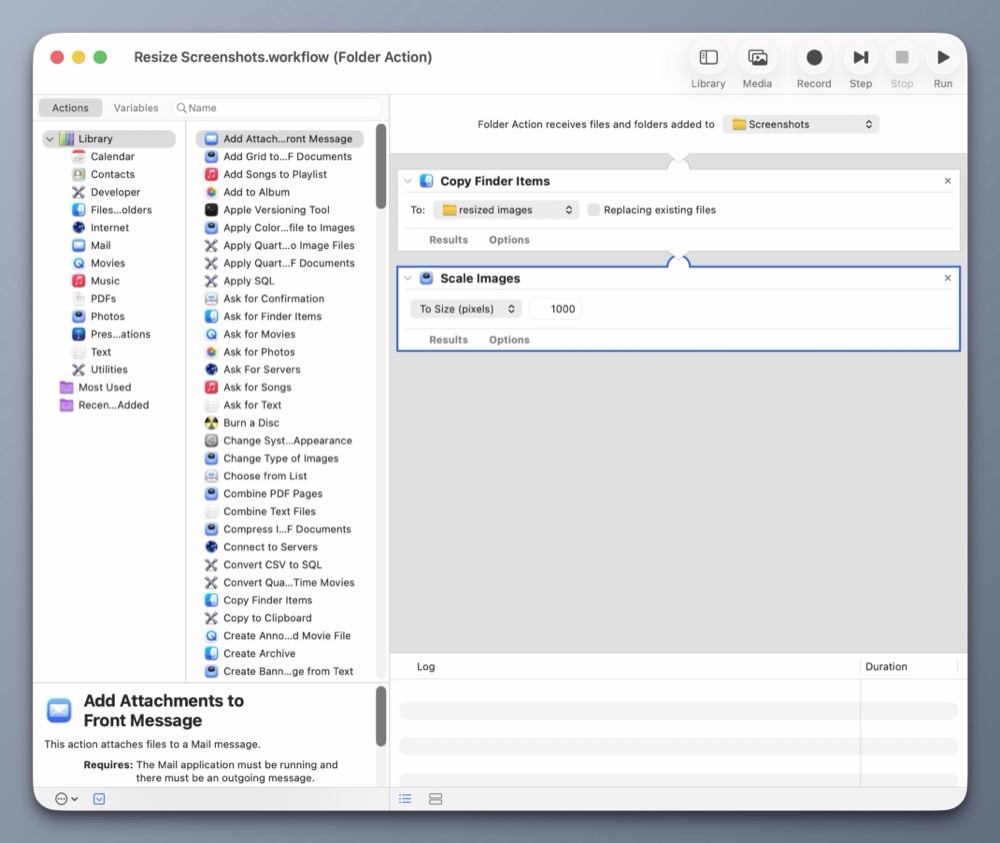
Automator includes Folder Actions, a handy construct for automating actions on files within specific folders. In this case, it’s my Screenshots folder.
Here’s how it works:
My Folder Action automation will copy any new files from the Screenshots folder and place them into the resized images folder. It will then scale the copied images down to 1000px wide, leaving the originals intact.

Each time I take a new screenshot (like the ones for this post) they are automatically saved into my Screenshots folder. Automator detects the new images in this folder and automatically scales them down. It’s a big time saver. Best of all, I did it all using the provided automation tools within macOS.
-Krishna