A few days ago on the Rocket Yard blog, I pontificated on features and fixes I’d like Apple to include in macOS 27. My hopes are not high, particularly due to the rumors swirling around Apple’s intent to deeply embrace AI integration within their numerous operating systems. Nevertheless, my wish list may resonate with other Mac users.
At this moment in time, macOS 26.5 seems fine, in terms of its overall stability in my day-to-day use. I’ve tested it on both the Mac mini M4 and the M1 Pro MacBook Pro. If you’ve been avoiding Tahoe, now may be the time to give it a spin.
With the M5 Pro MacBook Pro, I’m hoping to establish a clear Tahoe baseline. Some of the smaller annoyances I’m experiencing with macOS Tahoe on my M1 Pro model may stem from years of accumulated cruft.
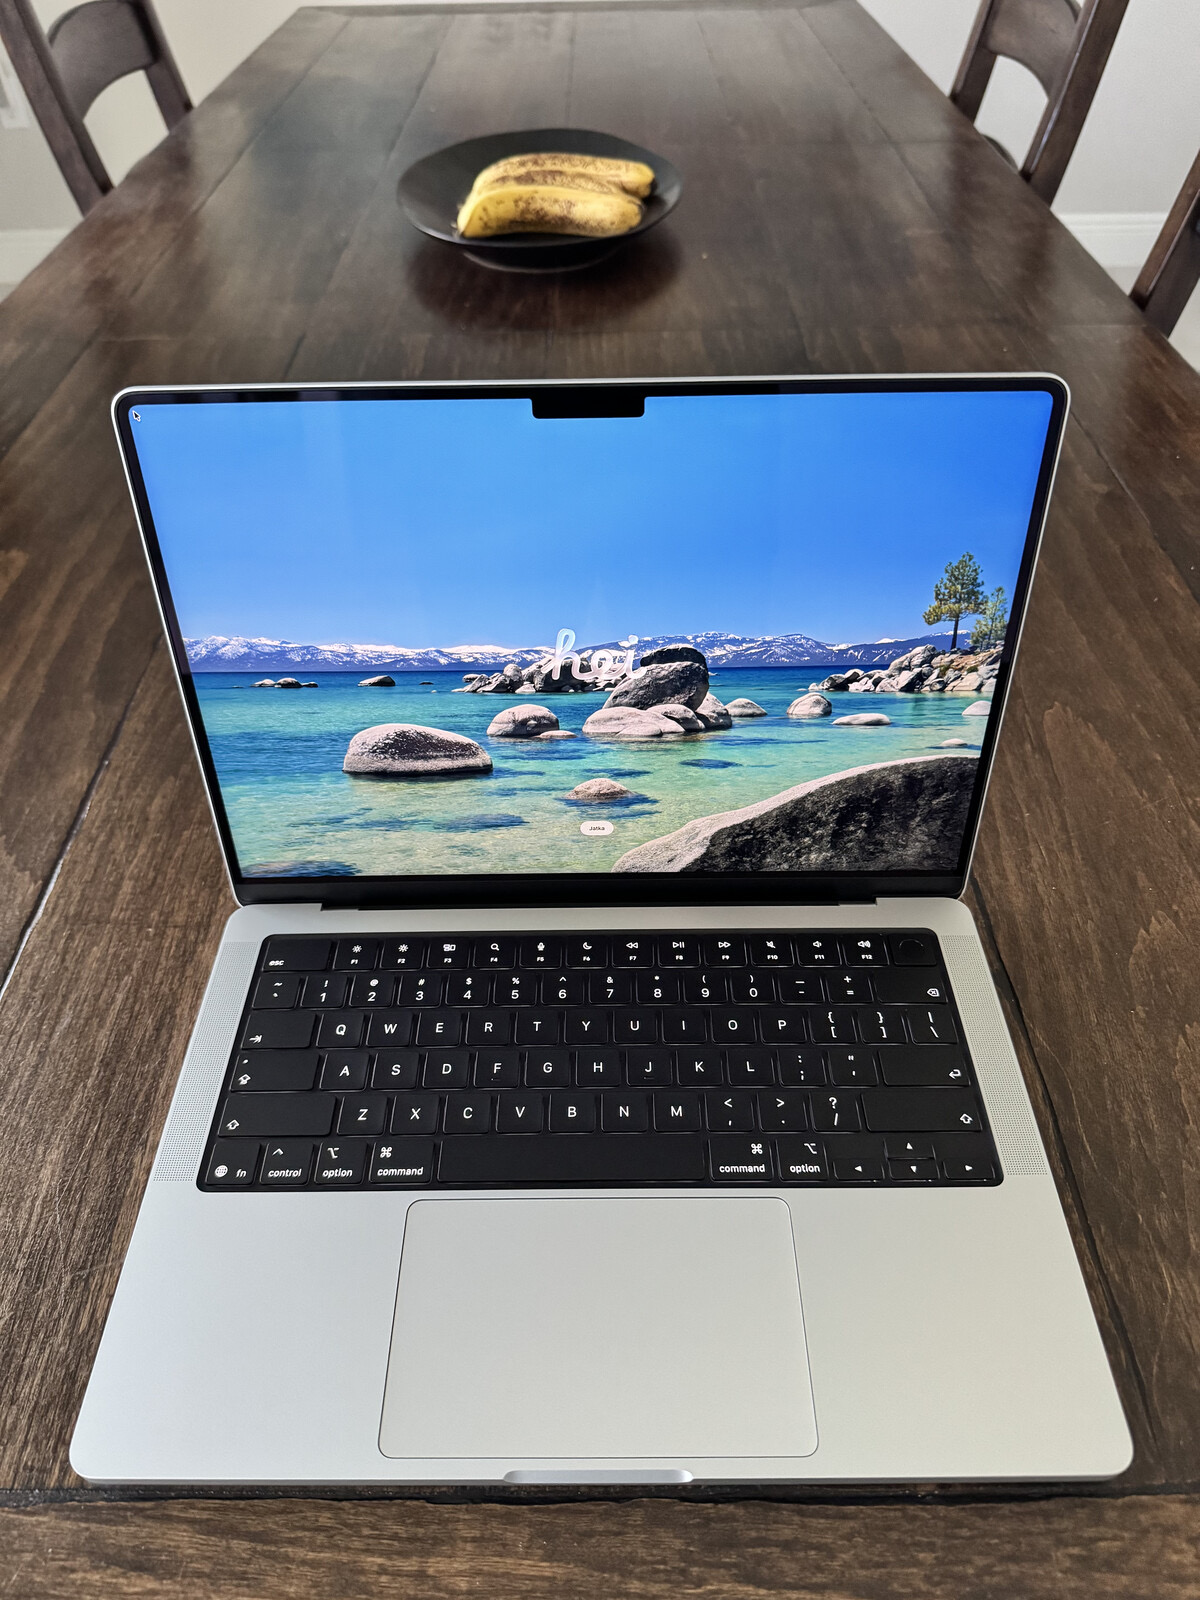
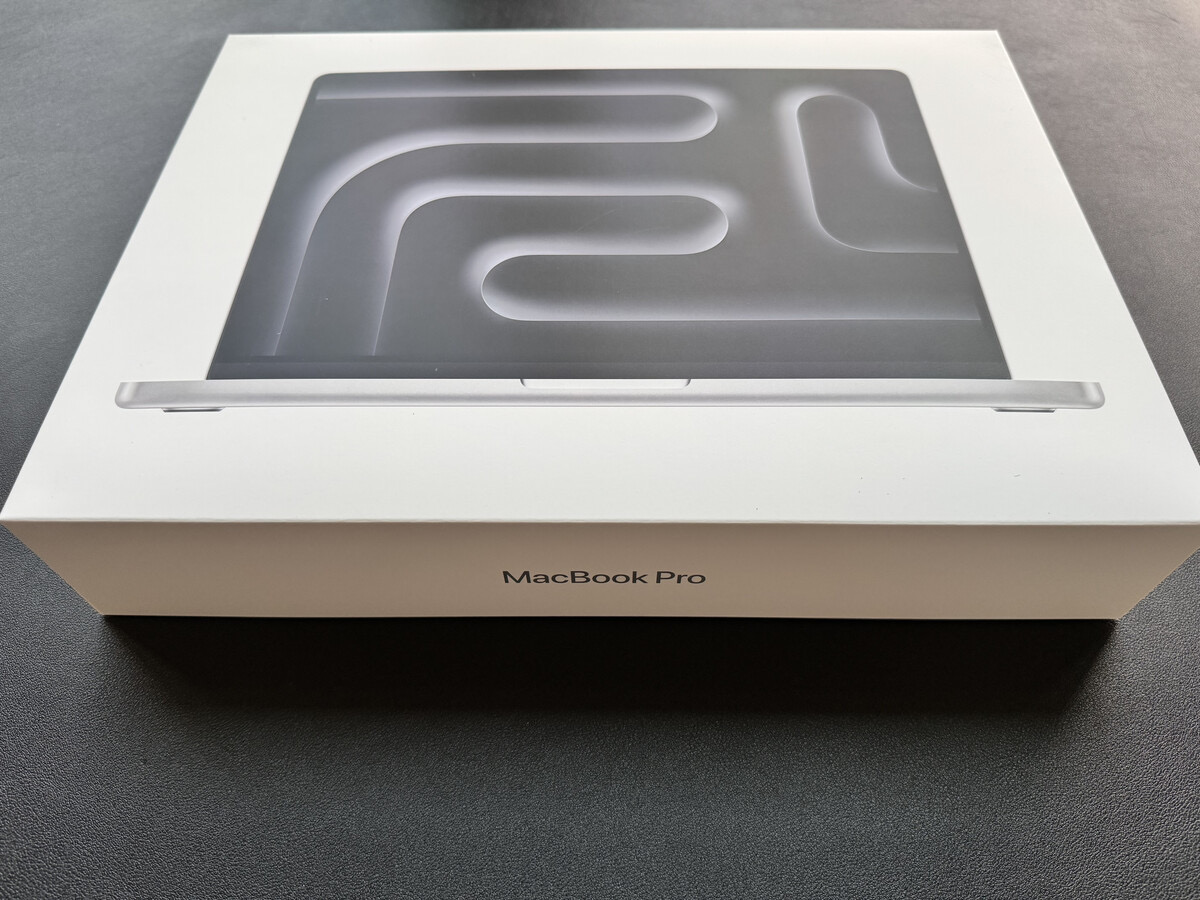
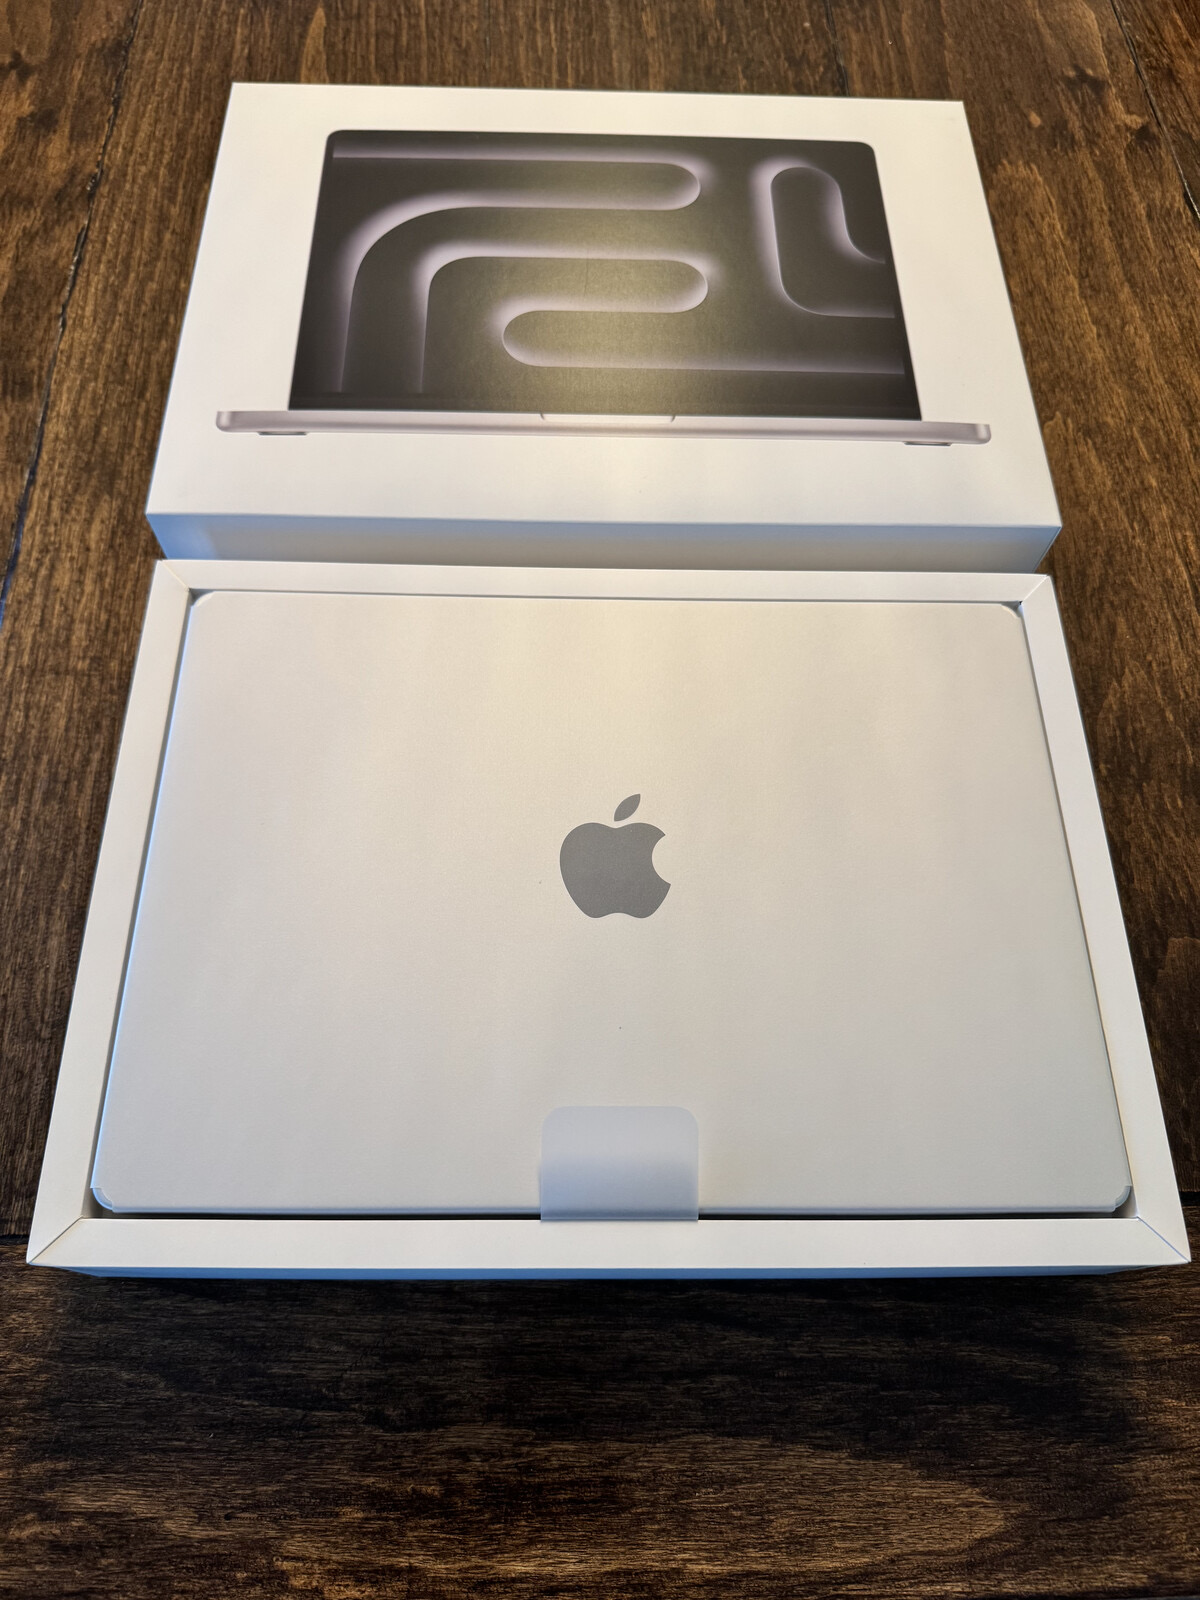
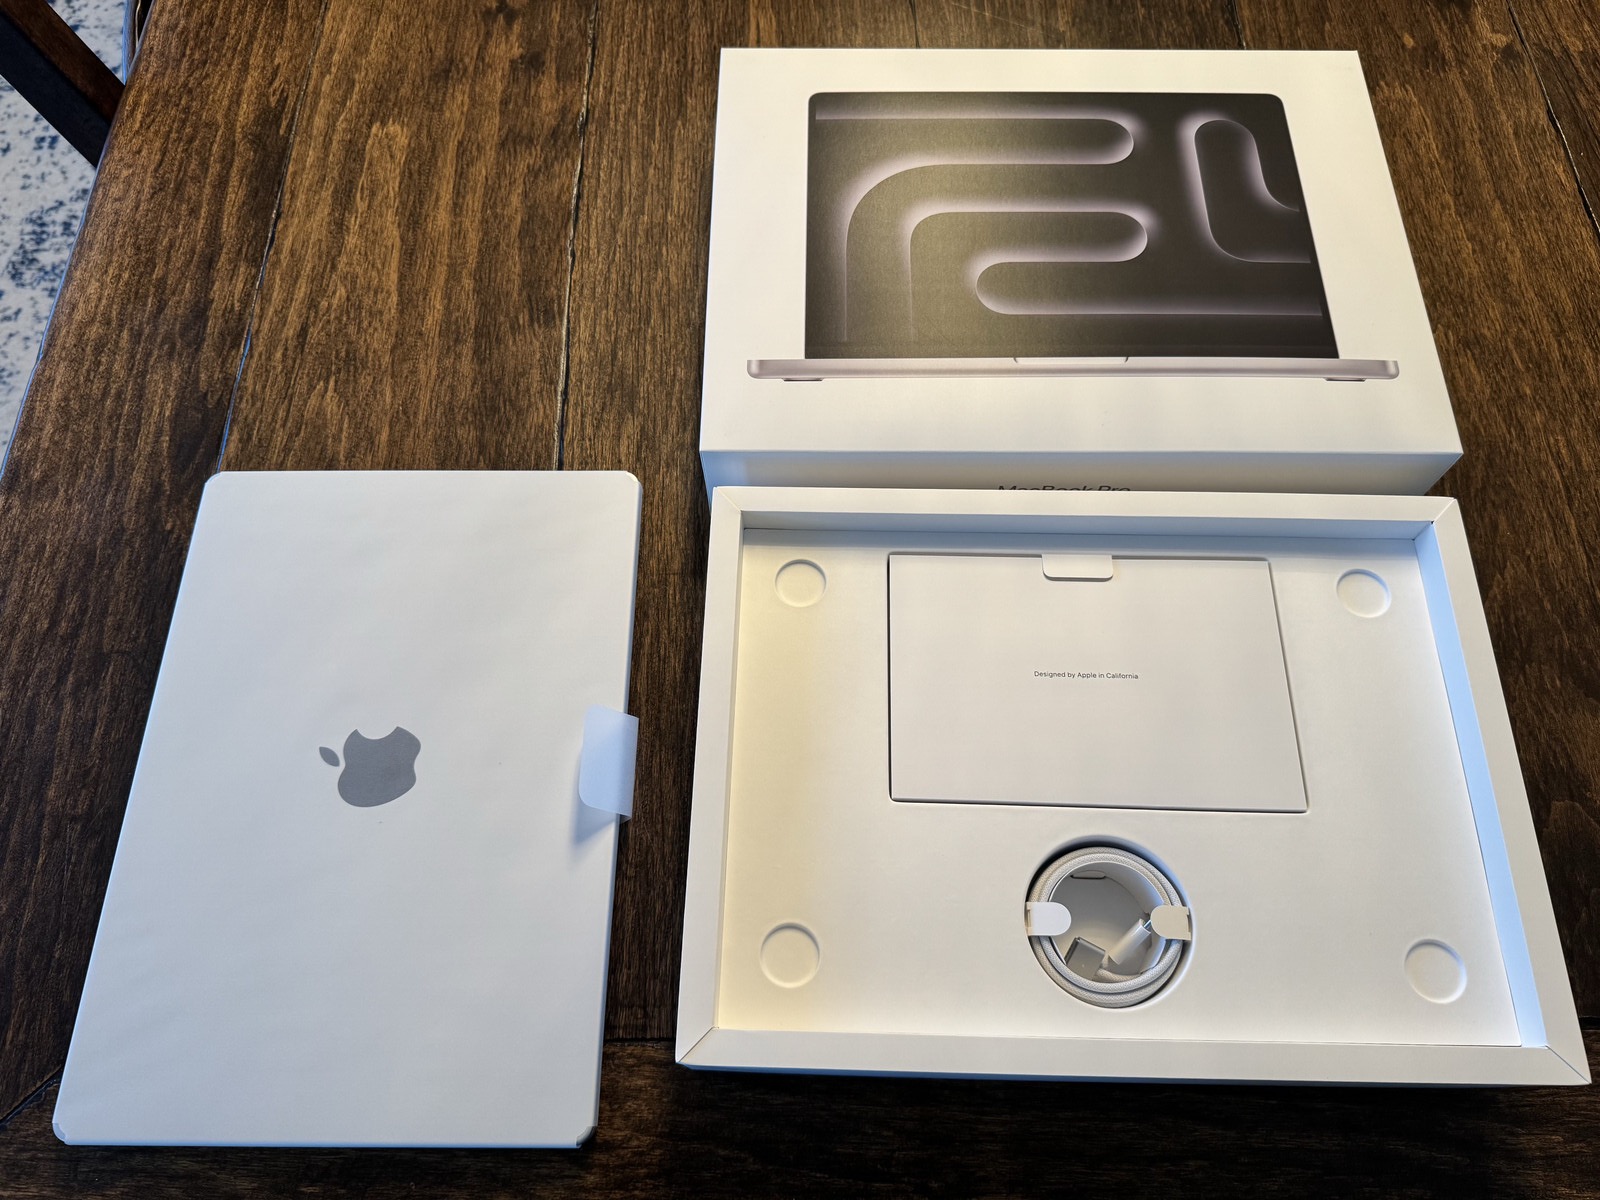
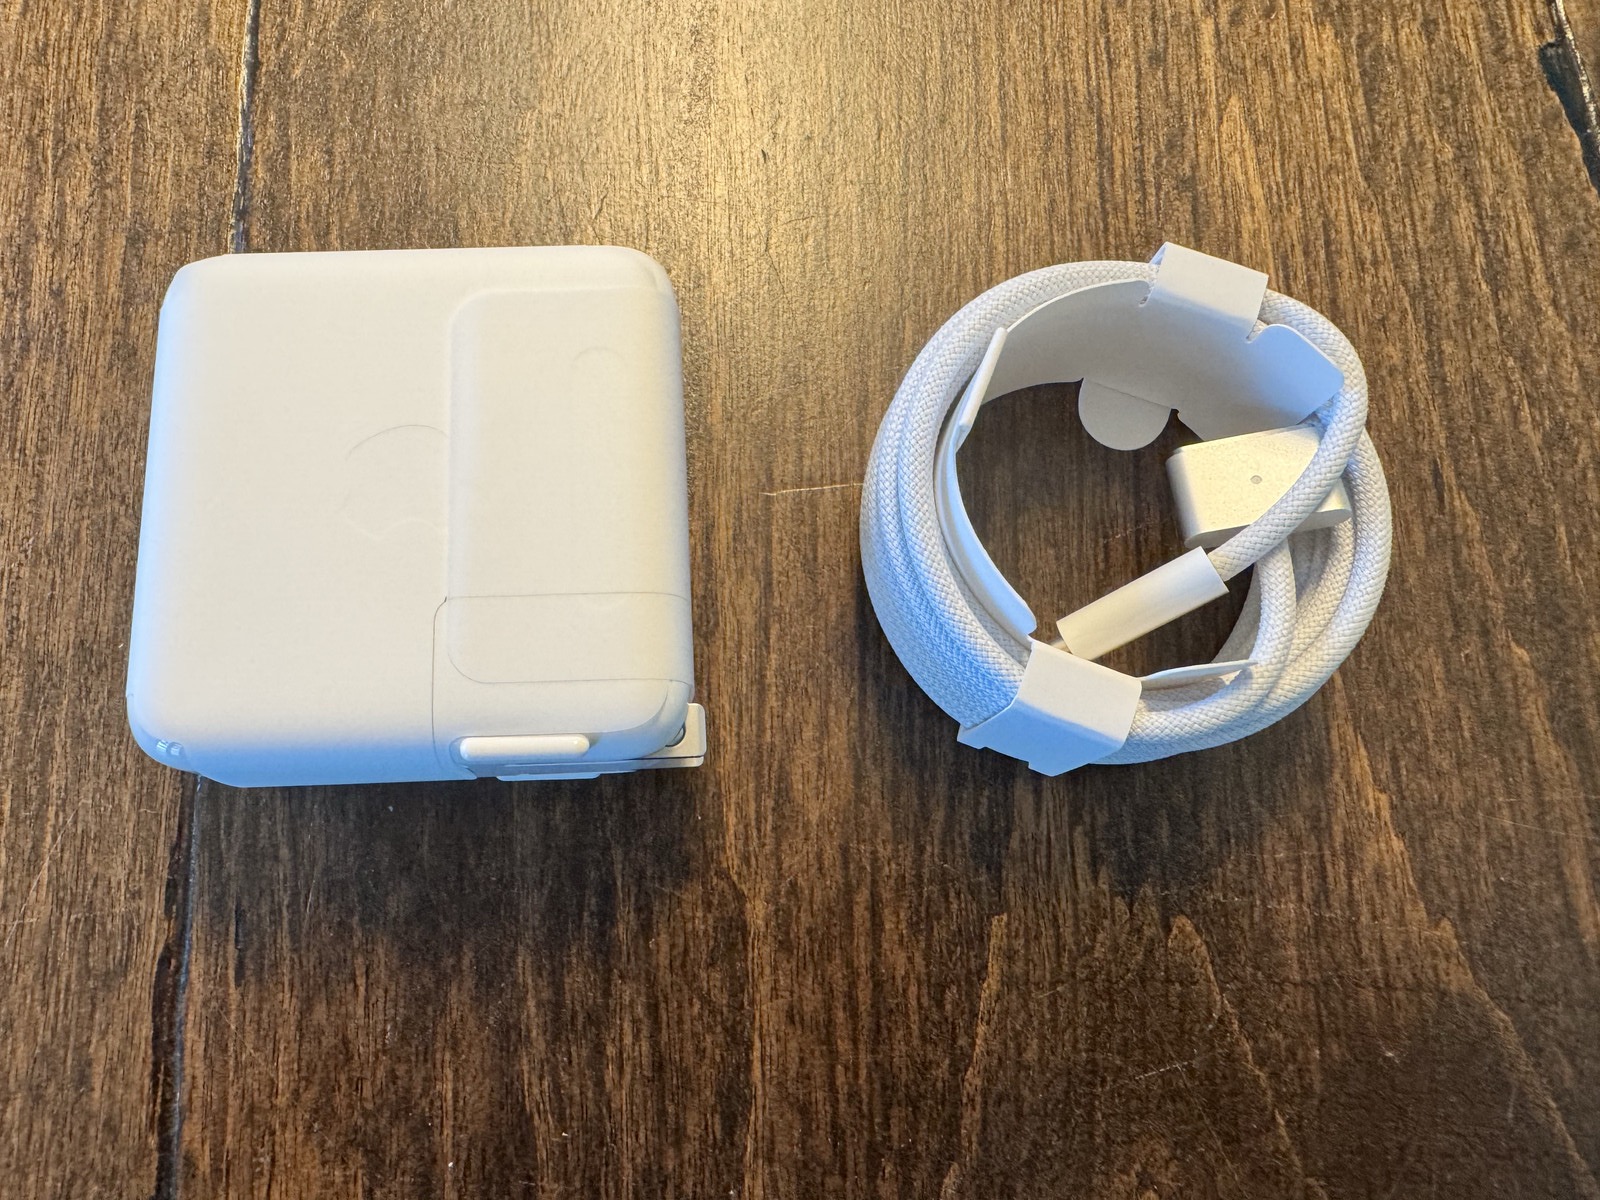
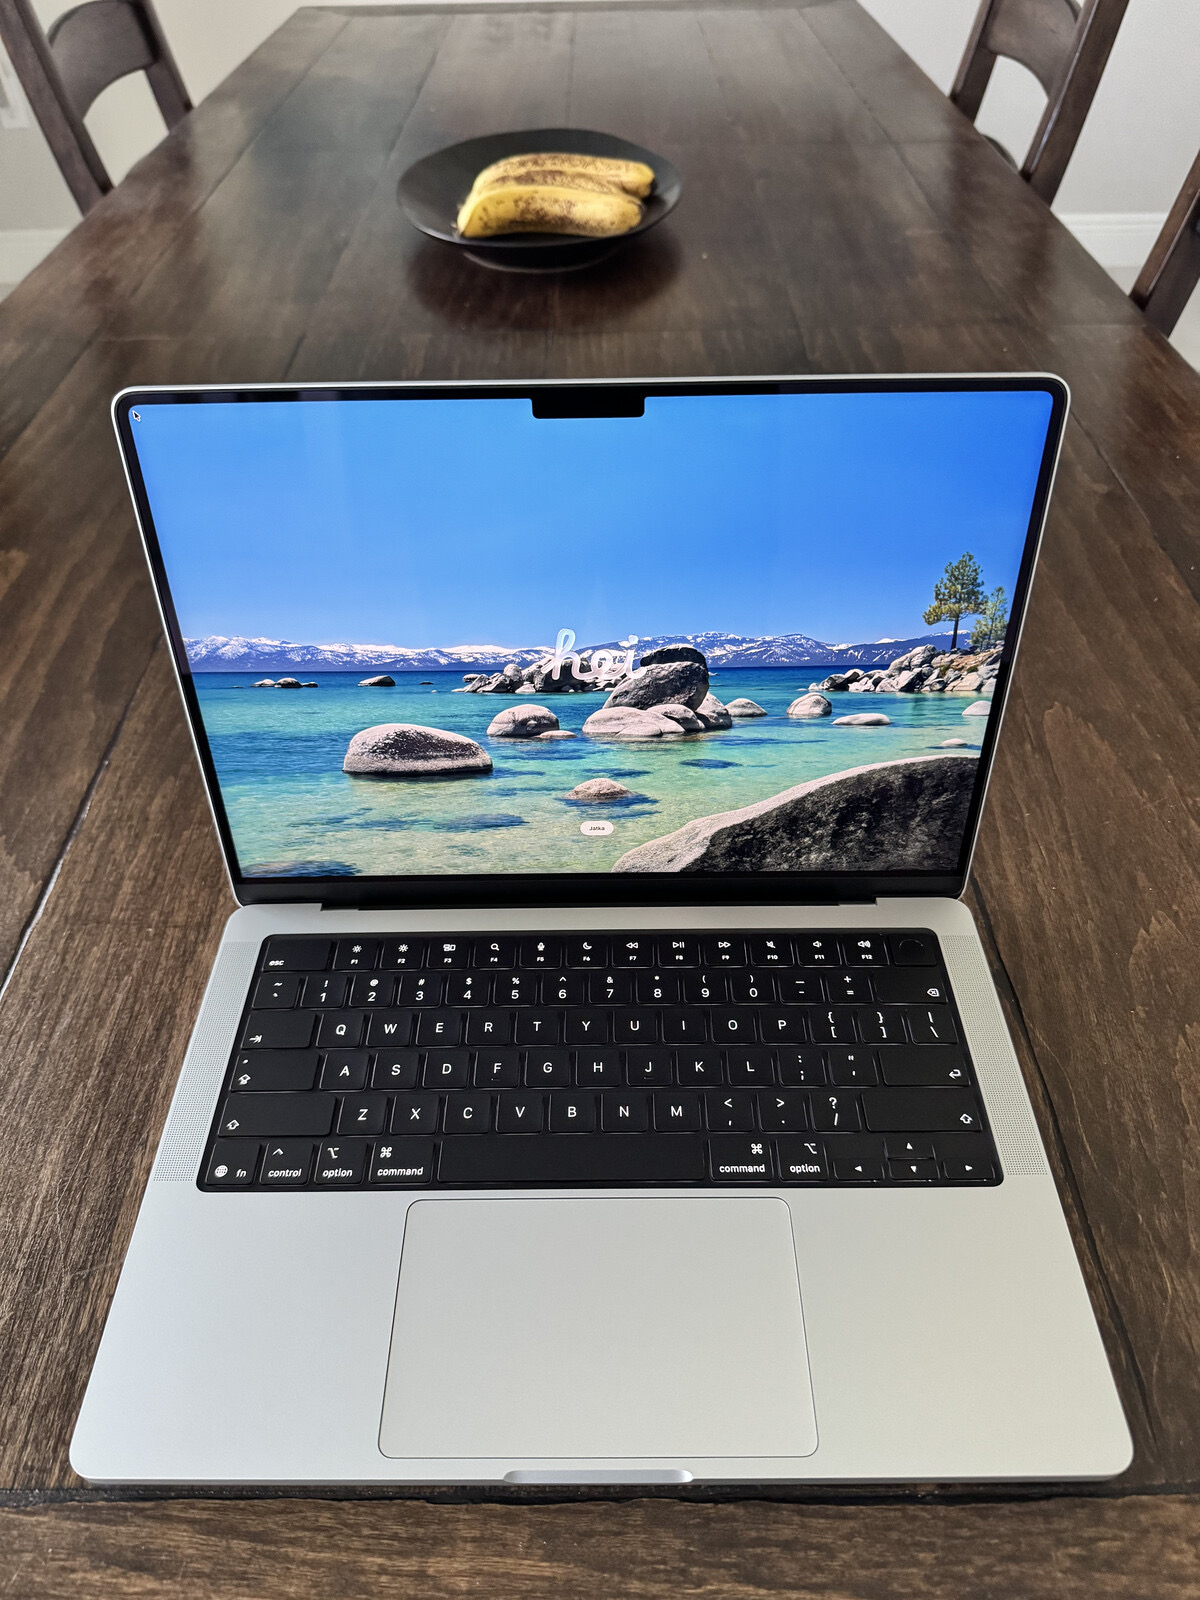
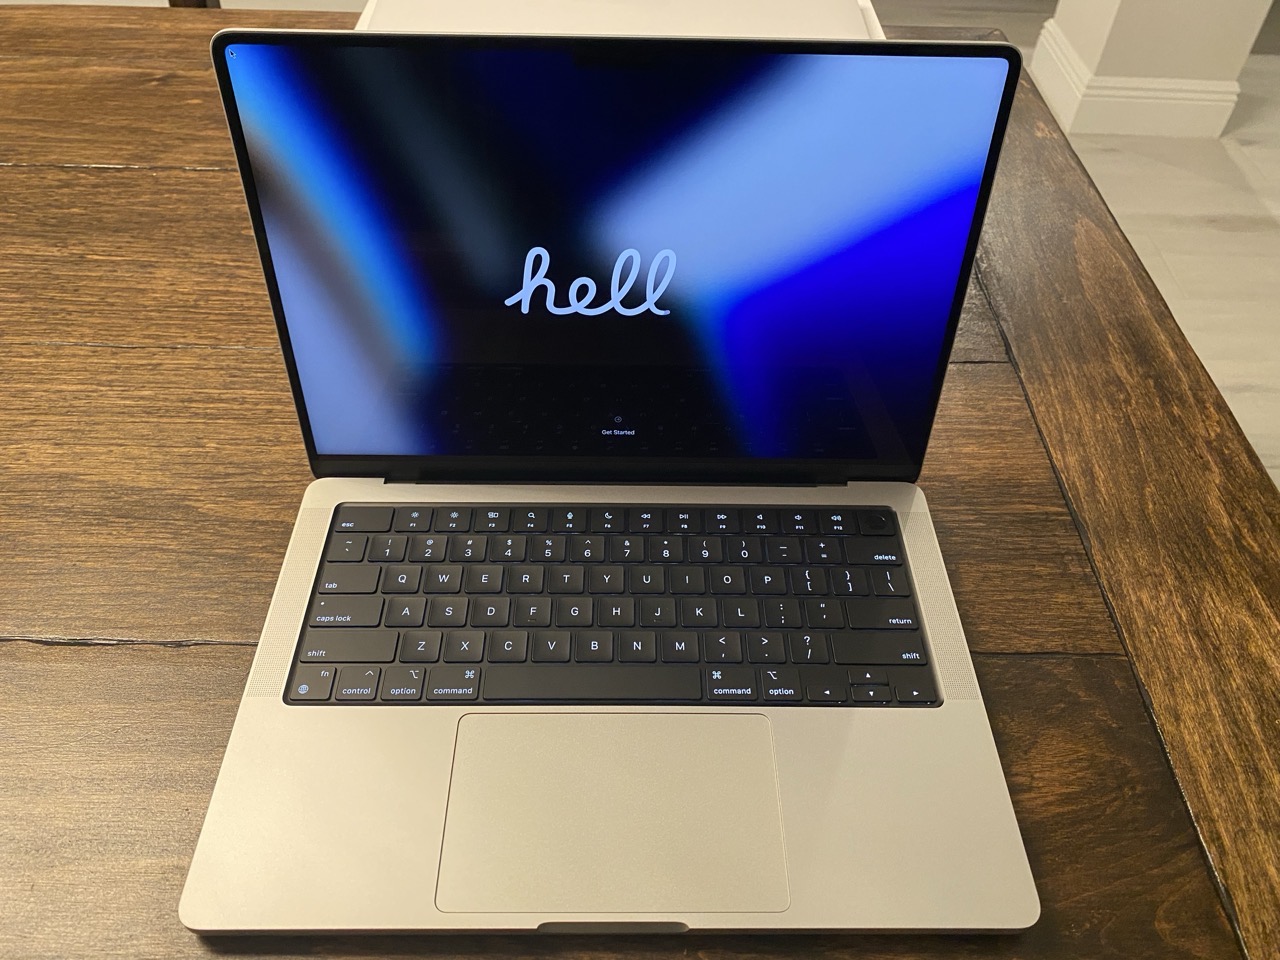
I’m typing this post within a few minutes of unboxing my new M5 Pro MacBook Pro. I’ll share a few obligatory photos, but I’ll skip past the usual commentary on the build quality and aesthetics.
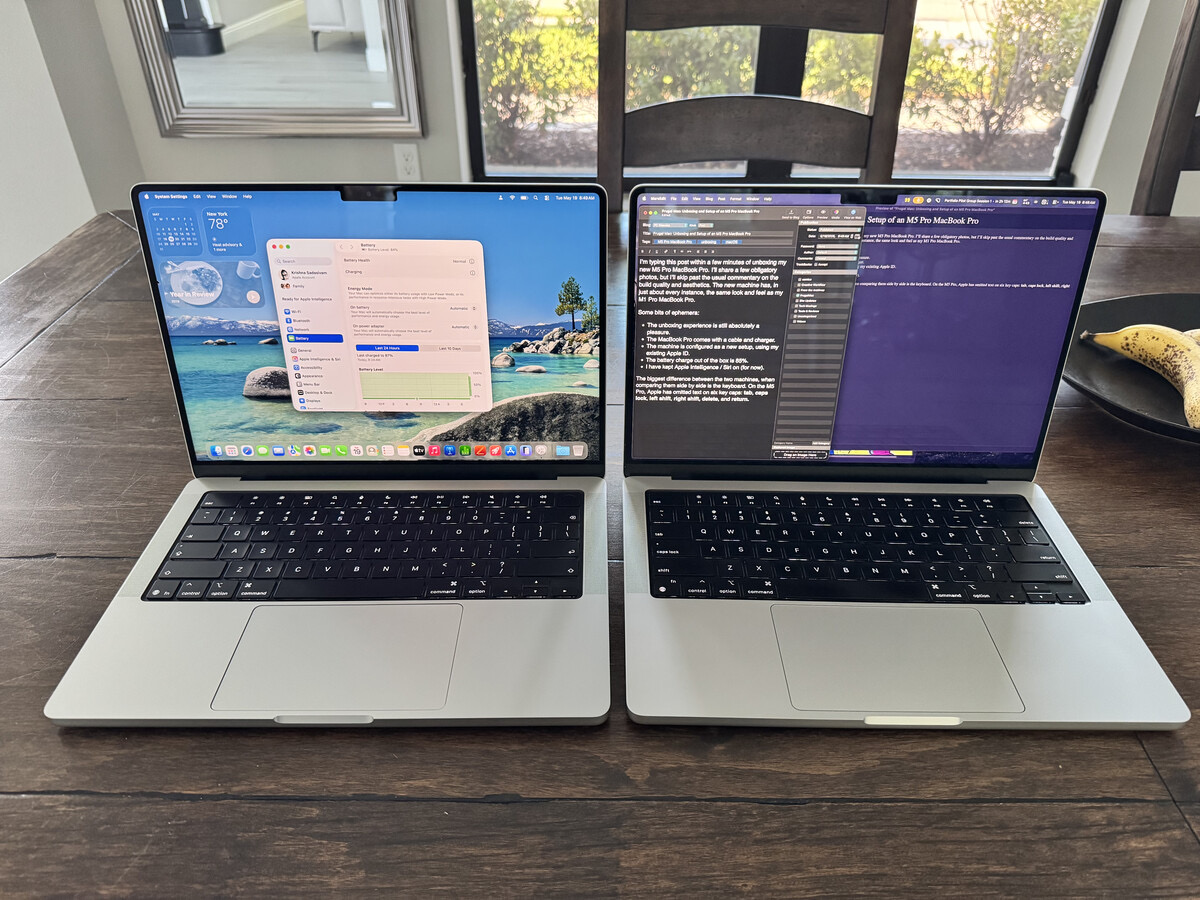
The new machine is, in just about every instance, identical to my M1 Pro MacBook Pro.
A few bits of ephemera:
The unboxing experience is still absolutely a delight.
The MacBook Pro comes with a braided USB-C cable and charger.
macOS Tahoe 26.4 is installed.
Apple presents only two update options: Update Automatically or Only Download Automatically.
The machine will be configured as a new setup, using my existing Apple ID.
The battery charge out of the box is 85%.
I have kept Apple Intelligence / Siri on (for now).
In Settings, the Mac is already set for Optimized Battery Charging.
The only observable difference between both two machines, when comparing them side by side, is the keyboard. On the M5 Pro model, Apple has omitted text on six key caps: tab, capslock, leftshift, right shift,delete, and return. While it does give the keyboard a cleaner look, I prefer the original layout. (Veteran Mac users will not have any issue, but new users, particularly those coming over from Windows, may encounter some friction.)
In my next post, I’ll share my thoughts on the default macOS Desktop experience. Spoiler alert: I hate it.
Tasks and errands got the best of me for most of the day, which means I still haven’t opened the box containing my new M5 MacBook Pro. (It will happen tomorrow, I promise.)
(Incidentally, the featured image for this post is of my M1 Pro MacBook Pro, shortly after it was unboxed.)
In my last post, I wrote about why and how I plan to use this new laptop. Today I wanted to share the rationale for the specific configuration I chose for my new Mac laptop.
1. Silver vs. Space Black
I chose Silver over Space Black after much internal debate. The Space Black MacBook Pro model looks sleek and sophisticated. I seriously considered it, but two things held me back: fingerprints and scratches. I take great pride in keeping my Macs pristine. Reports from users on various Mac reddit groups suggest that although Space Black looks good, it takes more upkeep to maintain. I suppose I could deal with a fingerprint-laden case, but visible scratches (from rings, watches, and plugging peripherals in and out) made Space Black a no-go for me.
2. 14” vs. 16″
I value portability over screen size. If I need to use a bigger screen, I can do so by plugging my laptop into an external display. Therefore, the 14” model was an easy pick. At work, I have access to a 16” M3 Max MacBook Pro. Despite it’s larger screen size, it’s far too big and bulky for me to tote around.
3. 48GB RAM
My M1 Pro MacBook Pro was outfitted with 32GB of RAM. I plan to use the M5 Pro MacBook Pro for at least five years or more, so I bumped RAM up to what I was comfortable with. Truthfully, for the work that I do, I could have probably settled for 24GB of RAM. But I didn’t feel like settling. Besides, I’ve never, ever regretted having more RAM in any one of my Macs.
4. 1TB storage
I’m very selective when it comes to the applications and files that live on my MacBook Pro’s internal drive. I have never used more than 350GB of storage space for apps / files on the M1 Pro’s 1TB drive. (Most of my files live on external drives.)
5. Binned vs. Non-Binned
I opted for the Binned variant CPU/GPU, largely based on the test results conducted by several YouTubers. For the type of work I do, I’m fine with waiting a few extra seconds. The extra cost for the non-binned CPU didn’t seem worth springing for. The 15 CPU cores and 16 GPU cores in the M5 Pro will be a massive step up from the 8 core (6 Performance and 2 efficiency) setup I have in the M1 Pro.
Extensive research and careful deliberation led me to this decision. Soon, I’ll be putting my new machine to the test. Now if you’ll excuse me, I’ve got a box to open…
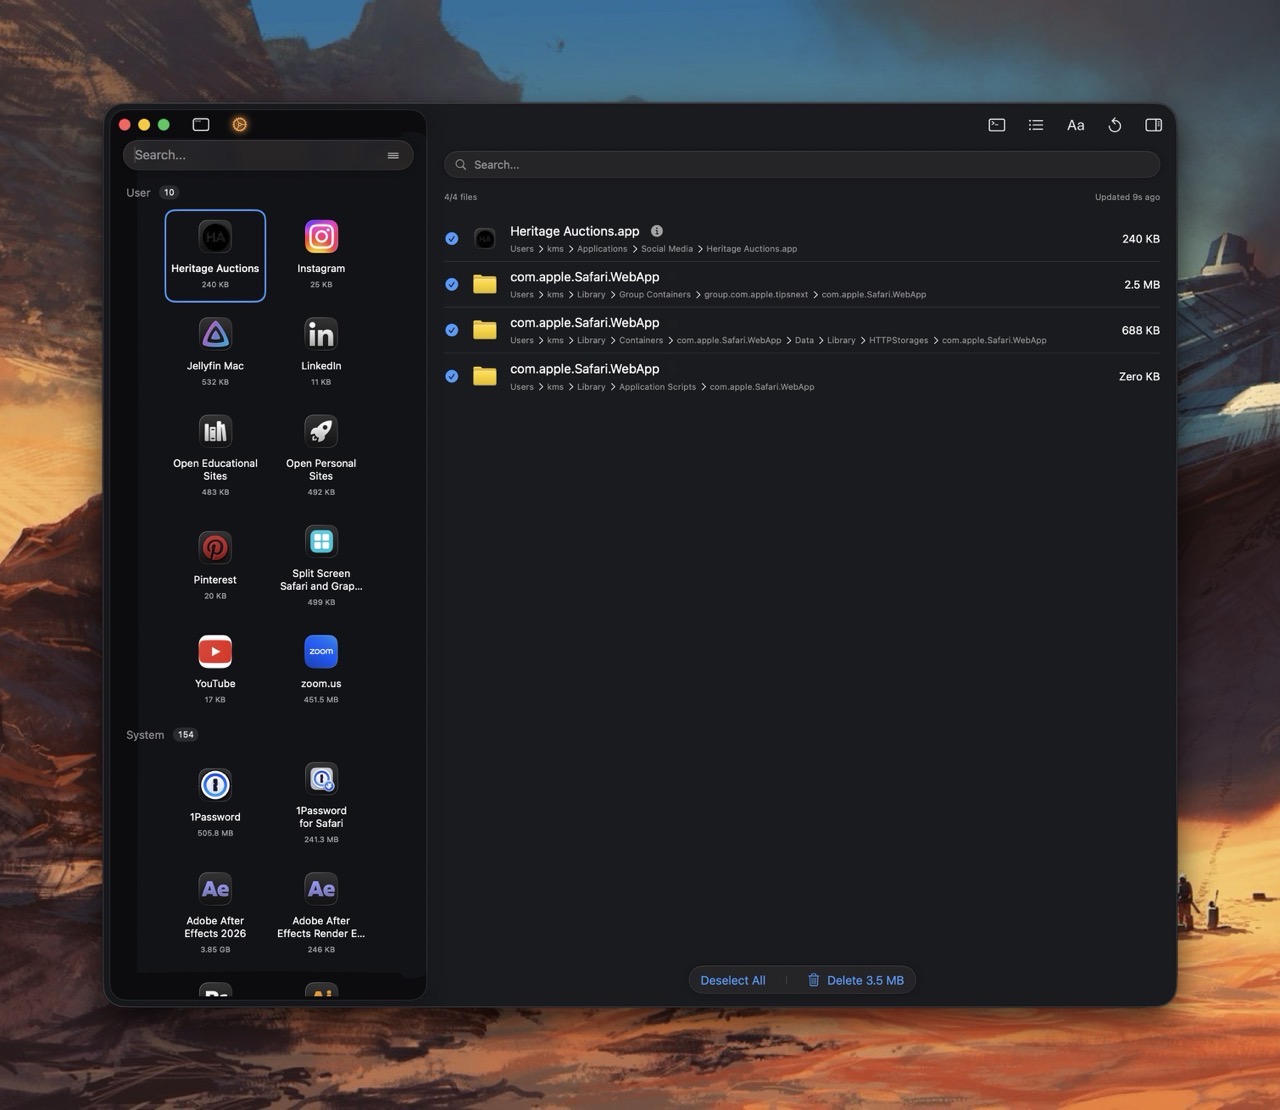
If you use a Mac for any period of time, you will slowly accumulate a raft of applications. But what happens when you want to remove an app you no longer need or use? In this scenario, users are often left to discover third party uninstallers, such as Pearcleaner, CleanMyMac or AppCleaner. Reviews across the Internet have been mixed, with regard to their effectiveness at removing all traces of a given app. (Personally speaking: I’ve used all three, and haven’t had any issues.)
But it brings me to my main point: Why doesn’t Apple include its own uninstaller app?
In the year of 2026, the exercise of removing apps is left to the user. And it’s not as simple as dragging an application into the Trash.
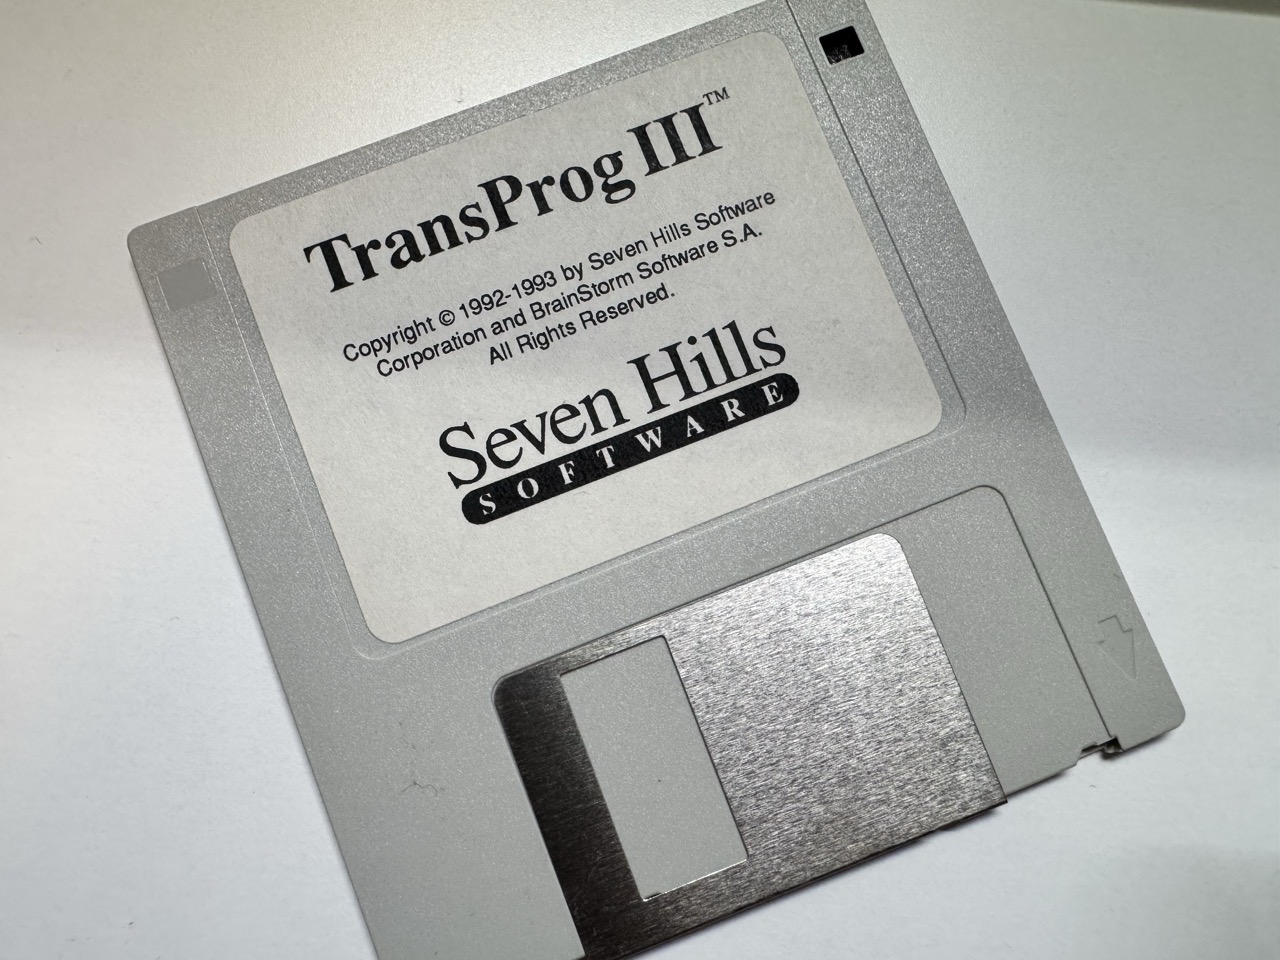
Remember when software could fit entirely on one floppy disk?
If you used a computer in the late 80’s, this was the norm. Hard drives were a luxury for many of us, so the almighty floppy disk was our only means to load programs and games. For context: my first computer, an Apple IIGS, came with one external 3.5″ 800K drive and one external 5.25″ (140K) drive. For computers of that era, it was commonplace to insert a disk, power on the computer, and wait anywhere from 30 seconds to a minute for an application to load. (We were more patient back then.)
I seriously doubt that anyone still yearns for the days of using floppy disks. But being forced to use floppies had a profound impact on developers from that era. They had to squeeze a lot of capabilities within a seemingly paltry amount of storage.
With gigabytes and terabytes of data being the norm nowadays, developers have no incentive to create fully optimized applications. As a result, modern software is mostly bloatware, getting larger and larger in size with each new release. (I’m looking at you Adobe, Microsoft, and Apple.)
The mindset of shipping something small, fast, native, and single-purpose is largely lost upon most modern developers. But one guy is doing something about it. Matt Sephton created a clever macOS screensaver called Fits on a Floppy, which thoroughly embraces the mindset of late 80’s development: speed and efficiency, in an almost meta way.
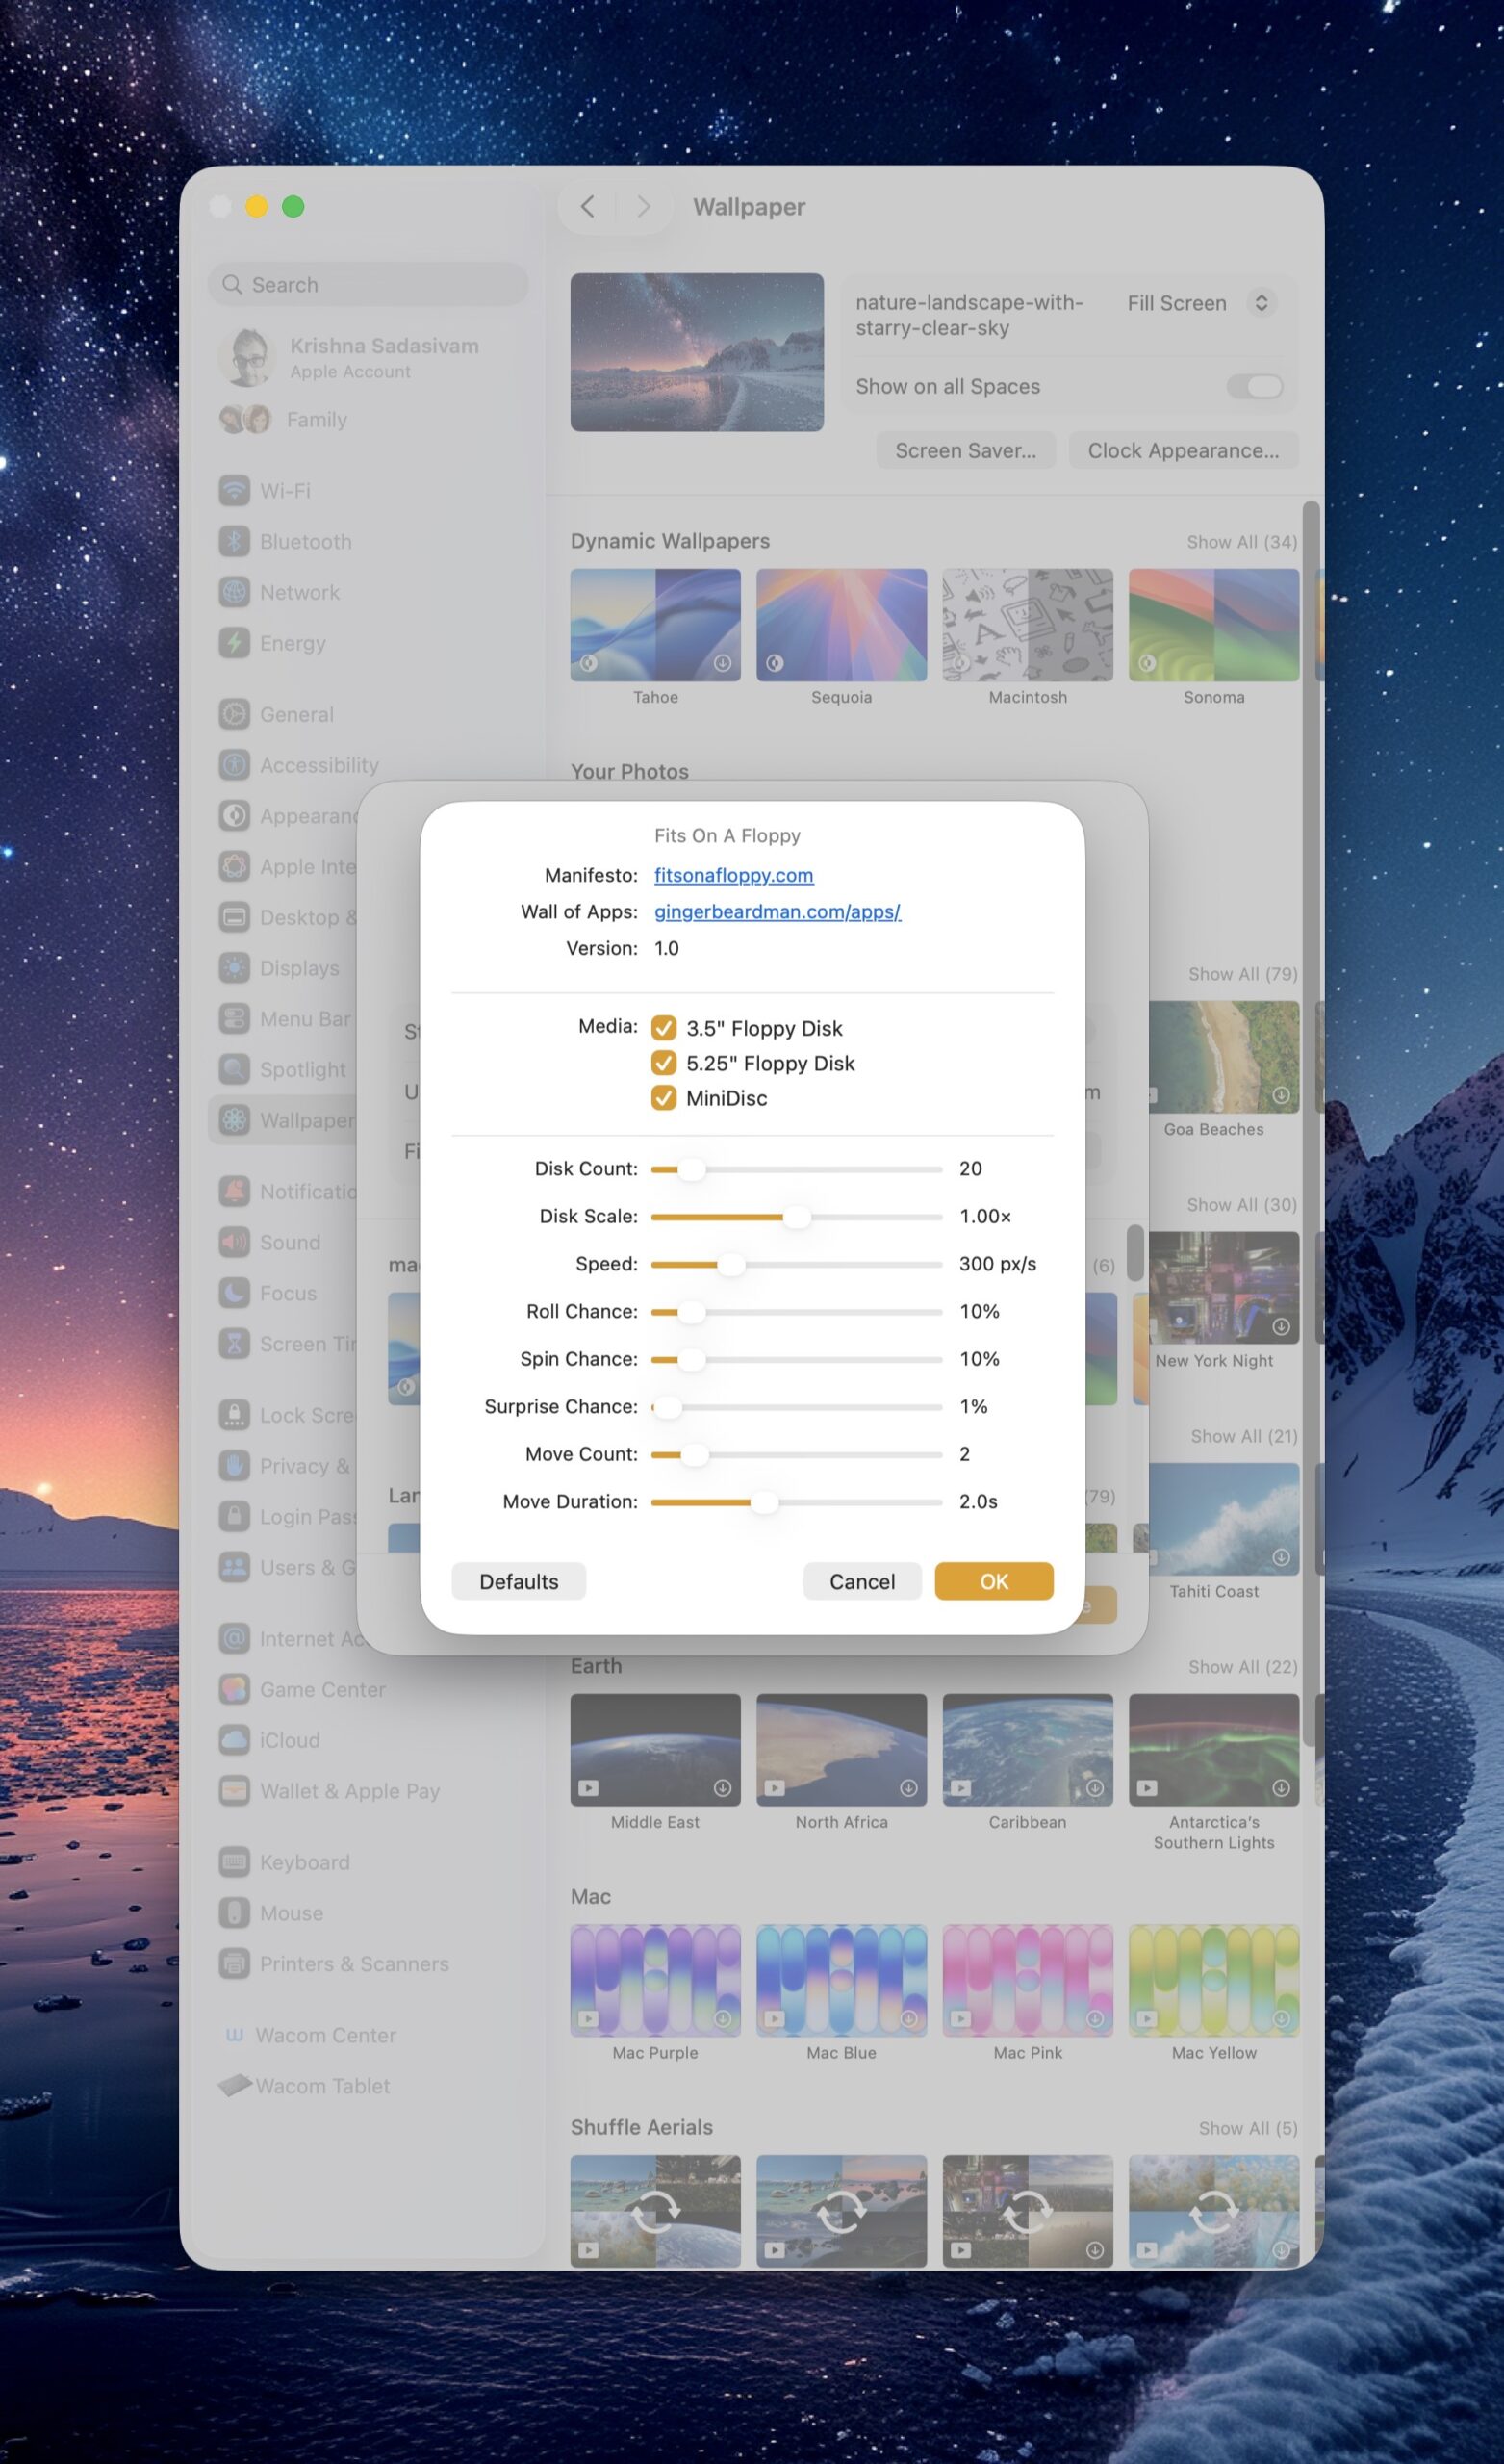
Fits on a Floppy is like After Dark’s Flying Toasters screensaver, if the toasters were replaced with a variety of 3.5″, 5.25″ and floppy disks. And if you’re feeling fancy, you can also toss in a few miniDiscs into the mix.
What I really appreciate about this screensaver is the attention to detail. Each and every disk that floats by is adorned with its own custom disk label. Watching the screensaver for a few minutes filled me with a wave of nostalgia. Fits on a Floppy isn’t bare-bones, it comes with several customization options – such as Disk Count, Disk Scale, Speed and more.
Fits on a Floppy, true to its namesake, fits inside a 1.44MB disk. (I wouldn’t expect anything less.) It’s also free, so what are you waiting for? And while you’re at it, check out the rest of Matt’s apps.
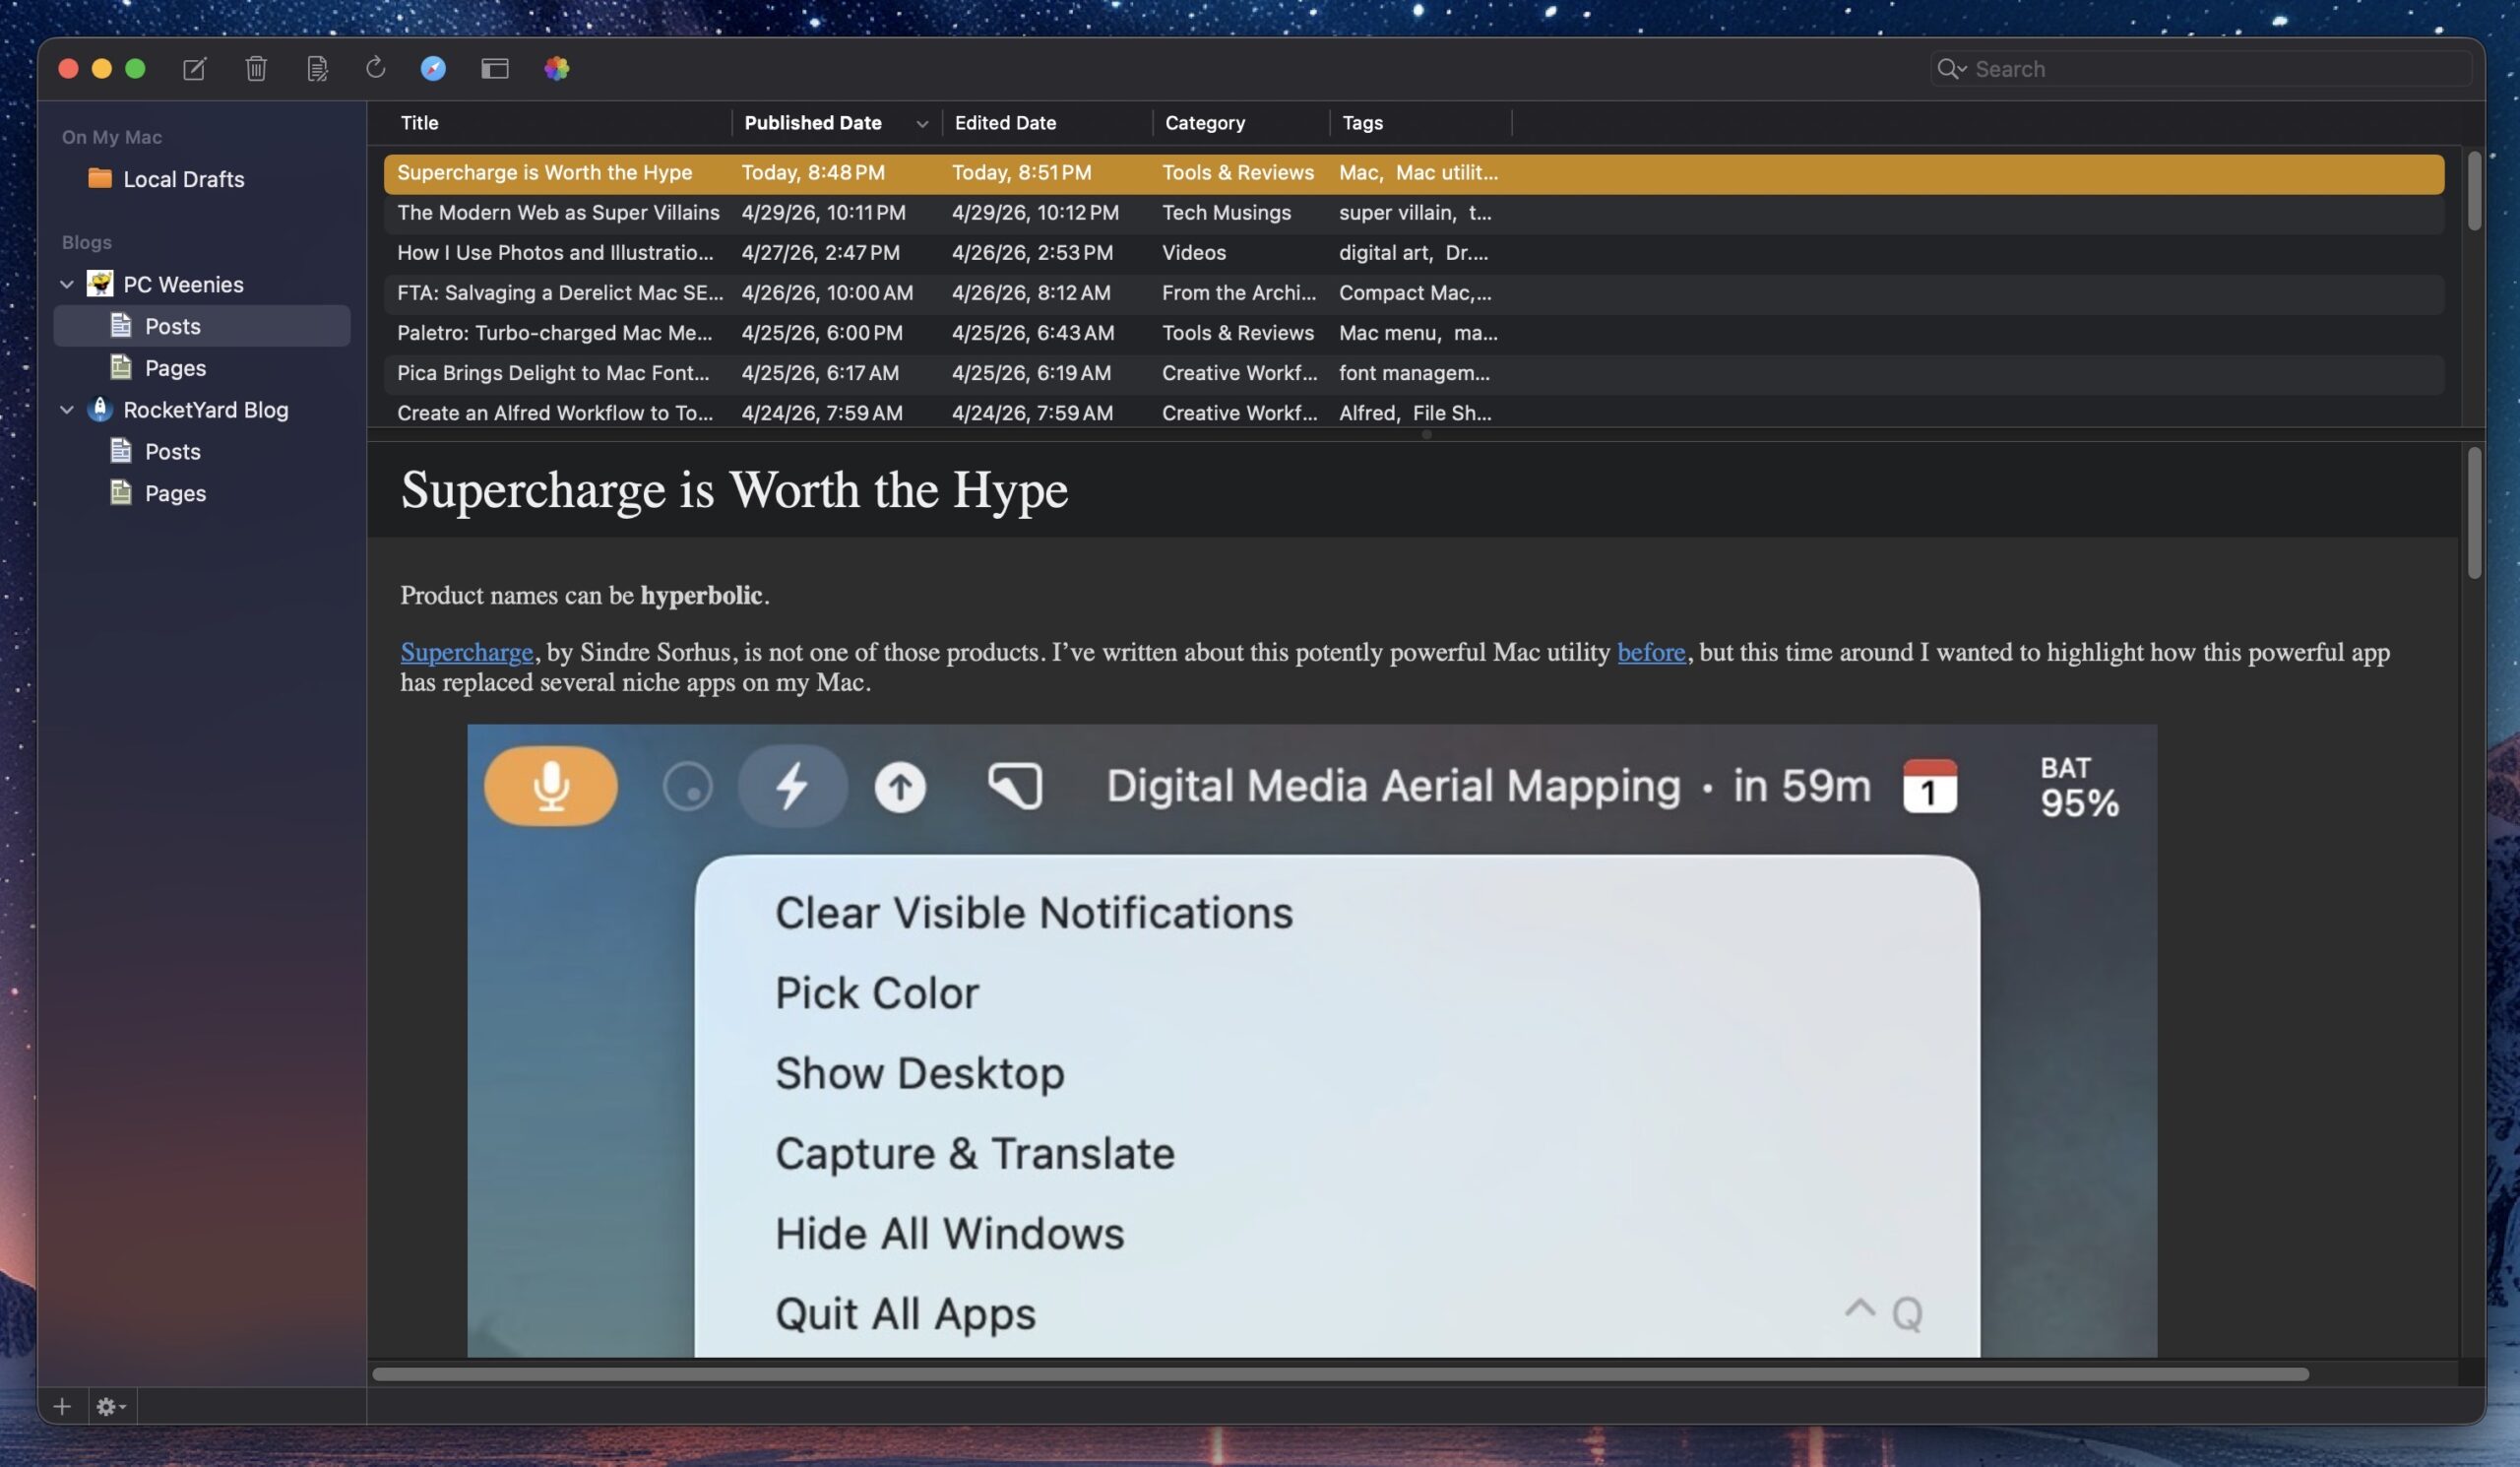
A few weeks ago, I wrote about my Mac blogging software stack. I use MarsEdit to write my posts. This week on the RocketYard blog, I take a deeper dive into MarsEdit’s offerings and why I prefer using it over the built-in WordPress editor.
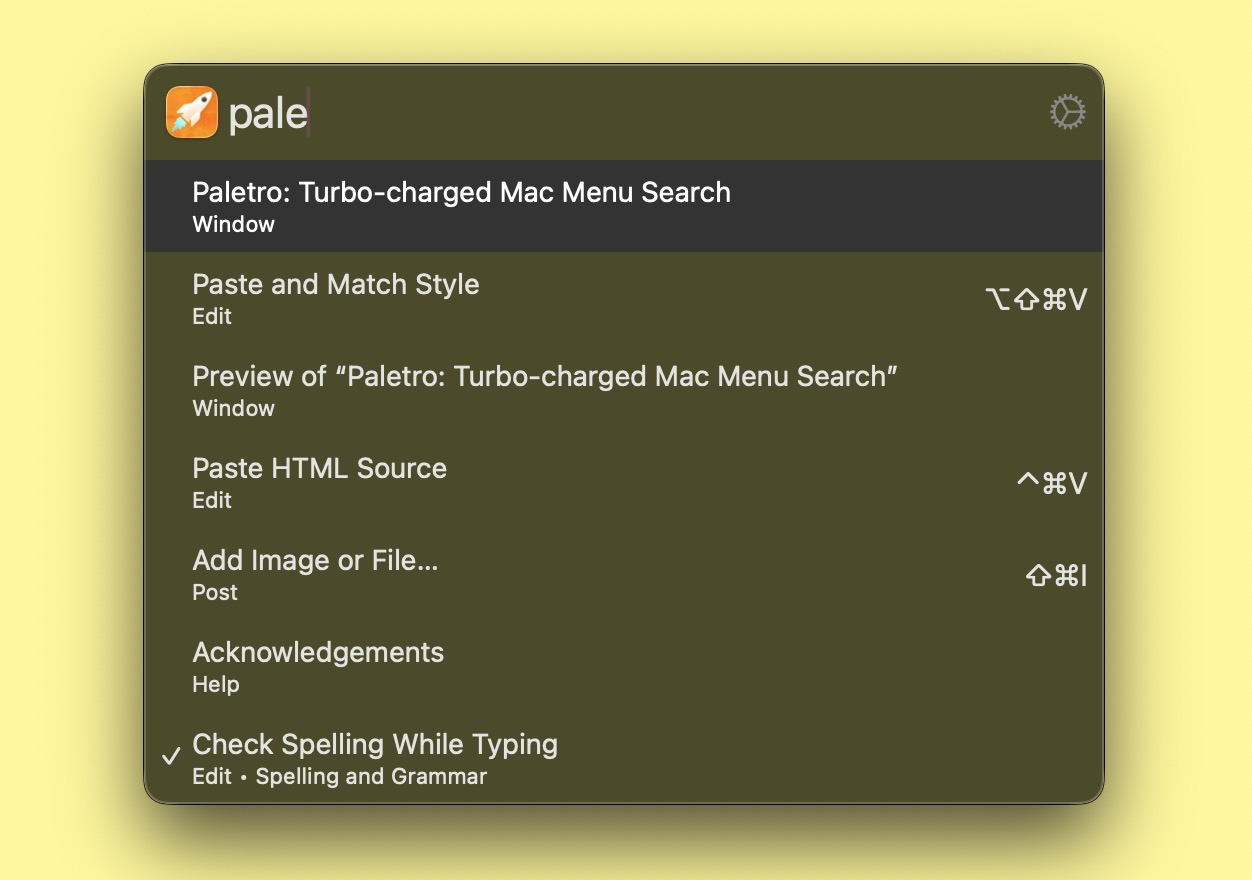
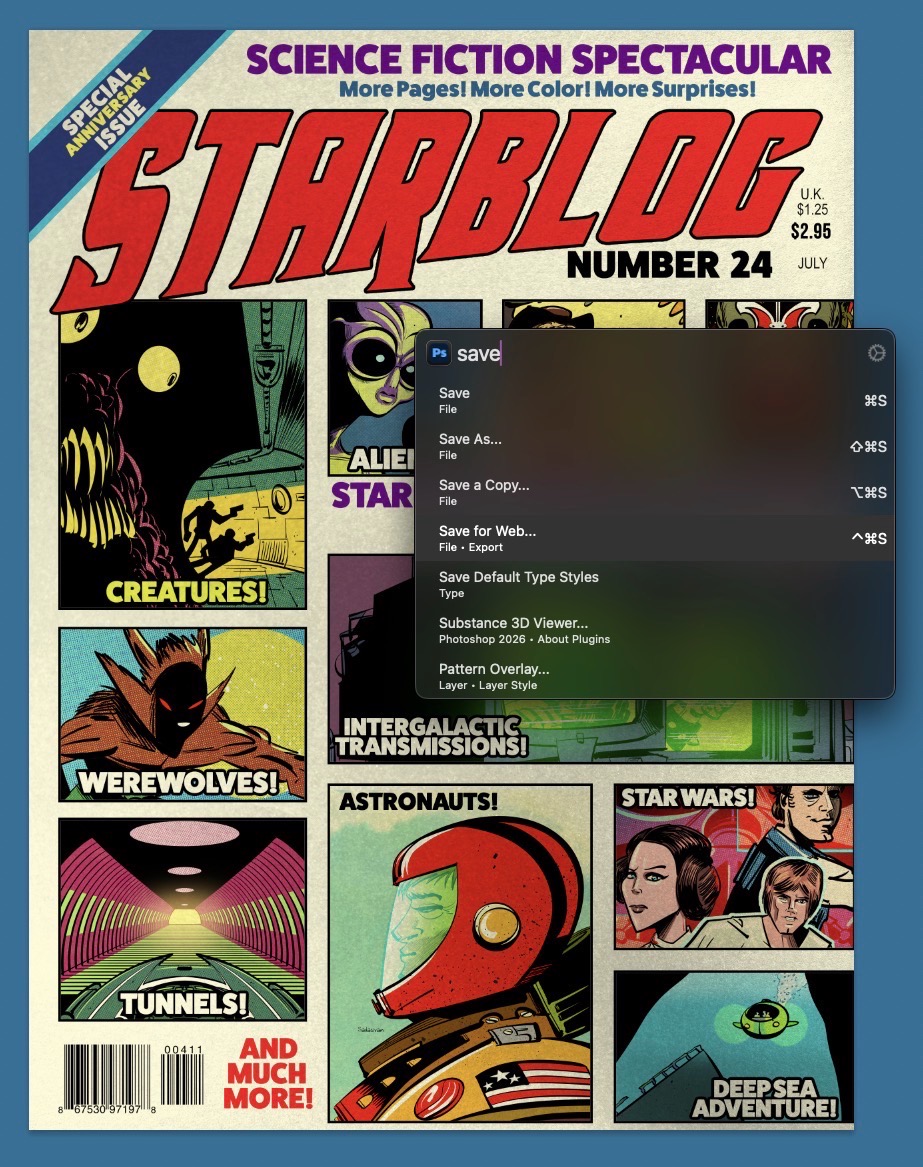
Paletro brings fast, keyboard-based search to your macOS Menu items. Using a custom assigned keyboard shortcut (initially set to Command-Shift-P), I can easily search and traverse menus for the app I’m currently working in.
Using Paletro has changed my Mac productivity ten-fold, because my hands never have to leave my keyboard to use it. It’s particularly handy for apps that have sprawling menu items, like Photoshop.
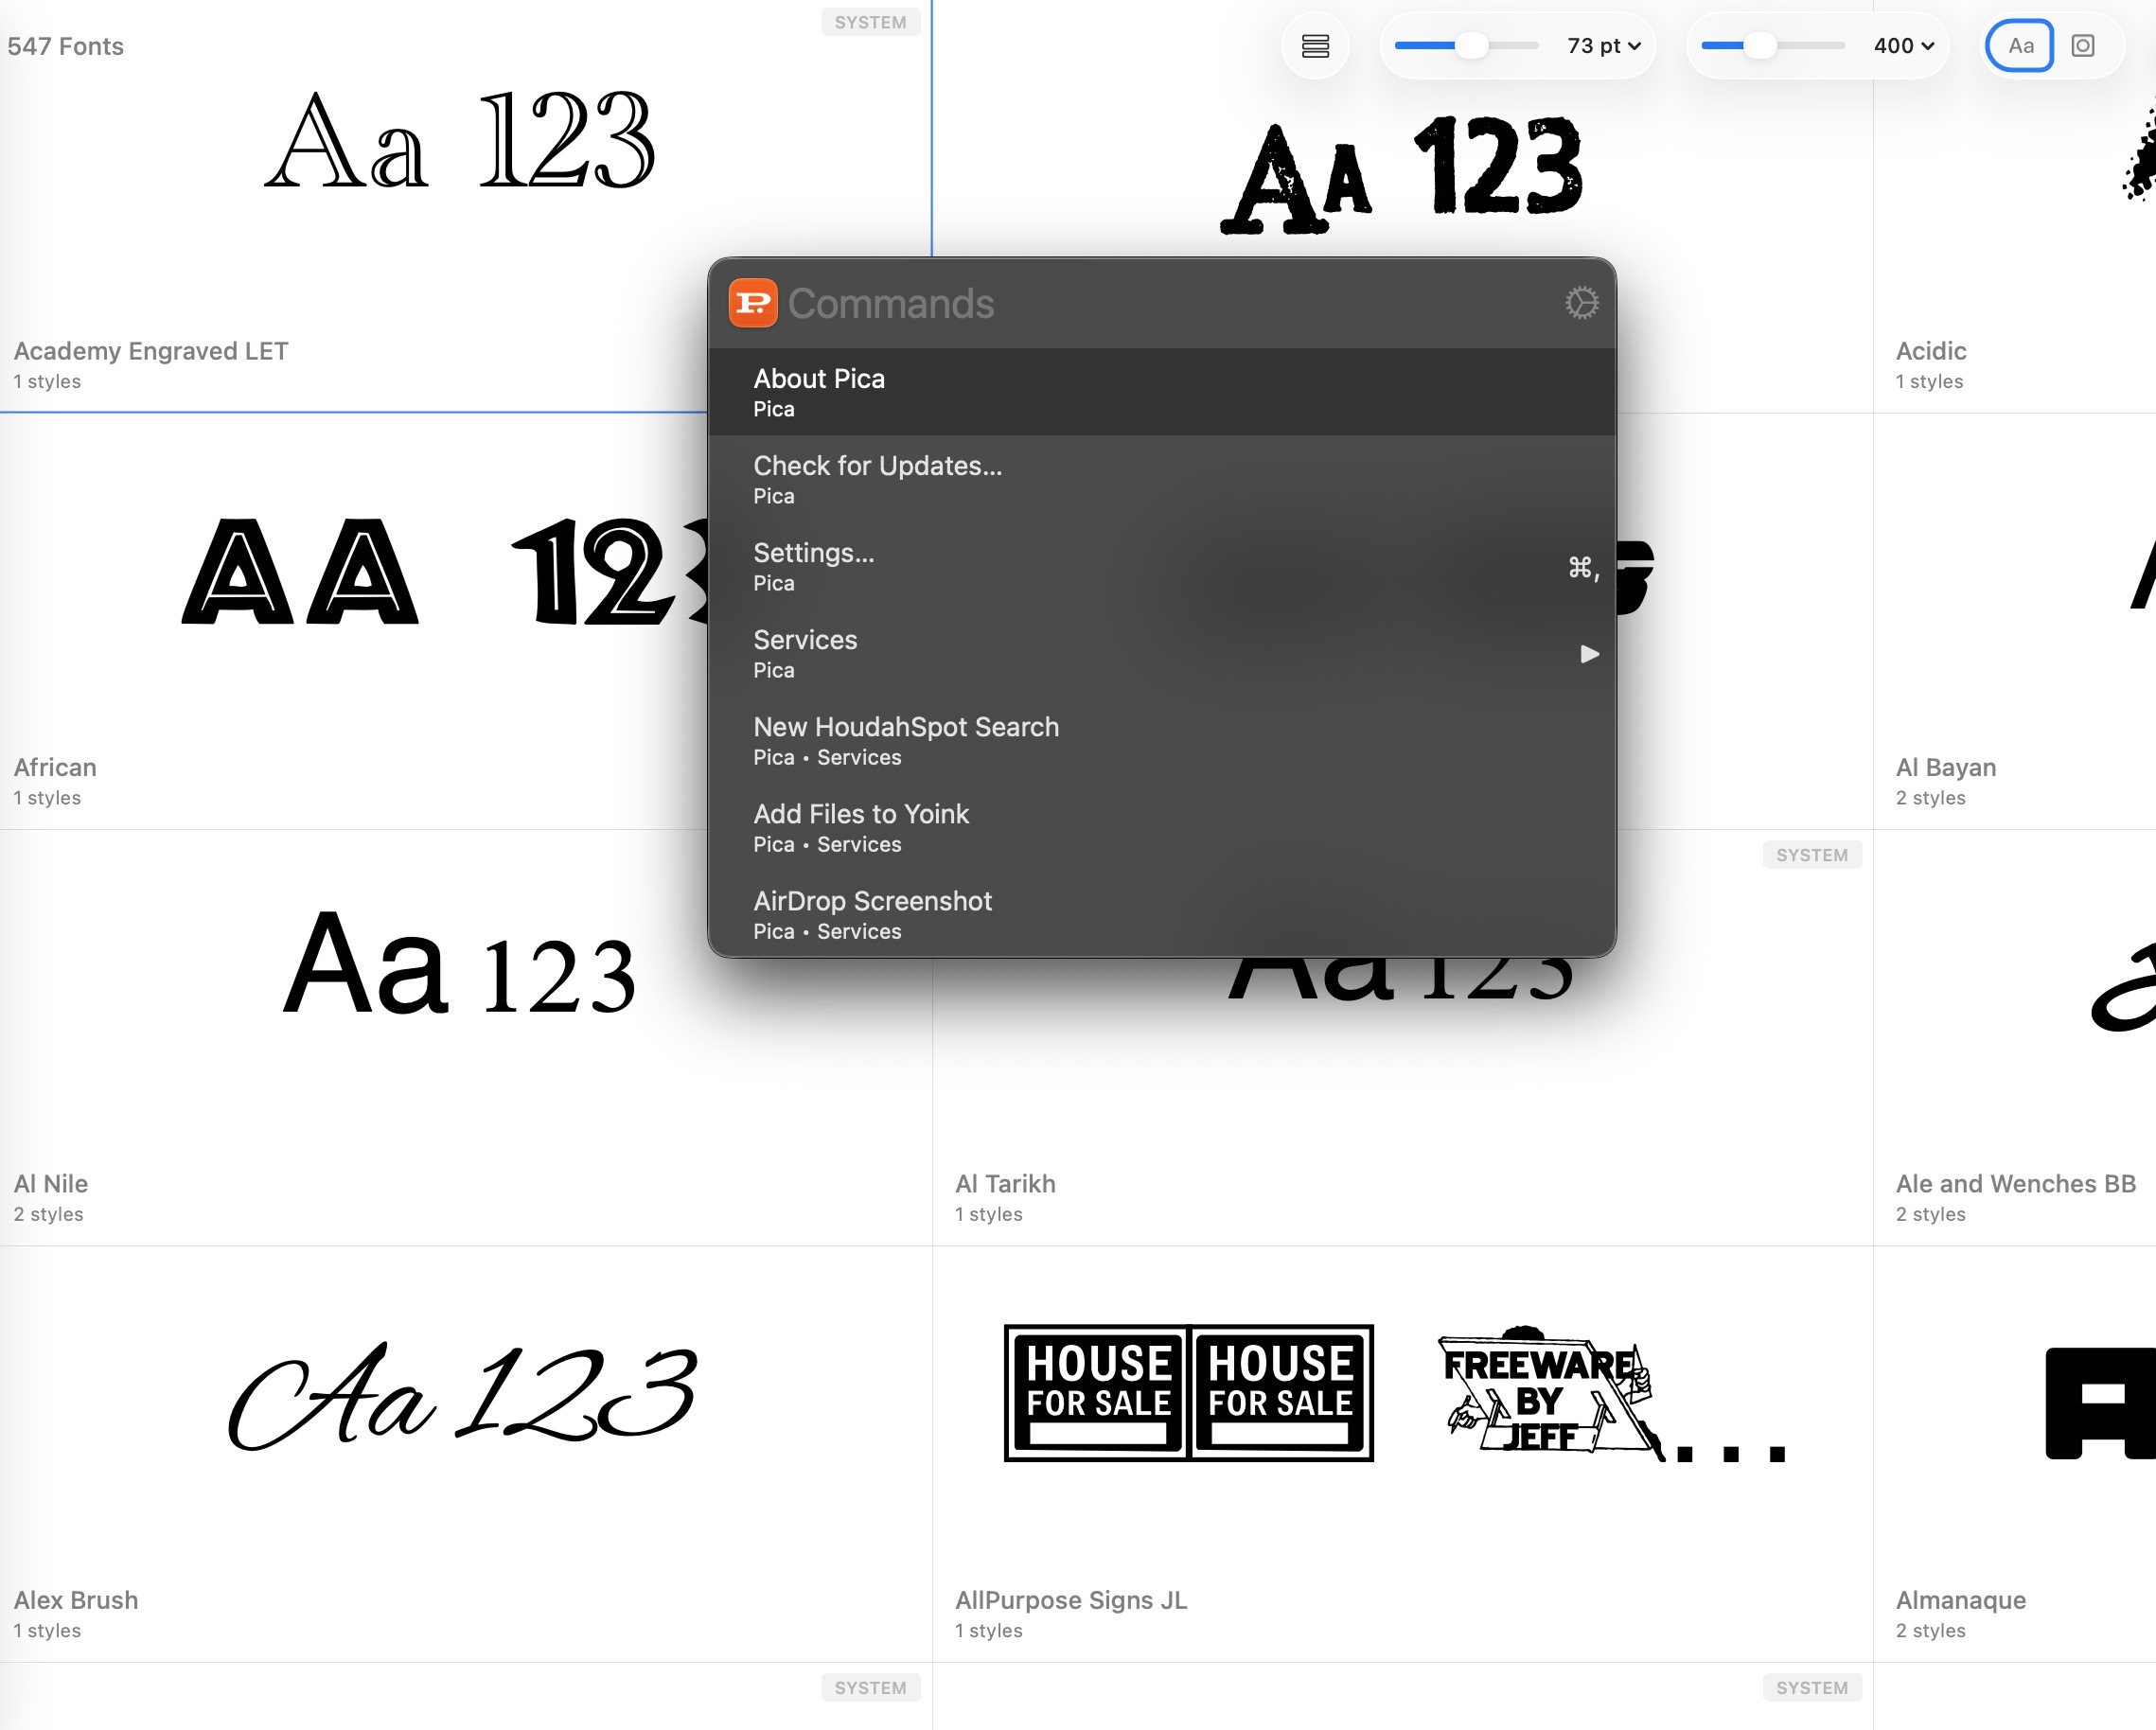
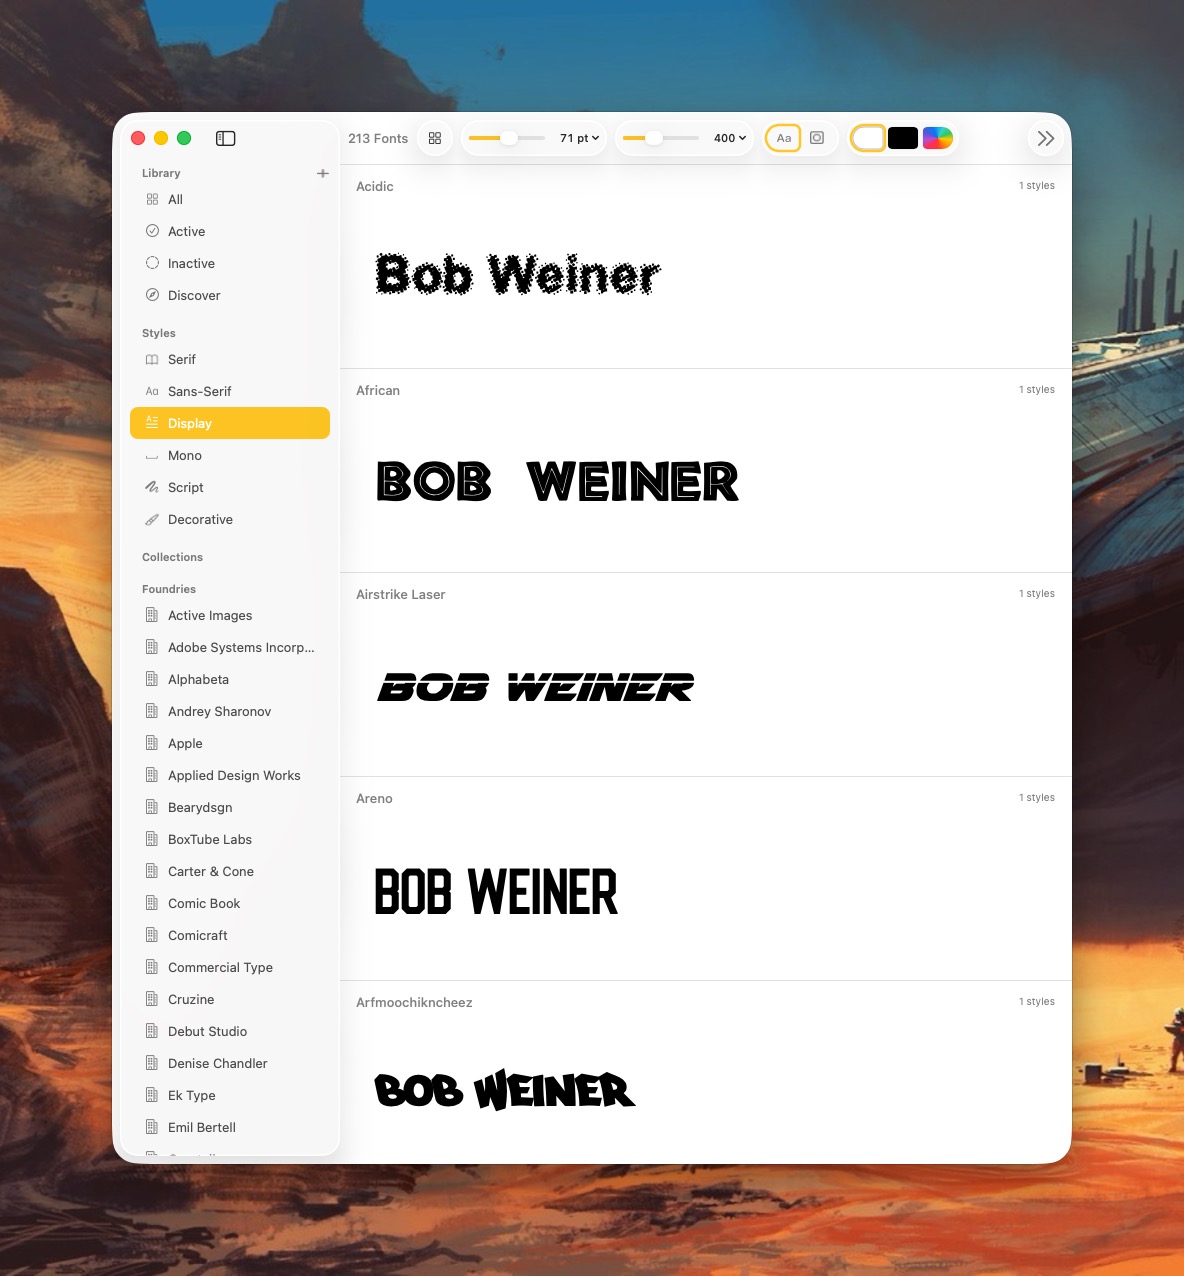
Pica is a new font manager for macOS. With it, you can easily view, categorize, and preview your Mac’s collection of typefaces. I’ve spent a day playing with it and wanted to share my first impressions.
First, Pica is fast!
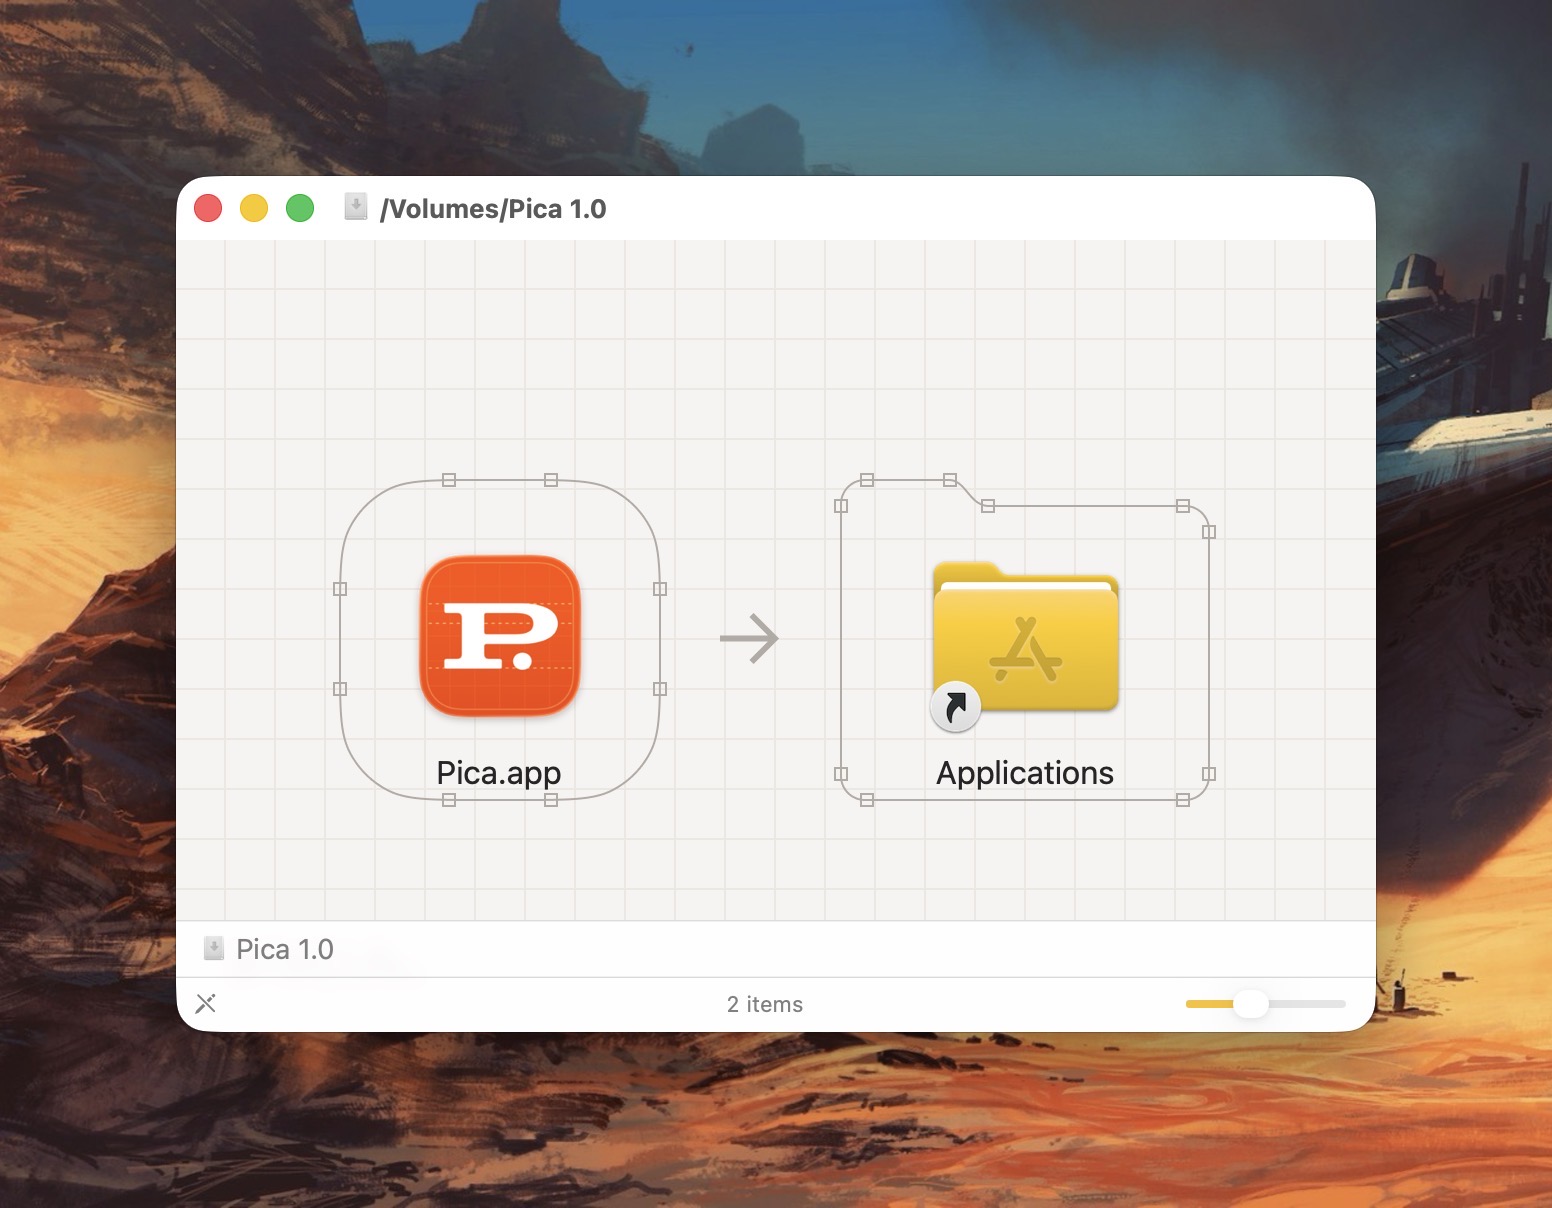
It takes full advantage of all the benefits that come with being natively written for the Mac. (This isn’t some janky Electron app.) Even the installation process is filled with whimsy and delight. Notice the beautiful attention to detail in the Installer below.
After installing Pica, you’ll be treated to series of falling typefaces that fill up your Mac’s screen. Unexpected, but delightful!
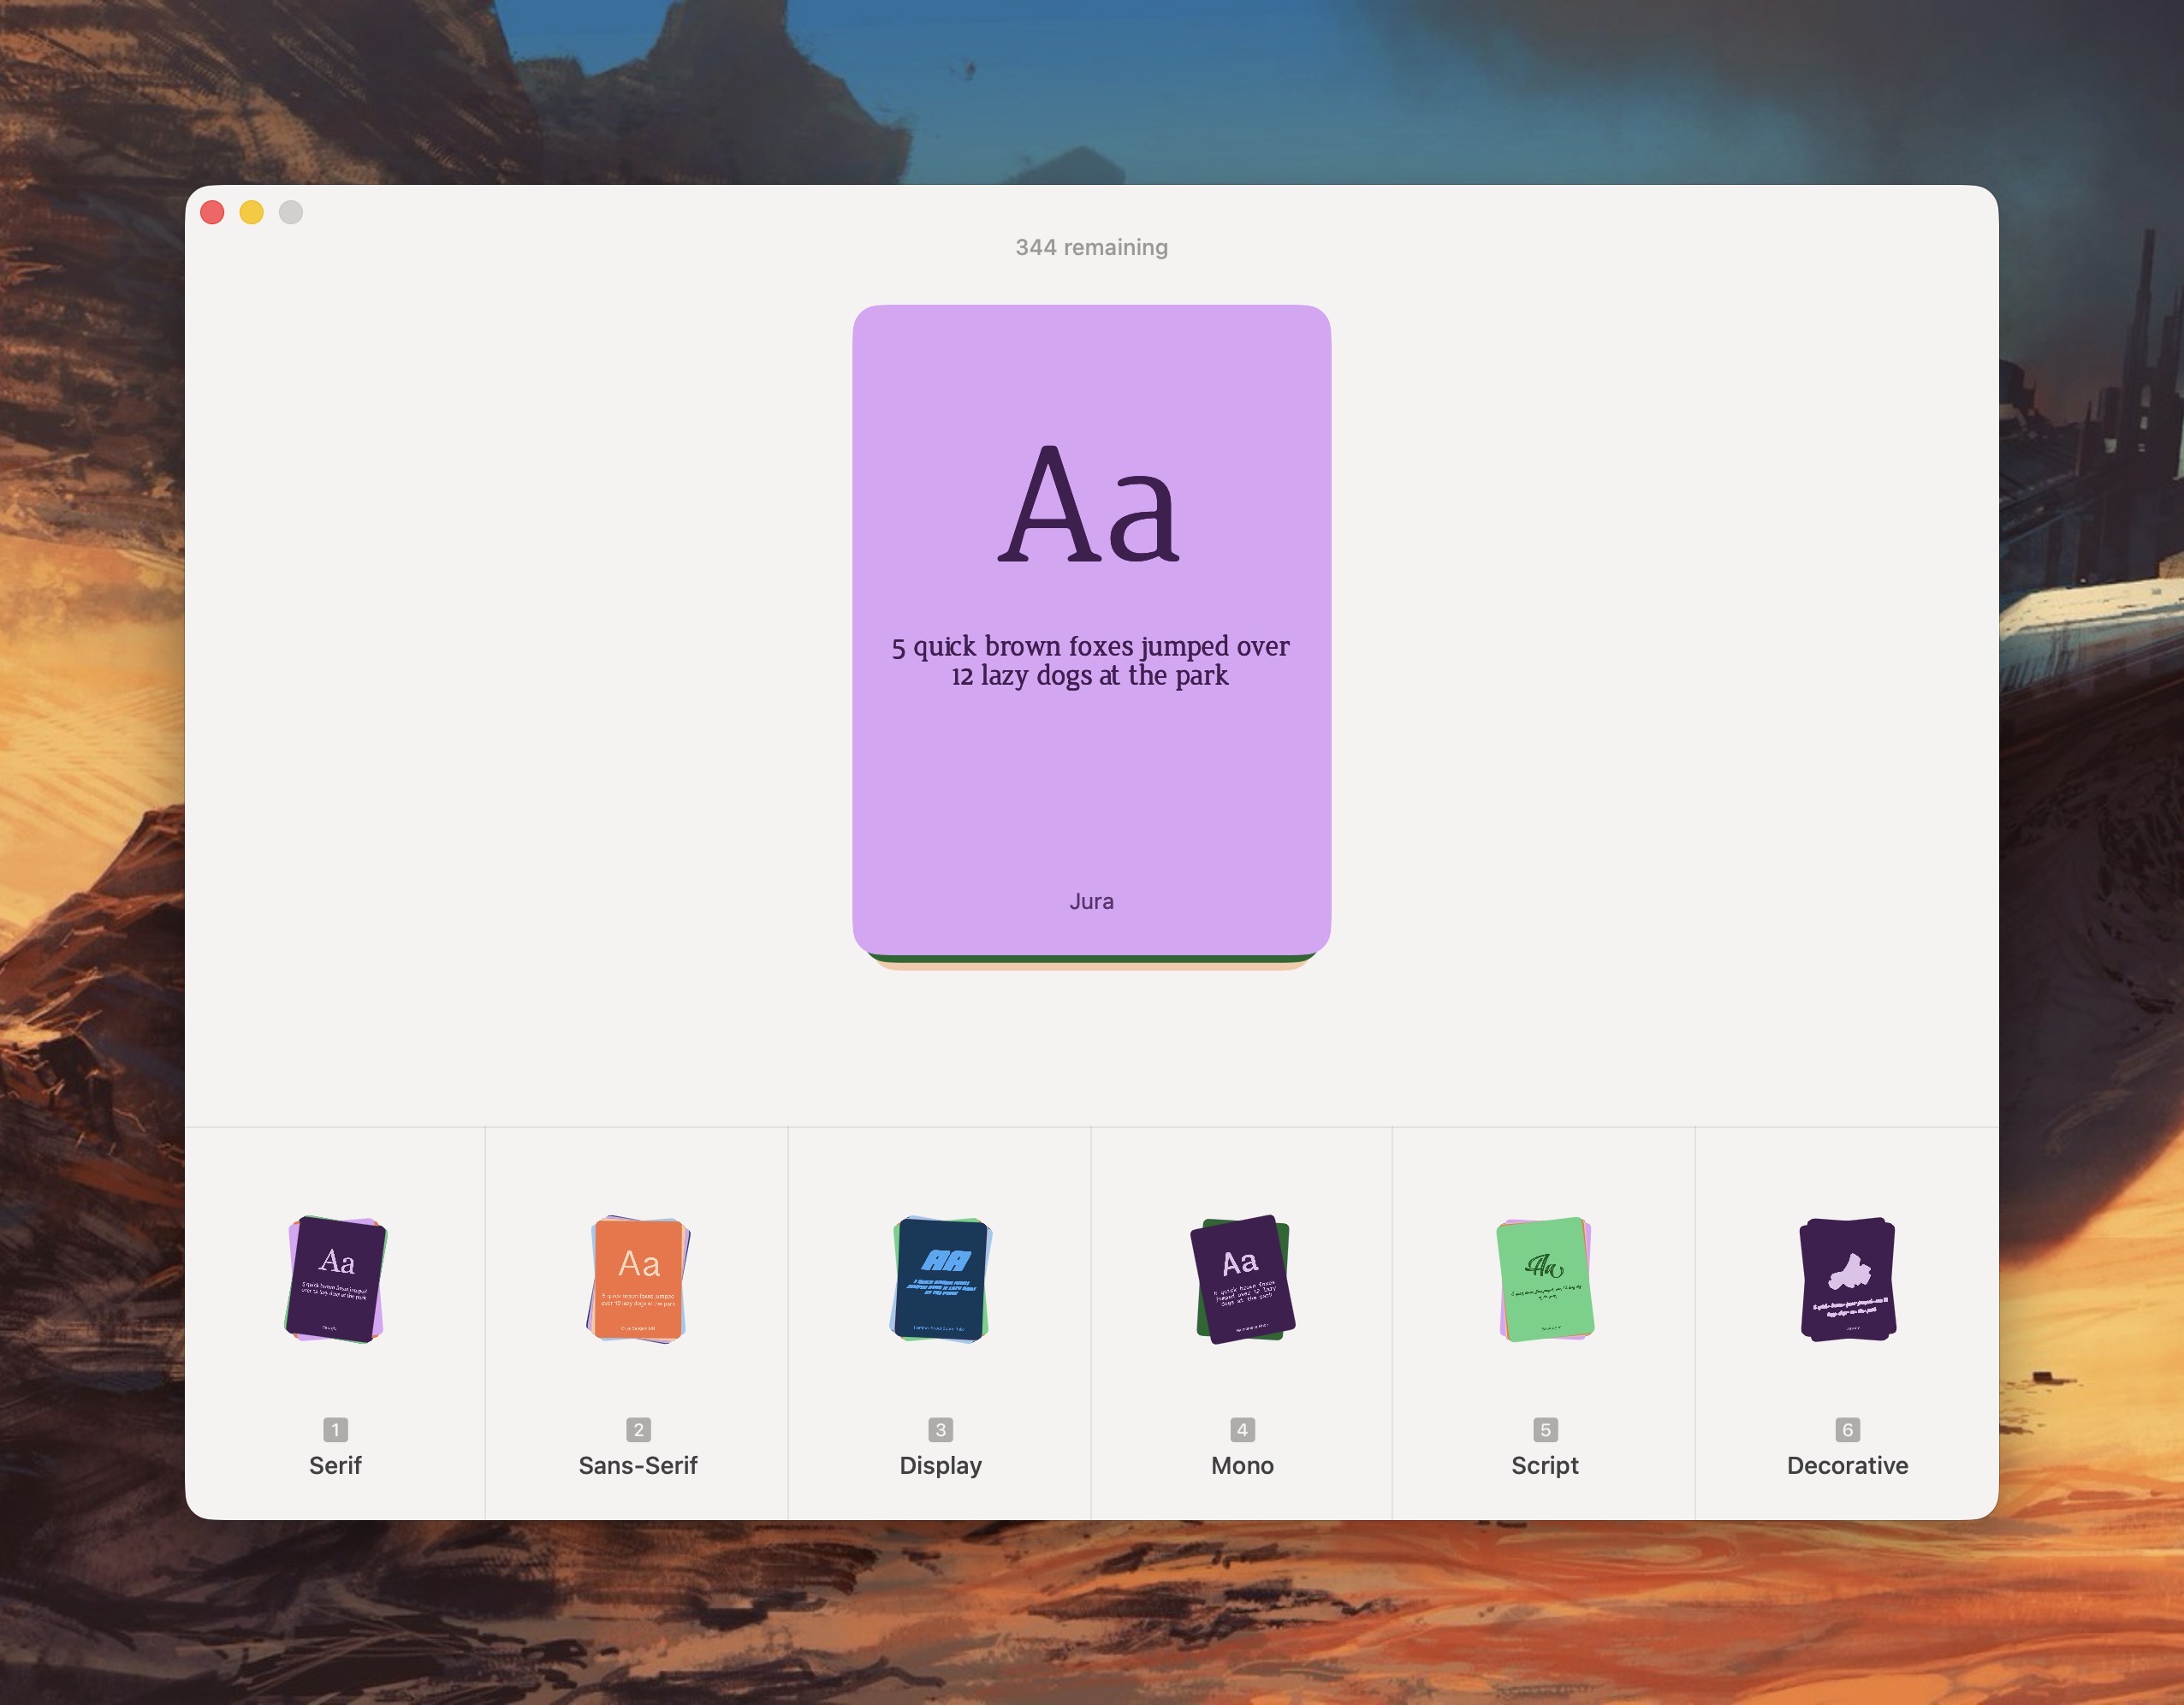
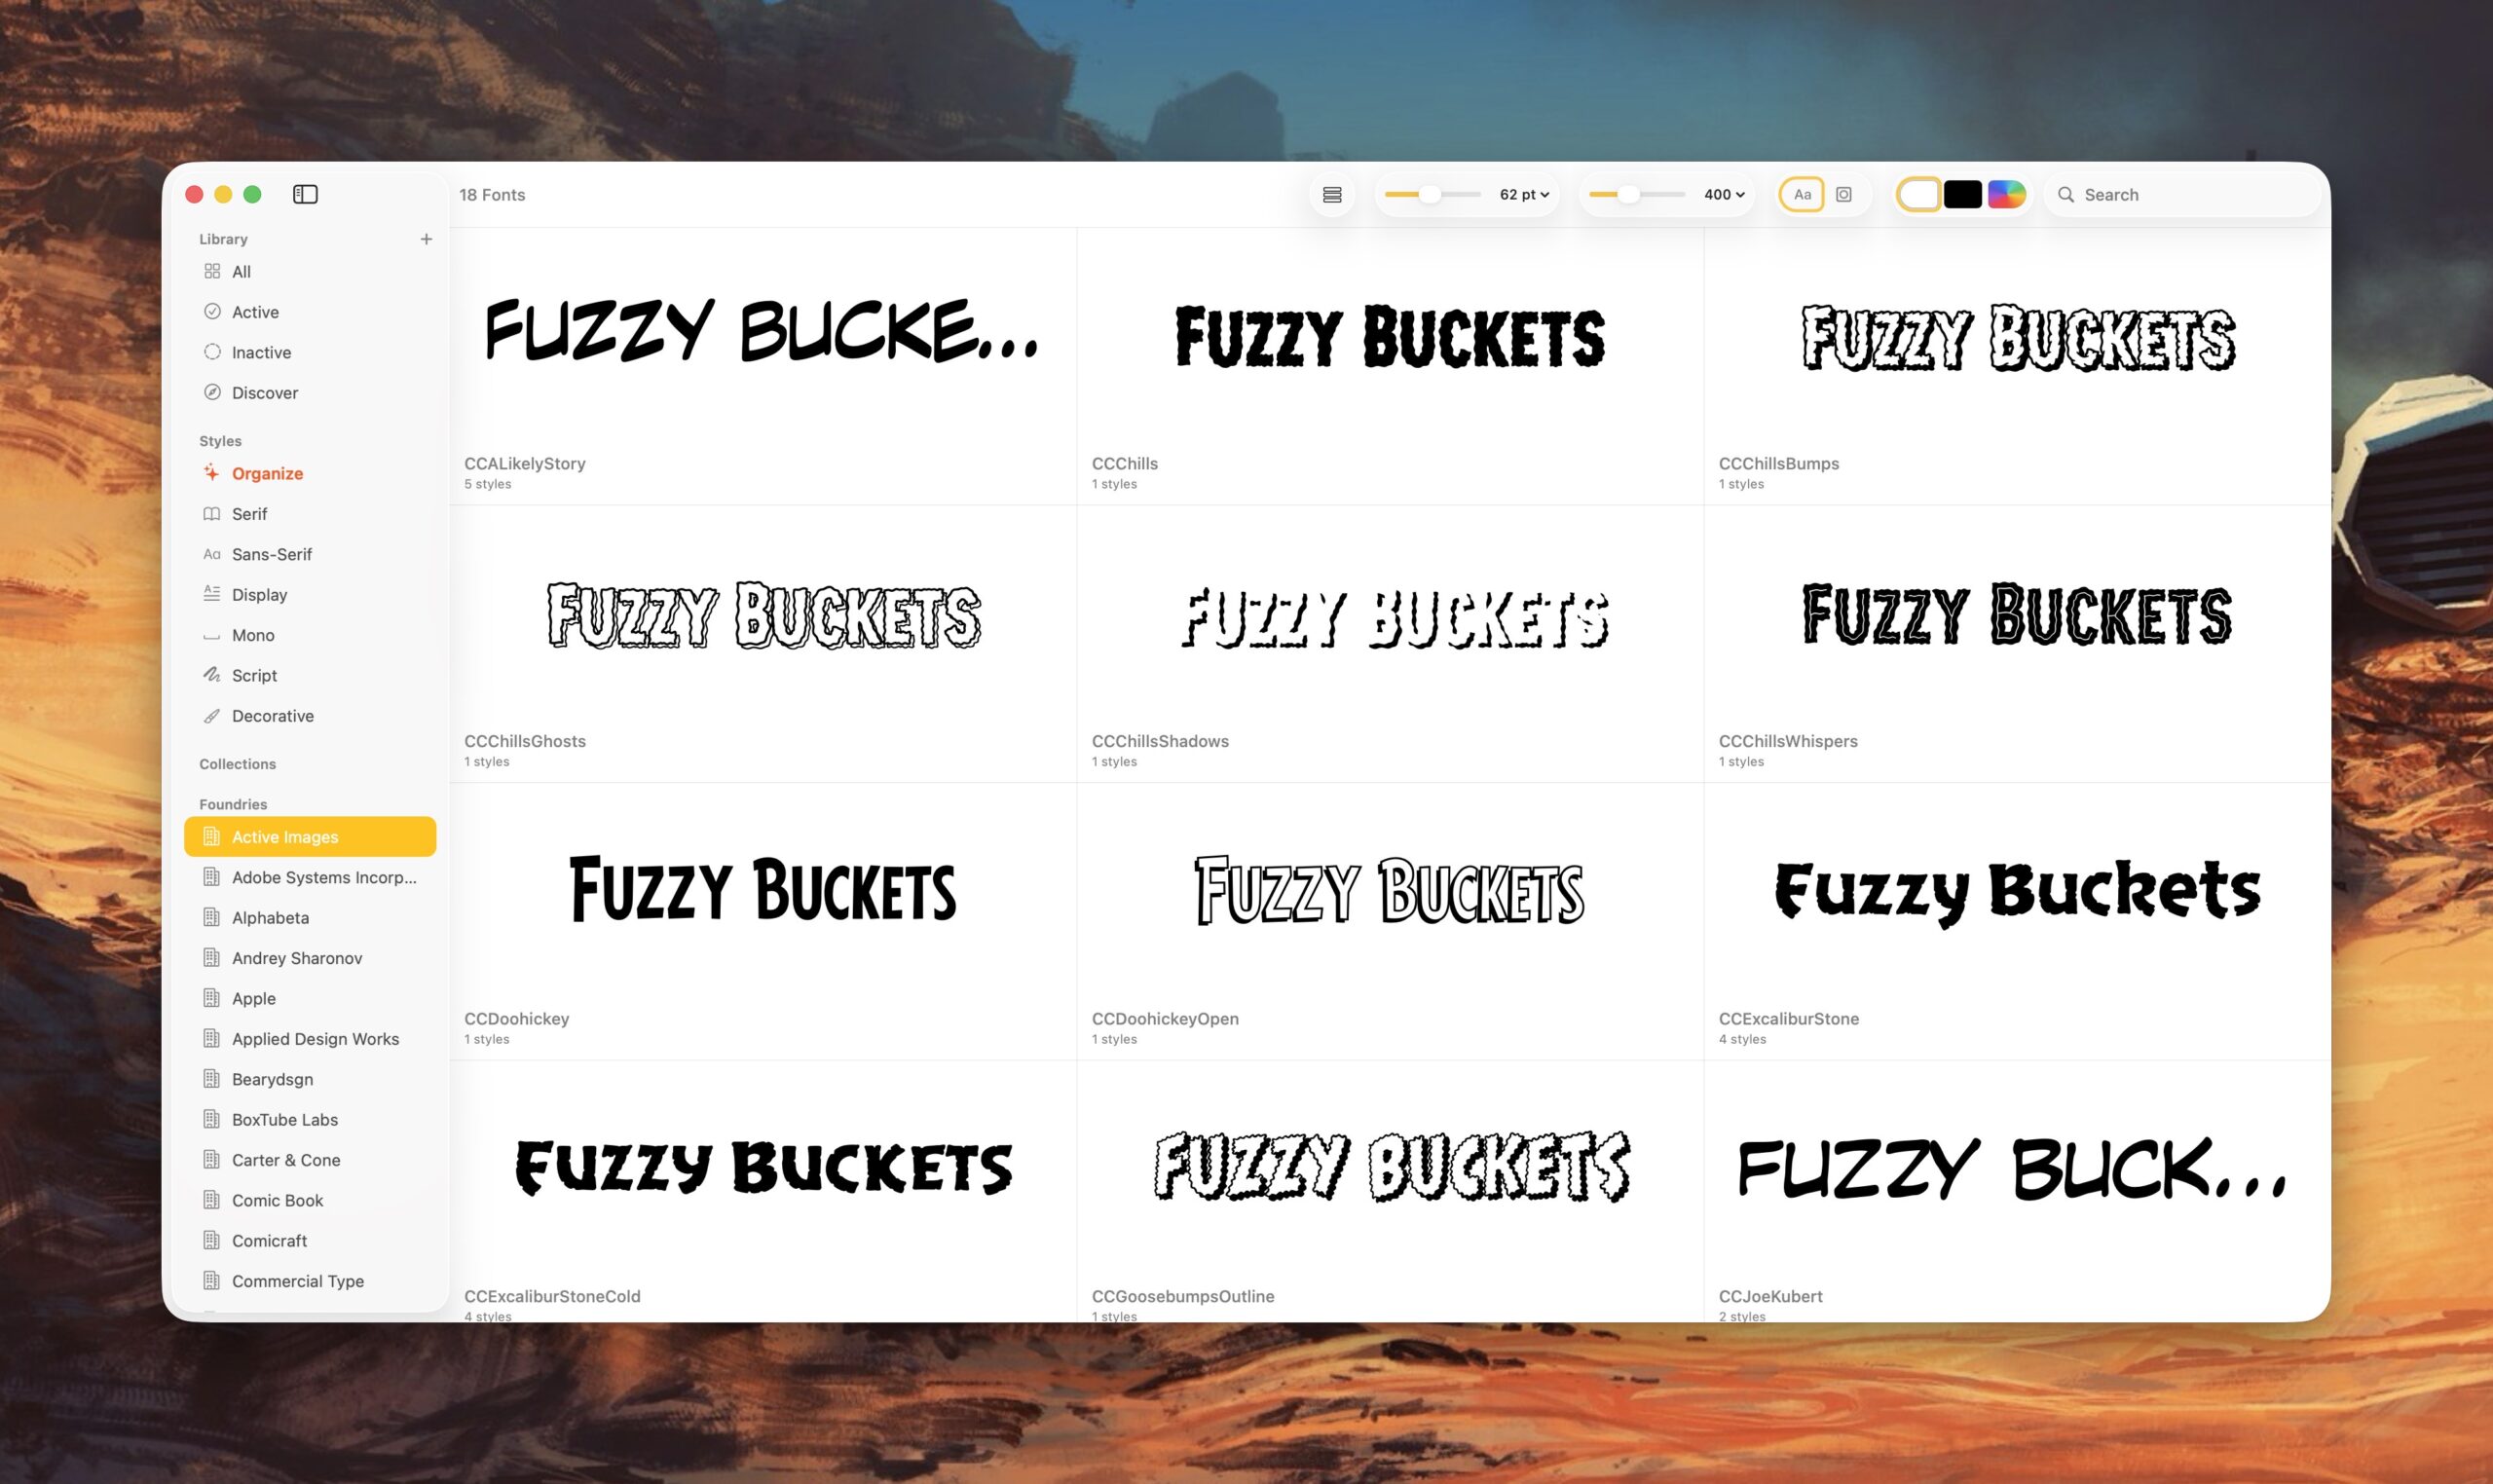
Pica lets me organize my typefaces the way I want; I can group typefaces into Serif, Sans-Serif, Display, Mono, Script or Decorative categories.
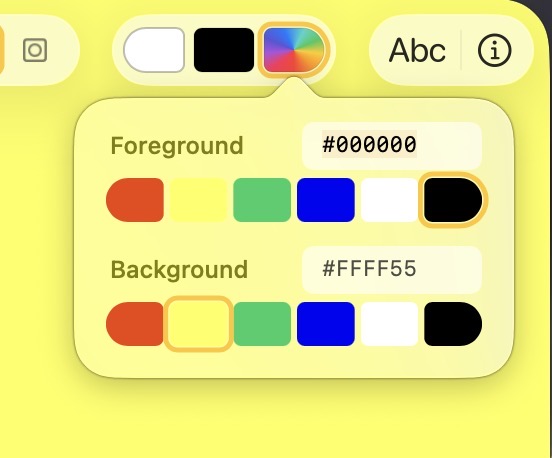
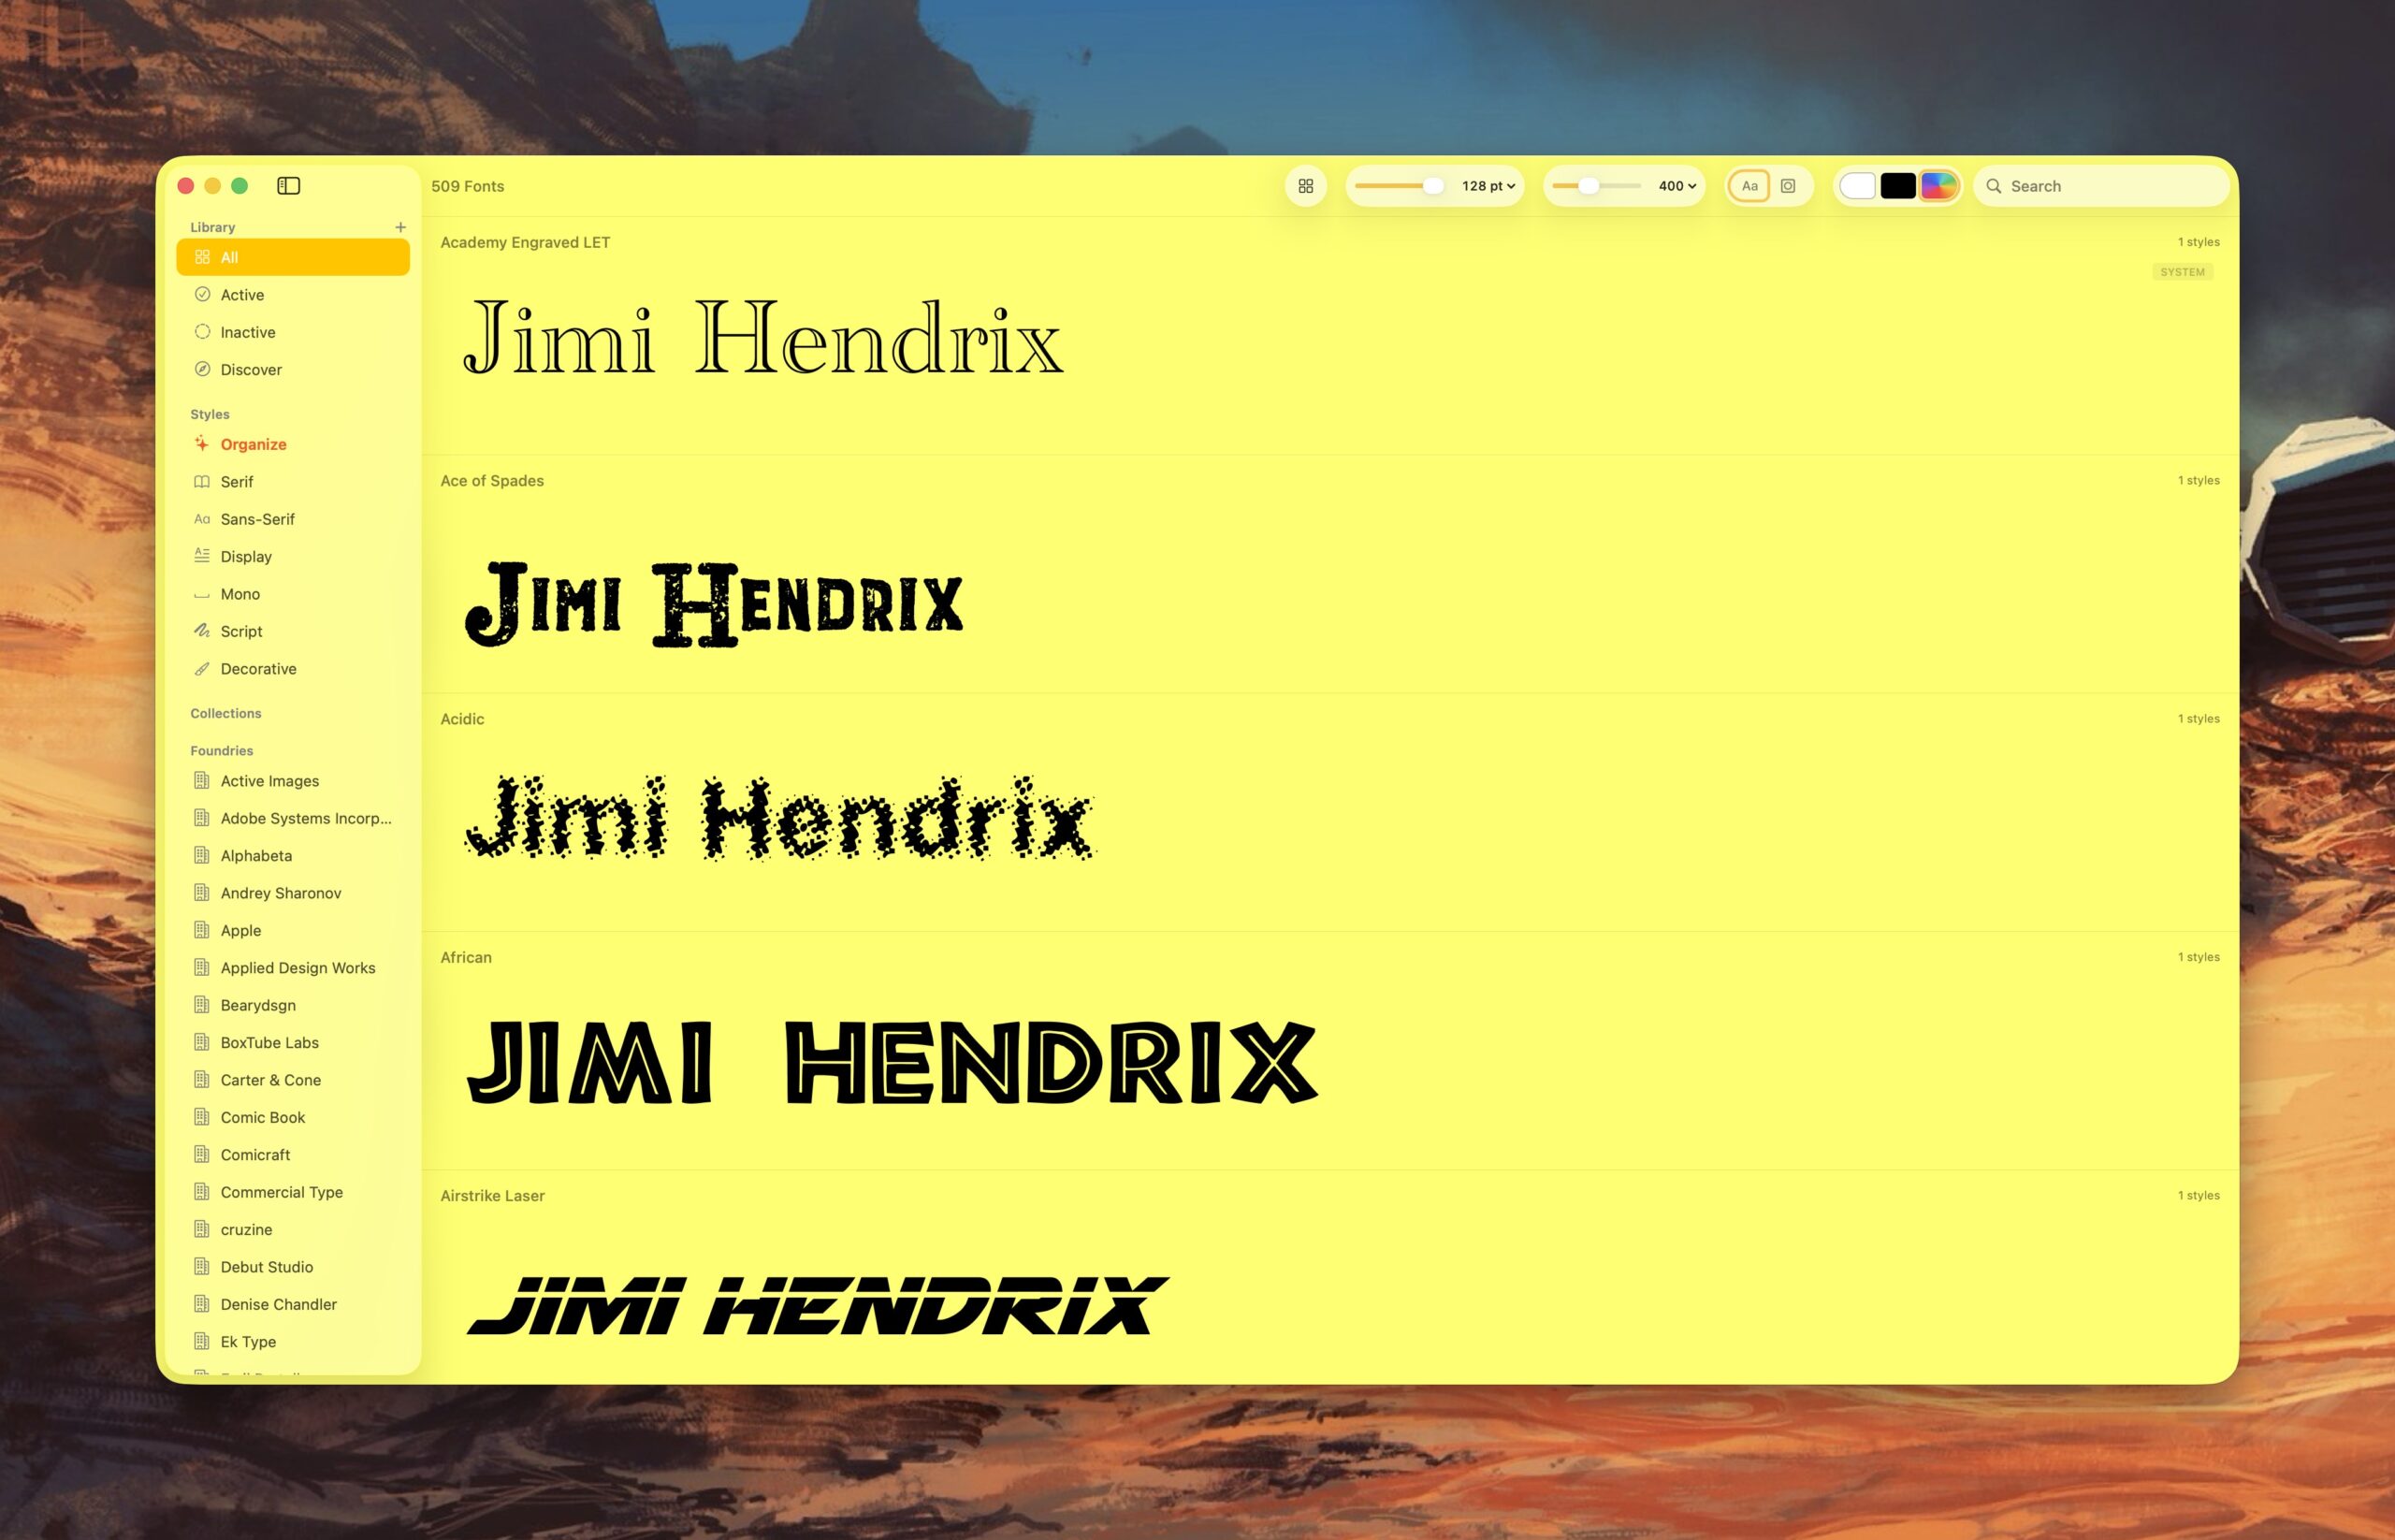
Pica offers several thoughtful customization options for viewing fonts. For example, I can view a typeface in black, white, or as any other HEX color value. This is great for designers!
I can also quickly change the background color of the app to see how it works with the typeface. With Pica, I can see what a green typeface looks like placed in front of a yellow background. (It’s not so great, as it turns out.)
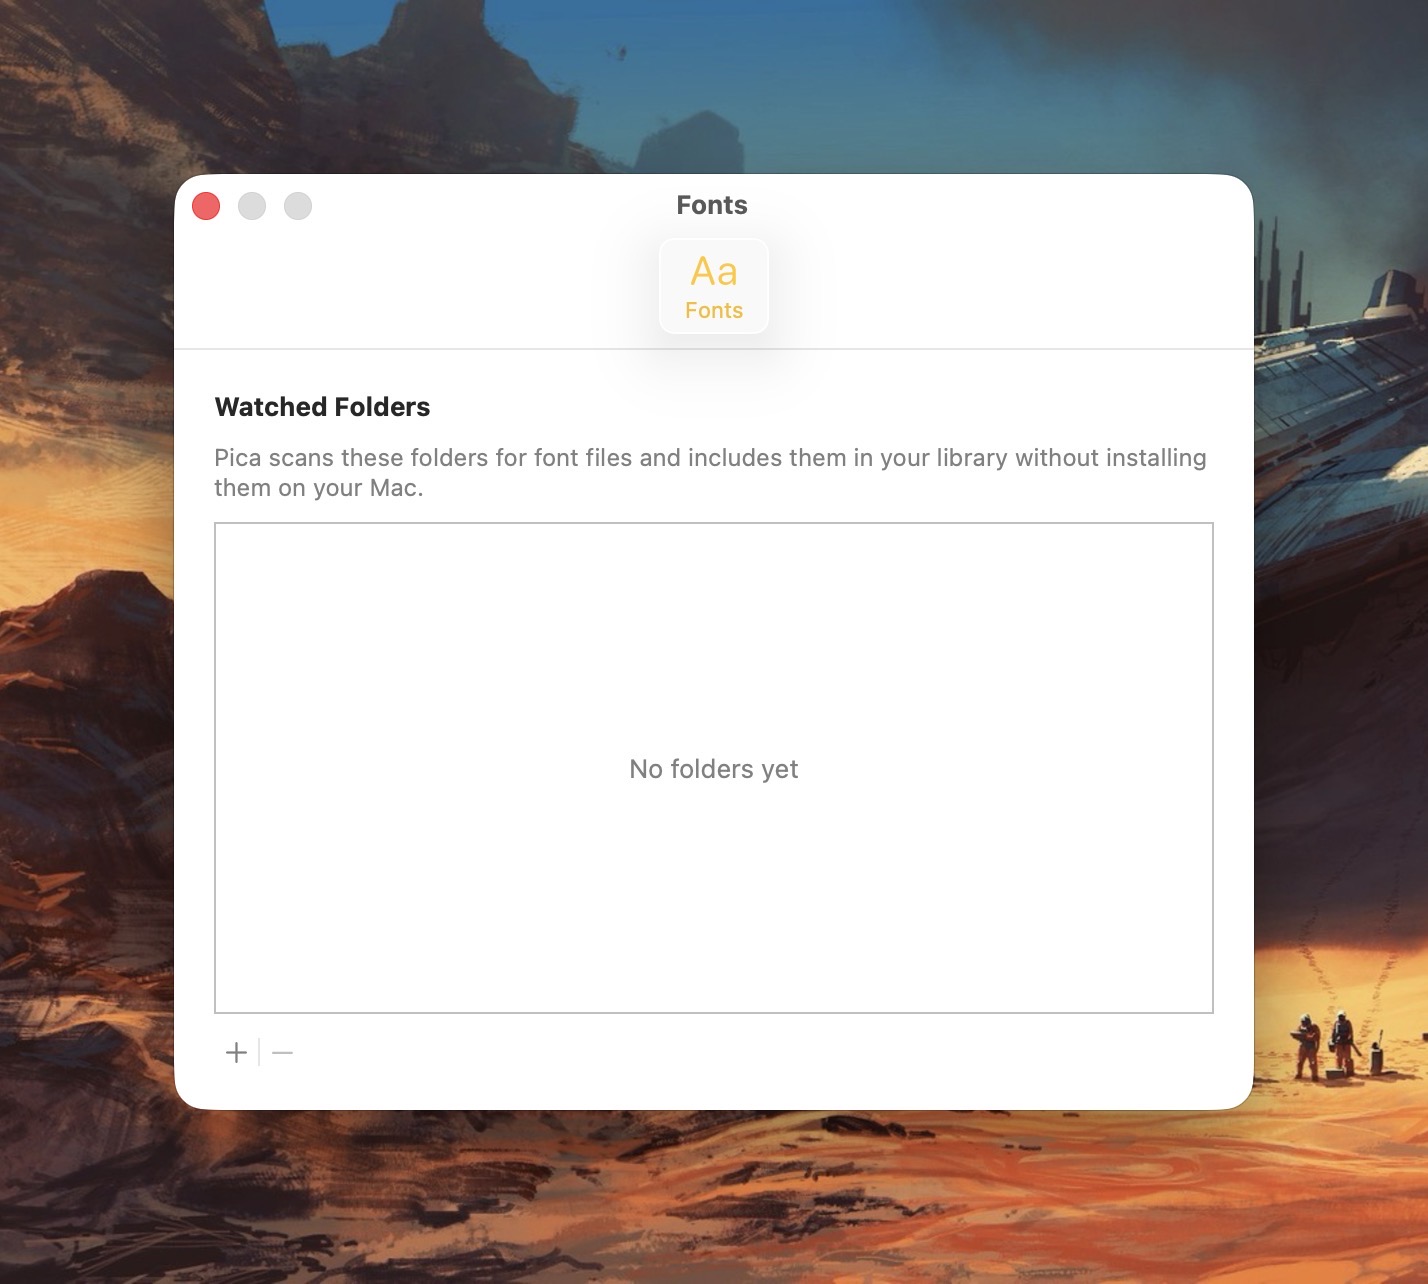
Pica offers full OpenType support, one-click font activation and something called Watch Folders.
Here’s how it works: Select a folder for Pica to “watch”, and each time the folder gets a new font update, Pica will display it. Translation:Pica lets me view typefaces that are not actively loaded onto my Mac.
Why use Pica when macOS already comes with Font Book?
In a word: customizability. Pica not only lets me preview custom text across every typeface I have on my Mac, it lets me quickly adjust font size and font weight independently via two top-located sliders. Typefaces can be viewed as a grid or stacked vertically.
Font Book, by comparison, is pretty basic.
Pica extends beyond the fonts you have locally on your Mac. Click the “Discover” option and you’ll be treated to bold and unique typefaces created by some of the world’s best font foundries.
Pica is a native Mac application, which means it takes full advantage of macOS’s underlying architecture. Best of all, it’s free.
If you spend considerable time working with fonts on your Mac, Pica’s a no-brainer download.
Let’s talk about macOS File Sharing, an option I use almost daily. On macOS, File Sharing lives under:
System Settings → General → Sharing → File Sharing
That method works fine if you only need to toggle it occasionally. But I need File Sharing ON when I bring my laptop home, and OFF when I’m about to take it with me when I leave for work. Visiting the System Settings each time to toggle File Sharing was getting tiresome.
So I decided to do something about it.
Below is a custom Alfred Workflow I made called File Sharing Toggle that I’ve tested on both Macs at home.
My Alfred Workflow has three options:
Turn File Sharing ON
Turn File Sharing OFF
Check File Sharing Status
The ON/OFF actions toggle File Sharing appropriately and displays a dialog box showing the current File Sharing state. A separate Status action displays a dialog box showing the result of a query on the current File Sharing state.
My workflow uses macOS shell commands and will ask for your administrator password when turning File Sharing on or off. (It’s a small price to pay for the convenience.)
Step 1: Create a New Alfred Workflow
Open:
Alfred Preferences → Workflows
Click the + button and choose:
Blank Workflow
Name it something like:
Toggle File Sharing
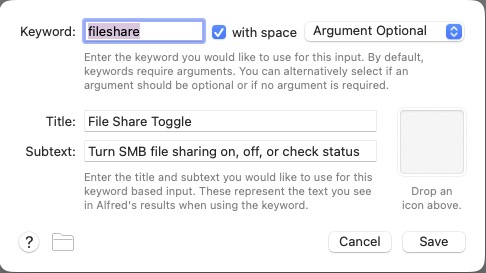
Step 2: Add a Keyword Trigger
Right-click in the workflow canvas and choose:
Inputs → Keyword
Use these settings:
Keyword: fileshare
Title: File Sharing Toggle
Subtext: Turn SMB File Sharing on, off, or check status
Argument: Argument Optional
Screenshot
Click Save.
Step 3: Add a List Filter
Right-click the canvas and choose:
Inputs → List Filter
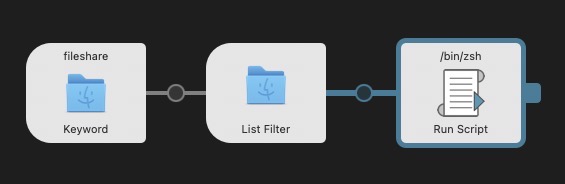
Connect the Keyword object to the List Filter.
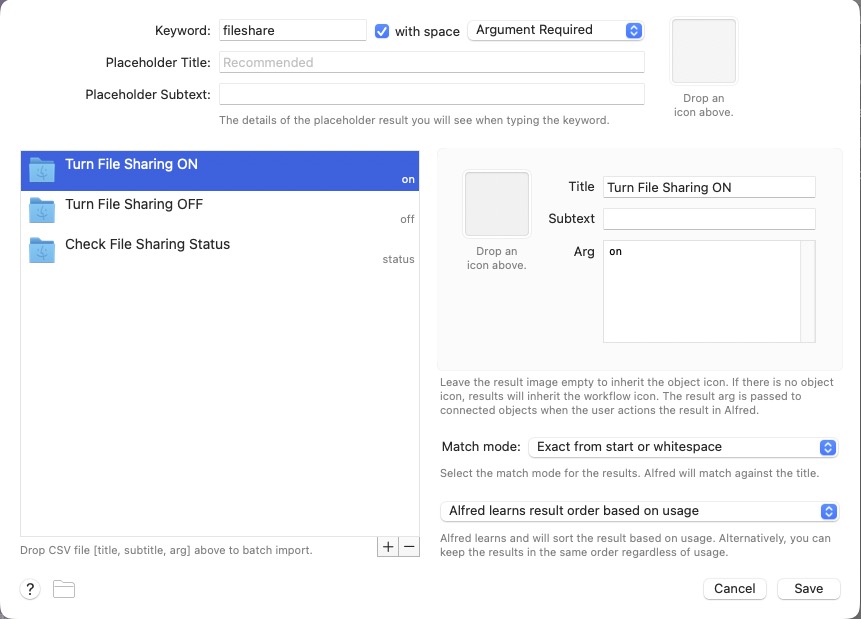
Set the Keyword to fileshare and Argument Required. Then add these three list items.
Item 1
Title: Turn File Sharing ON
Arg: on
Item 2
Title: Turn File Sharing OFF
Arg: off
Item 3
Title: Check File Sharing Status
Arg: status
Screenshot
Click Save.
Step 4: Add a Run Script Action
Right-click the canvas and choose:
Actions → Run Script
Connect the List Filter to the Run Script action.
Use these settings:
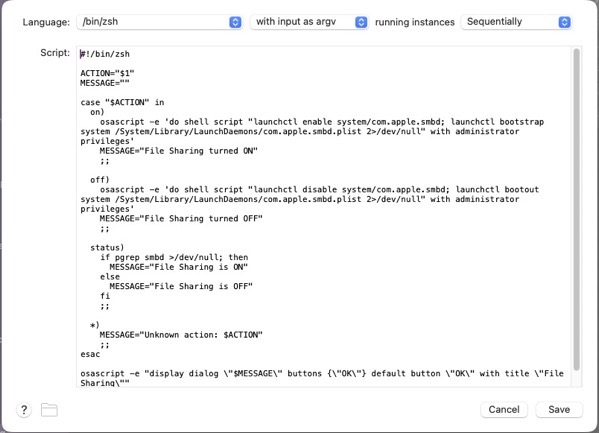
Language: /bin/zsh
with input as: argv
Paste this script:
#!/bin/zsh

ACTION="$1"
MESSAGE=""

case "$ACTION" in
  on)
    osascript -e 'do shell script "launchctl enable system/com.apple.smbd; launchctl bootstrap system /System/Library/LaunchDaemons/com.apple.smbd.plist 2>/dev/null" with administrator privileges'
    MESSAGE="File Sharing turned ON"
    osascript -e "display notification \"$MESSAGE\" with title \"File Sharing\""
    ;;

  off)
    osascript -e 'do shell script "launchctl disable system/com.apple.smbd; launchctl bootout system /System/Library/LaunchDaemons/com.apple.smbd.plist 2>/dev/null" with administrator privileges'
    MESSAGE="File Sharing turned OFF"
    osascript -e "display notification \"$MESSAGE\" with title \"File Sharing\""
    ;;

  status)
    if /usr/bin/pgrep smbd >/dev/null 2>&1; then
      MESSAGE="File Sharing is ON"
    else
      MESSAGE="File Sharing is OFF"
    fi
    osascript -e "display dialog \"$MESSAGE\" buttons {\"OK\"} default button \"OK\" with title \"File Sharing\""
    ;;

  *)
    MESSAGE="Unknown action: $ACTION"
    osascript -e "display dialog \"$MESSAGE\" buttons {\"OK\"} default button \"OK\" with title \"File Sharing\""
    ;;
esac

echo "$MESSAGE"
Click Save.
Your final Alfred Workflow Object Chain should look like this:
Step 5: Test the Workflow
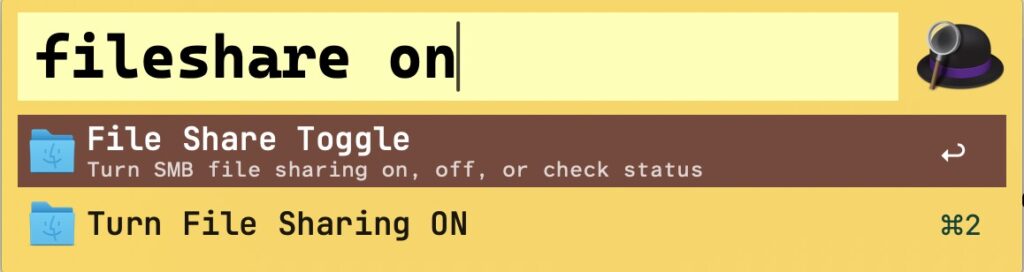
Bring up Alfred and type:
fileshare
You should see three options:
Turn File Sharing ON
Turn File Sharing OFF
Check File Sharing Status
Select Turn File Sharing ON. macOS will prompt for your administrator password, and you should see a notification:
File Sharing turned ON
Select Turn File Sharing OFF to disable it, and choose Check File Sharing Status to see a dialog with the current state.
Status Dialogs
Switching File Sharing states (ON/OFF) will show a dialog indicating the updated state. Checking File Sharing status will show the current File Sharing state.
How the Script Works
The workflow interacts with the macOS SMB service:
com.apple.smbd
To enable File Sharing:
launchctl enable system/com.apple.smbd
launchctl bootstrap system /System/Library/LaunchDaemons/com.apple.smbd.plist
To disable it:
launchctl disable system/com.apple.smbd
launchctl bootout system /System/Library/LaunchDaemons/com.apple.smbd.plist
Status is determined by checking if the SMB daemon is running:
/usr/bin/pgrep smbd
Final Result
Toggle file sharing on with a simple Alfred command.
Now you can type fileshare on in Alfred to quickly toggle File Sharing ON. Similarly fileshare off turns File Sharing OFF. And fileshare status will check its current state— no need to root around inside System Settings.
(I did use AI to help me in writing the shell script.)