Tag: Adobe Photoshop

  • Two Key Photoshop Settings Most New Designers Overlook

    Two Key Photoshop Settings Most New Designers Overlook

    No matter how much memory you have on your computer, it seems that Photoshop always wants more. And when Photoshop exhausts all available RAM on your machine, it uses your computer’s internal storage. This can become an issue of your computer’s internal boot drive is almost full. The less space you have on your boot drive, the more performance degradation will occur, culiminating in the dreaded “Scratch Disk is Full” dialog.

    To prepare against this inevitability, I strongly recommend having a dedicated Scratch Disk connected to your computer. A Scratch Disk acts as temporary virtual memory that can be used to store, read and write project data. Instead of writing this data to my Mac’s internal drive, Photoshop will write to an external storage device connected to my Mac. The sole purpose of this drive is to act as a Scratch Disk. For the type of work that I do, a 512GB SSD more than suffices. 
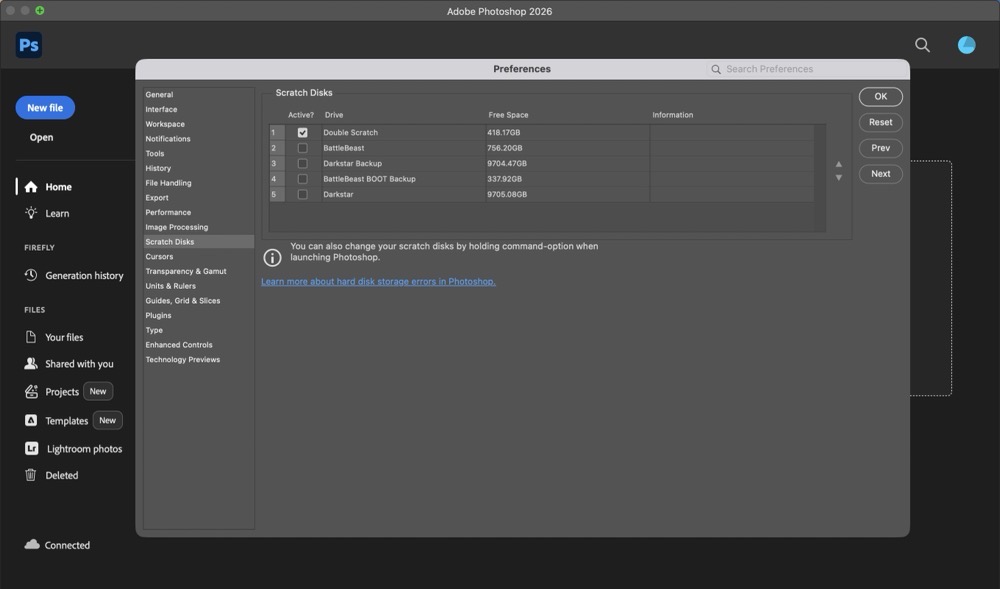
    Photoshop ScratchDisk.

    Most Adobe applications include the option to assign a dedicated Scratch Disk, so the very same storage device I’m already using for Photoshop can serve as a scratch disk for Illustrator, Premiere, After Effects etc. Visit your Photoshop > Settings > Scratch Disks tab to assign your Scratch Disk. If need be, more than one scratch disk can be assigned. This can be helpful if you’re working with really, really large or complex files. If Photoshop can’t find your dedicated scratch disk (because its unplugged, etc.), it will use your computer’s internal drive. 

    The second key setting I recommend adjusting is under Photoshop > Settings > Performance.  You’ll want to adjust these settings based on your intended use case. I typically work with files that are 9” x 12” at 600ppi. The largest size canvas I work with is 24” x 36”. As such, I have provisioned Photoshop to use half of my system’s memory. For History and Cache, I opted for the “Web / UI Design” option, electing to have 20 History States instead of 50. (History states refer to the number of Undos available.) The larger the number, the more the RAM usage.
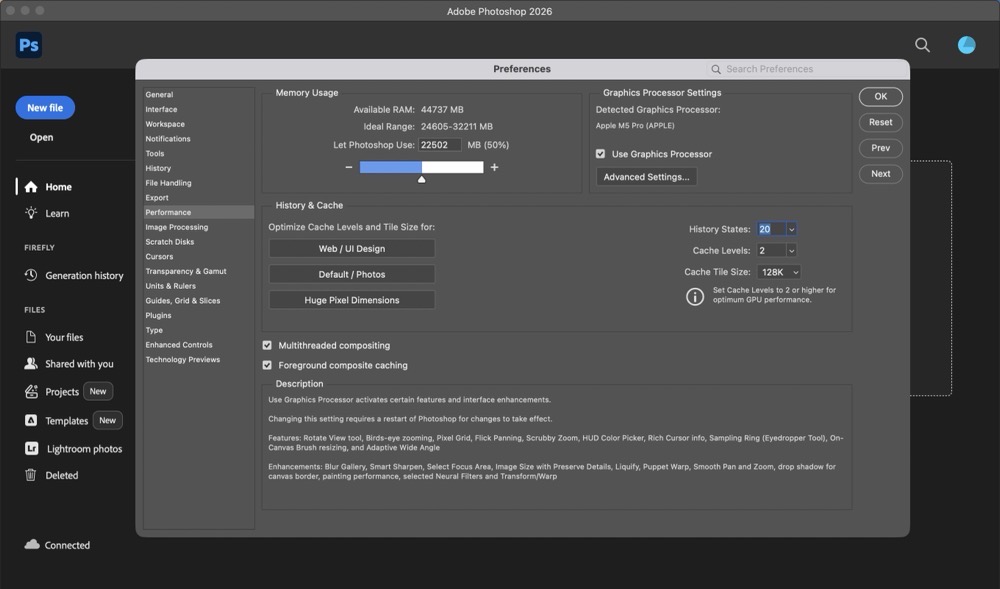
    Photoshop Performance.

    Your mileage (and settings) may vary. But it’s important to be aware of these factors as they can play a dramatic role in how Photoshop performs.

    -Krishna
  • Combining Vectors with Rasters: Shape Builder and More

    Combining Vectors with Rasters: Shape Builder and More

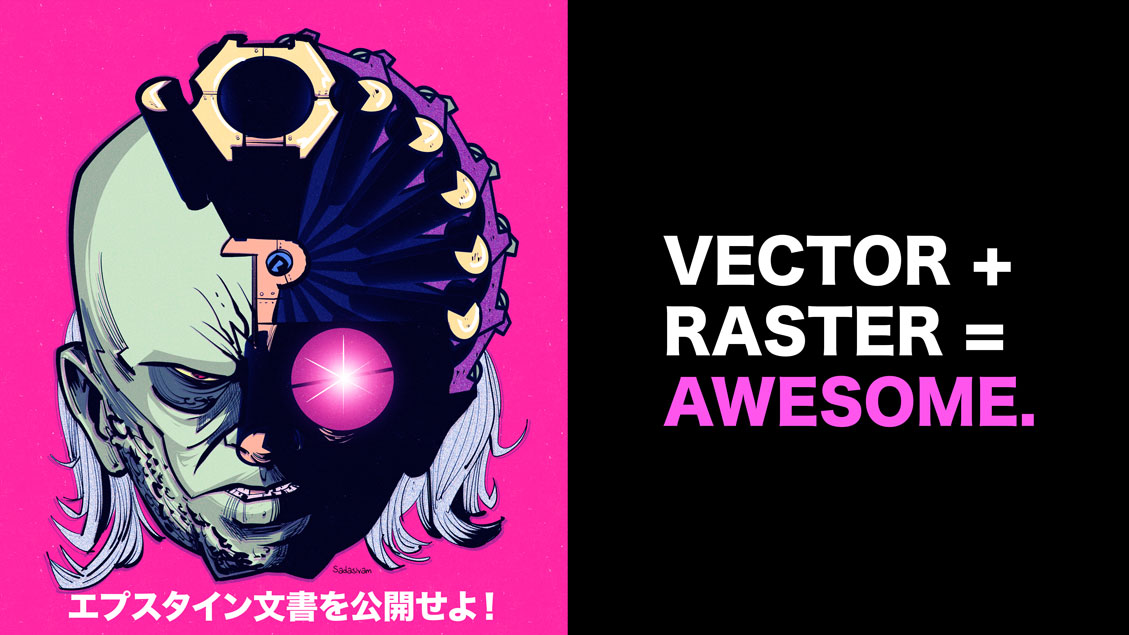
    My newest instructional video focuses on using Illustrator’s Shape Builder tool (Shift M), coupled with Effect > 3D and Materials > Extrude and Bevel and Effect > Distort and Transform > Transform tools to create interesting head gear (among other things).

    I used this technique to create the following illustrations below.

    Demon mask medium.

    Vvolorg medium.

    -Krishna

  • How I Learn New Design Skills in 2026

    How I Learn New Design Skills in 2026

    In terms of learning new skills, we live in a glorious time. The Internet is chock full of excellent, actionable design tutorials that go way beyond what a classroom environment or textbook could provide. 

    Incidentally, much of what I know about Photoshop comes from reading books and applying the techniques into my own work. (Aside: Scott Kelby’s “Photoshop Down and Dirty Tricks” and Matt Kloskowski’s “Layers” books are two excellent resources for hands-on learning.) This was in the days before YouTube, so options were limited.

    While I’m very comfortable with many aspects of Photoshop, I’m using this summer to really shore up my Adobe Illustrator skills. I have a good working foundation of vectors, anchor points and the like, but I want to go beyond OK and become highly proficient. 

    Enter social media. 

    I use my Instagram’s algorithm to surface tutorials on Illustrator. The more tutorials I like, the more Instagram learns what I’m interested in. The Instagram format provides me a space where I can be exposed to a wide gamut of Illustrator techniques. Some of the more helpful instructional reels show two contrasting approaches, amateur and pro. Seeing side-by-side comparisons in this way, allows me to build on what I know and improve my skill. My only critique is that some of these videos are a bit too fast; I have to watch a video multiple times in order to absorb the technique.

    When I watch a particularly useful video, especially one that includes accompanying keyboard shortcuts, I’ll take a screenshot of it on my iPhone and send it over to Apple Notes. I’ll then organize my screenshots into one Apple Notes file, for quick access. Because Apple Notes synchs across all my Apple devices, I have a collection of foundational tutorials that I can easily refer to when I’m at my Mac. 

    Viewing and capturing tutorials is only part of the learning equation. Practicing them on a new personal project helps reinforce what I have just learned. I also take the new skills I’ve learned and teach it on my YouTube channel. (The old adage rings especially true: “The more I teach, the more I learn.”)

    Make no mistake, Illustrator has a steep learning curve. Go into learning with an open mind. I recommend going to YouTube to learn the basics. From there, I recommend watching one or two Instagram tutorials a week, to get slowly exposed to new workflow techniques. Don’t overwhelm yourself.

    Practice what you’ve learned and find ways to inject that knowledge into a few of your own personal works, to build that muscle memory.  Scaffolding what you know with what you are learning gives room for absorption and a sense of accomplishment; two traits that are vital to learning.

    And lastly, don’t be afraid to experiment.

    -Krishna