Optimizing Photoshop CC
Photoshop eats your computer’s resources like you wouldn’t believe. It seems like no matter how much storage or RAM you throw at Adobe’s popular image manipulation app, it wants more. As of this writing, 16GB of RAM seems to be the sweet spot for comfortably running Photoshop, while 8GB is considered by many to be the absolute minimum requirements.
Optimizing Photoshop doesn’t necessarily mean you have to invest in new hardware. There are several tweaks you can employ to improve its overall performance. Many of these tips can be applied to earlier versions of Photoshop, but for this discussion we’ll look at Photoshop CC 2017. Some of these tips will improve memory usage and speed, while others will make changes to the interface to improve readability.
Start by visiting Photoshop CC’s Preferences. On the Mac, the preferences can be found at Photoshop CC > Preferences. On Windows, the preferences are located under Edit > Preferences.
General:
I didn’t fundamentally alter anything here, except for turning off “Export Clipboard” to free up some RAM usage.
Interface:
This section lets you set the appropriate color theme for Photoshop’s user interface. I set the “UI Font Size” to Large and settled on the defaults for the rest.
Workspace:
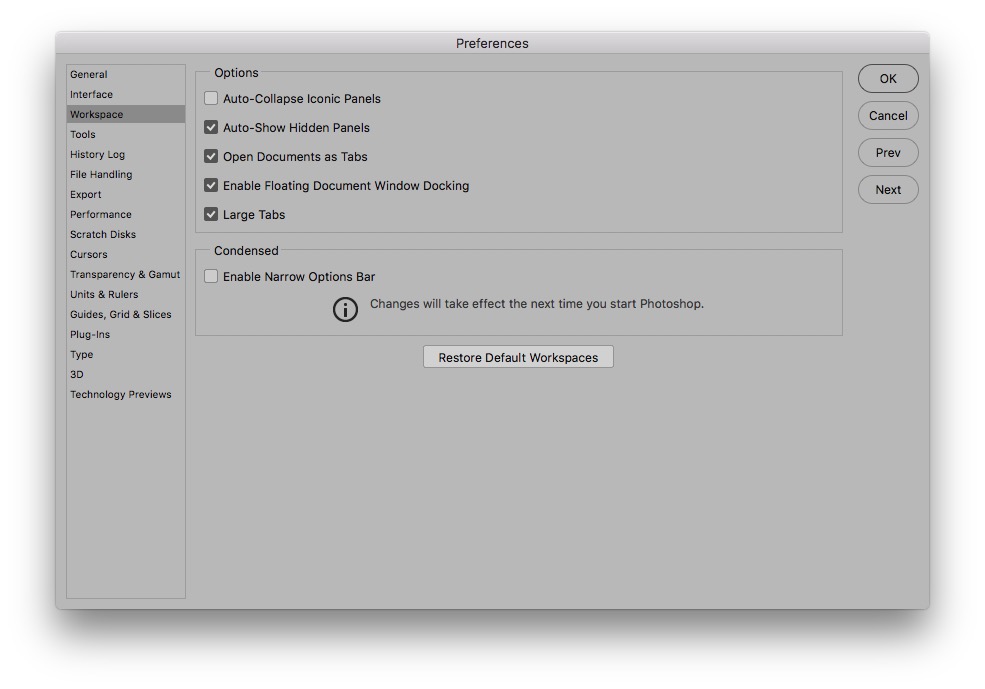
I checked the “Large Tabs” option to make it easier to move between multiple open PS documents.
Tools:
Turn off “Show Tool Tips” and “Enable Gestures”, “Flick Panning” and “Animated Zoom”. If you don’t use these, why keep them on?
File Handling:
Saving a thumbnail preview of your document might make it easier to visually identify a document you’re working on but it adds to the saving time. Instead of using image previews, I prefer saving with descriptive file names. I reduced the Recent File List to 5 files, down from 10. In this section, you can set Photoshop’s auto save time interval.
Export:
I prefer saving Metadata with my copyright info. I also prefer a slightly higher quality on my JPG saves.
Performance:
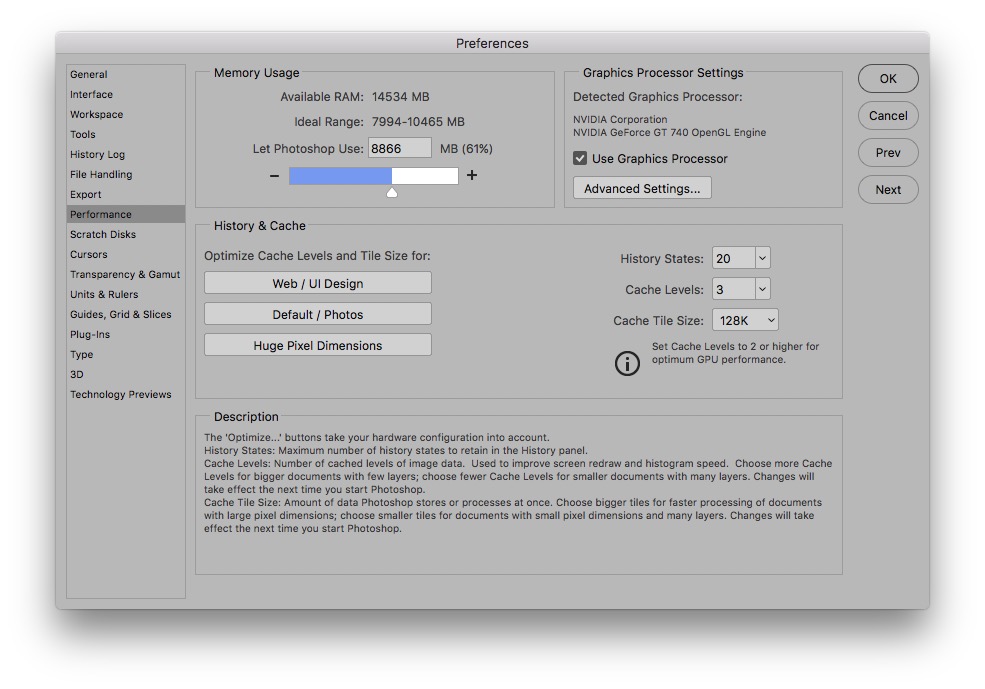
The Performance tab is the most important section. Lowering the History States will reduce the number of Undos Photoshop will save (down from its default of 50). Bumping down the Cache Tile Size from 1024K to 128K will realize a major speed boost, particularly on older machines with the minimum RAM configuration. I’ve also adjusted the Memory Usage to about 61%, down from the default 70%.
Scratch Disk:
For heavy Photoshop usage, you’ll want a dedicated Scratch Disk drive. It’ll make saving and writing to files much faster. The Scratch disk is also used as a sort of “Virtual RAM” that works in conjunction with your machine’s physical RAM configuration.
Cursors:
I keep these at their default values.
Transparency & Gamut:
Here you can change the look and feel of your transparent backgrounds. I prefer the larger grid with light values.
Units & Rulers:
Save a few extra steps by selecting your default resolutions. I work with 600ppi for all my source images. Setting the Screen Resolution accordingly (from its default of 72ppi, shown below) saves me one extra step.
For the sections not covered, I stick with the default values. It’s important to note that after you make your changes to save them. You’ll want to restart Photoshop for the new settings to take.
I’ve noticed significant performance improvements from altering only the Performance settings (as shown above) and keeping a dedicated scratch disk volume. Try them out and let me know how they work for you.
-Krishna


t3rminus
March 14, 2017 at 7:51 pmGood call on the “Never save previews”.
Mac OS can generate PSD thumbnail previews anyway, if you have that turned on in Finder. It’s not as accurate as Photoshop’s, but it’s definitely faster and cleaner.