Upgrading My 2014 Retina MacBook Pro
Time flies. It was only a few years ago when I contemplated the notion of moving along from my mid-2014 13″ Retina MacBook Pro. Shortly after making that post, I purchased a new 2018 Mac mini with 32GB of RAM and 256GB SSD. Though it’s six years old as I write this, the Mac mini still serves me well. In late 2021, when I switched to a new job, I purchased a 14″ MacBook Pro M1 Pro with 32GB of RAM and a 1TB SSD.
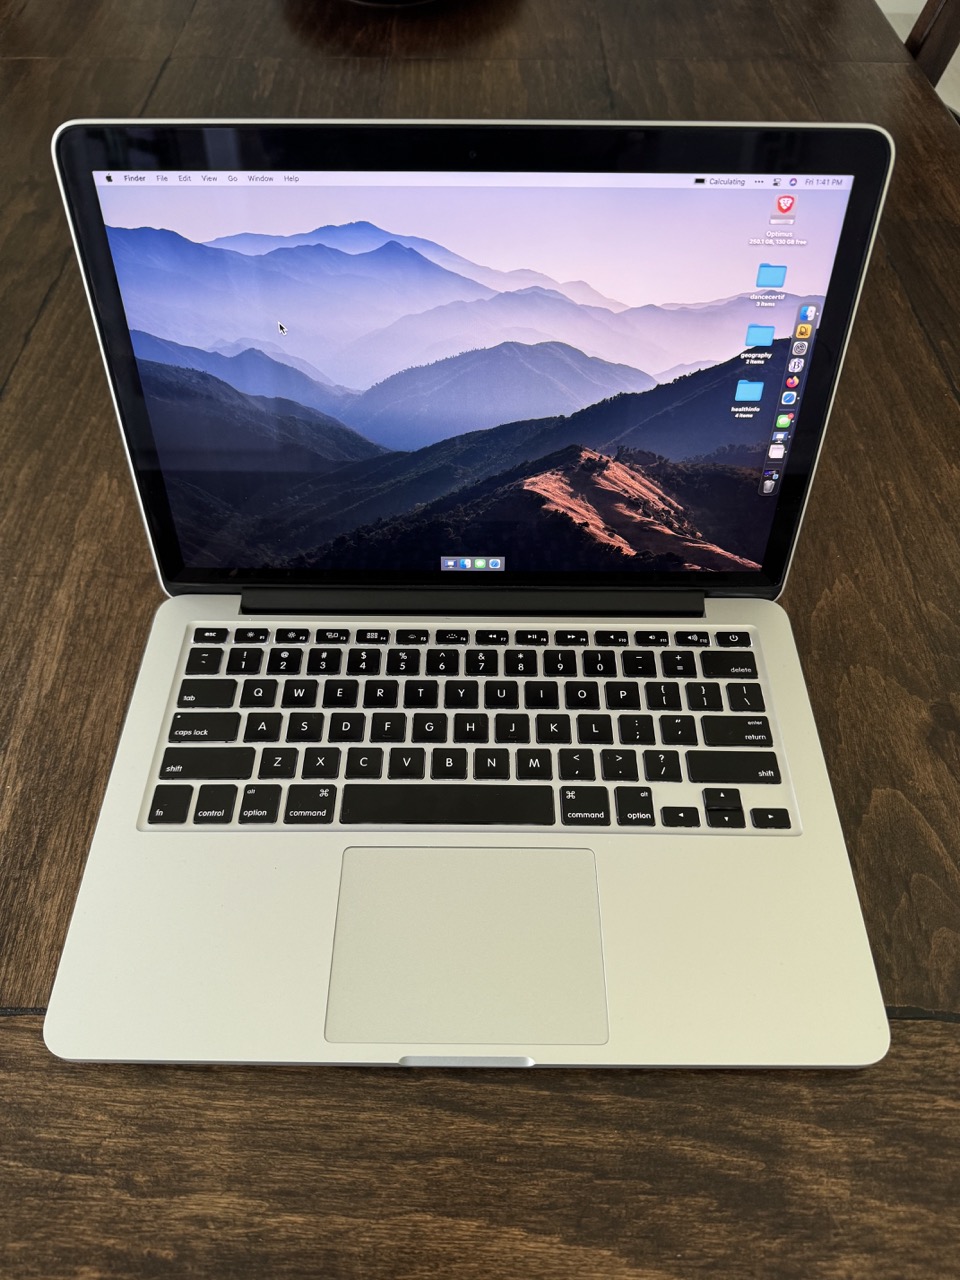
A slow, tired 2014 MBP running an old, unsupported version of macOS.
When online instruction became the norm as a result of the pandemic, I bequeathed my 2014 MacBook Pro to my daughter. She’s made good use of it over the past five years, using her laptop for writing papers, completing her course work online, checking e-mails and even occasionally watching Netflix.
Late last year, we replaced the swollen original battery inside her MacBook Pro with a new one. This repair bought us a little more time as we weren’t ready to purchase a new laptop just yet. But, increasingly, the machine has been acting up, impacting her ability to complete her course work. This is to be expected, I suppose, given the machine’s age. The fact that her MacBook Pro runs slow, is hot to the touch, and running an out of date version of macOS is all par for course.
My daughter will be receiving a new M3 MacBook Air this summer. Suffice it to say, she is beyond excited at the prospect of owning her very own machine. And I’m excited, too! I finally get a chance to tinker with it (and potentially give her old MacBook Pro a second life).

These guys look familiar…
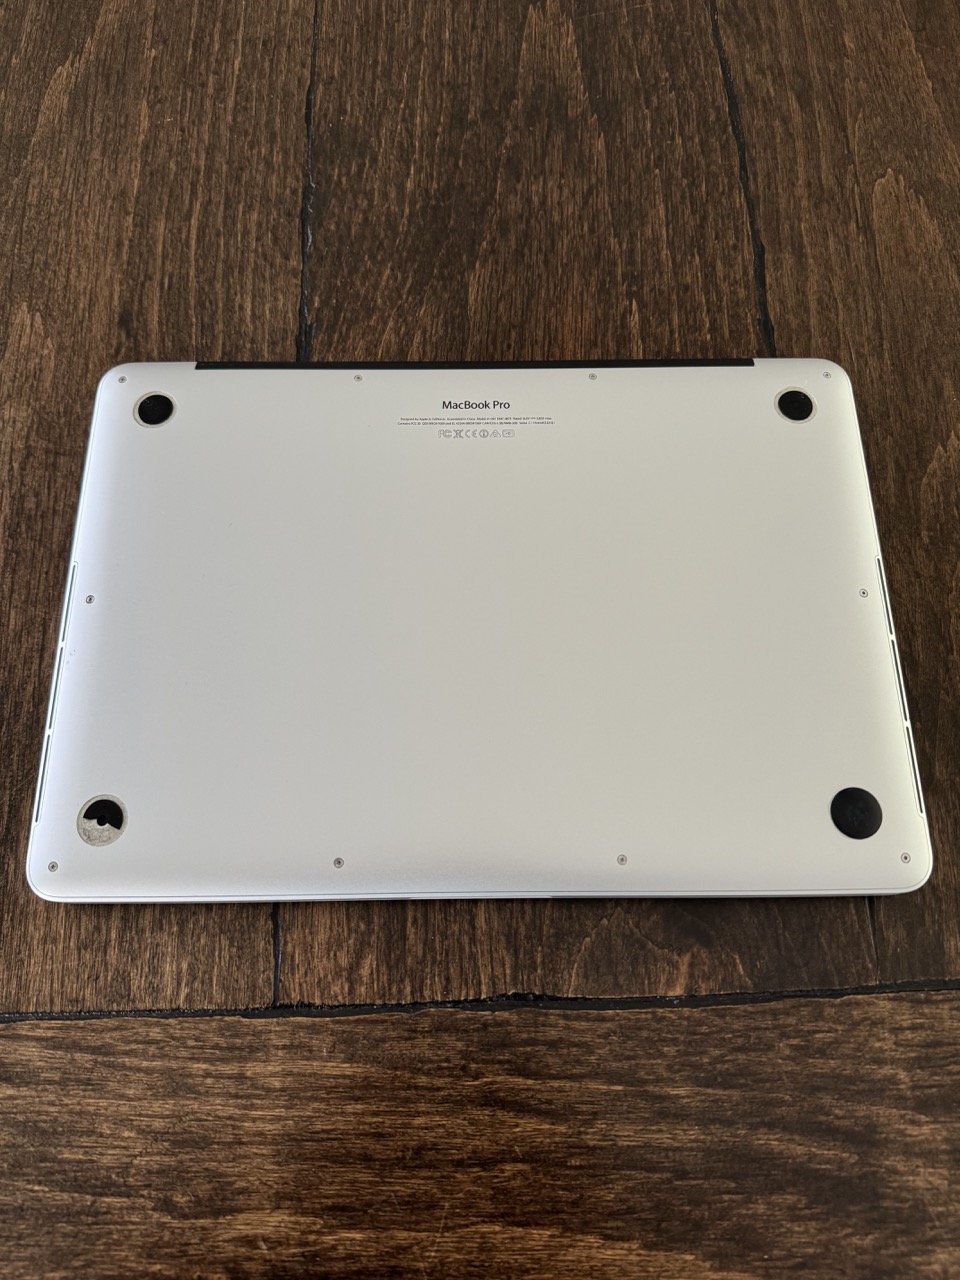
Cosmetically, the machine is in very good shape. The top of the case still sports a one-off custom PC WEENIES top cover decal, which has held up remarkably well over the years.
The rubber feet (before). One is falling apart, the other have small spider cracks in them.
There are a few small, but noticeable scratches on the bottom of the machine. The screen is still sharp and vibrant. One of the machine’s rubber feet is completely missing, while the others are slightly cracked and a bit worse for wear. Performance-wise, the machine still runs, albeit, very slowly.
All in all, it’s a good base to work from. And it makes for a great daddy / daughter project, to boot!
But before we get into the actual upgrades, let’s look at the specs of this venerable machine.
At the time it was new, this MacBook Pro was almost certainly a mid-tier machine, with a 4-core i5 processor (2.6GHz), 8GB of RAM and a rather paltry 256GB SSD drive.
My plans for this MacBook Pro are as follows:
- upgrade the 256GB SSD to a 1TB NVMe M.2 model
- remove the old thermal paste from the CPU and apply new thermal paste to maximize cooling
- replace the worn rubber feet with new ones
- install a flavor of Linux on it
I want to use this MacBook Pro for regular day-to-day computing while I’m sitting on the sofa.
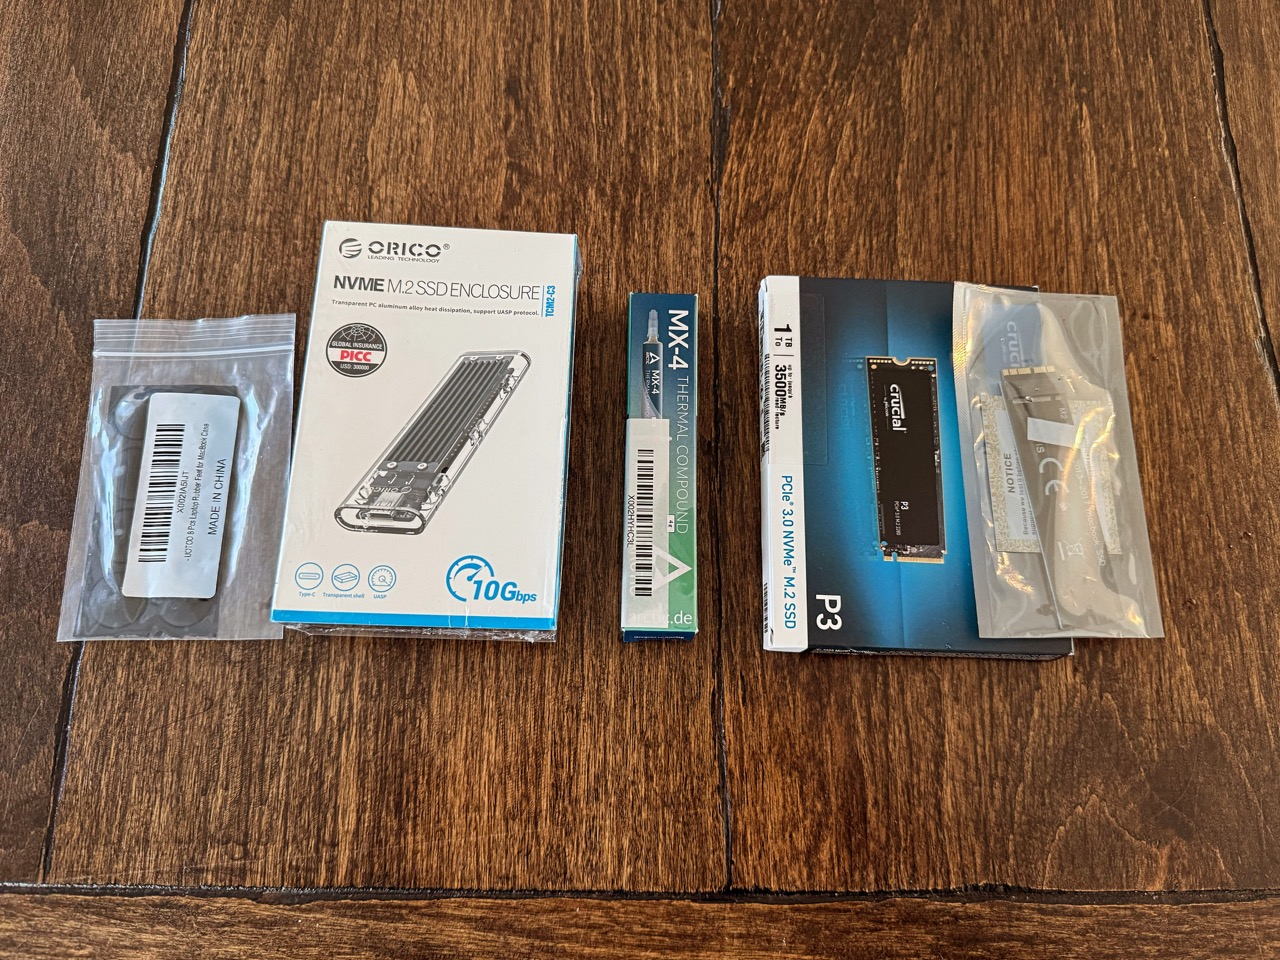
I ordered the following parts for the upgrade:
- ARTIC MX-4 thermal paste
- Orico M.2 NVMe SSD enclosure*
- Crucial P3 1TB Gen3 SSD NVMe
- Sintech NGFF M.2 NVMe SSD adapter
- UOTOO Laptop rubber feet (8 pc)
The total outlay for the above items was under $100US. *The Orico is not really needed for this task, but it will see more use later.
I wanted to make sure that the 1TB drive was in working order. I installed it in the Orico case and used Disk Utility to format it. The Orico case is easy to disassemble. Simply slide the top part off, install the NVMe stick inside, close the enclosure, and use one of the supplied USB cables to connect it to your machine. This enclosure will be repurposed to house another new 1TB SSD that will serve as a back-up drive for my daughter’s new laptop.)
With parts in hand, the first order of business was to remove the remaining rubberized feet on the bottom of the MacBook Pro. This task was accomplished using some rubbing alcohol, a pair of tweezers, my nails, and some patience. I first applied the rubbing alcohol to each of the rubber pads to make them a bit more pliable.
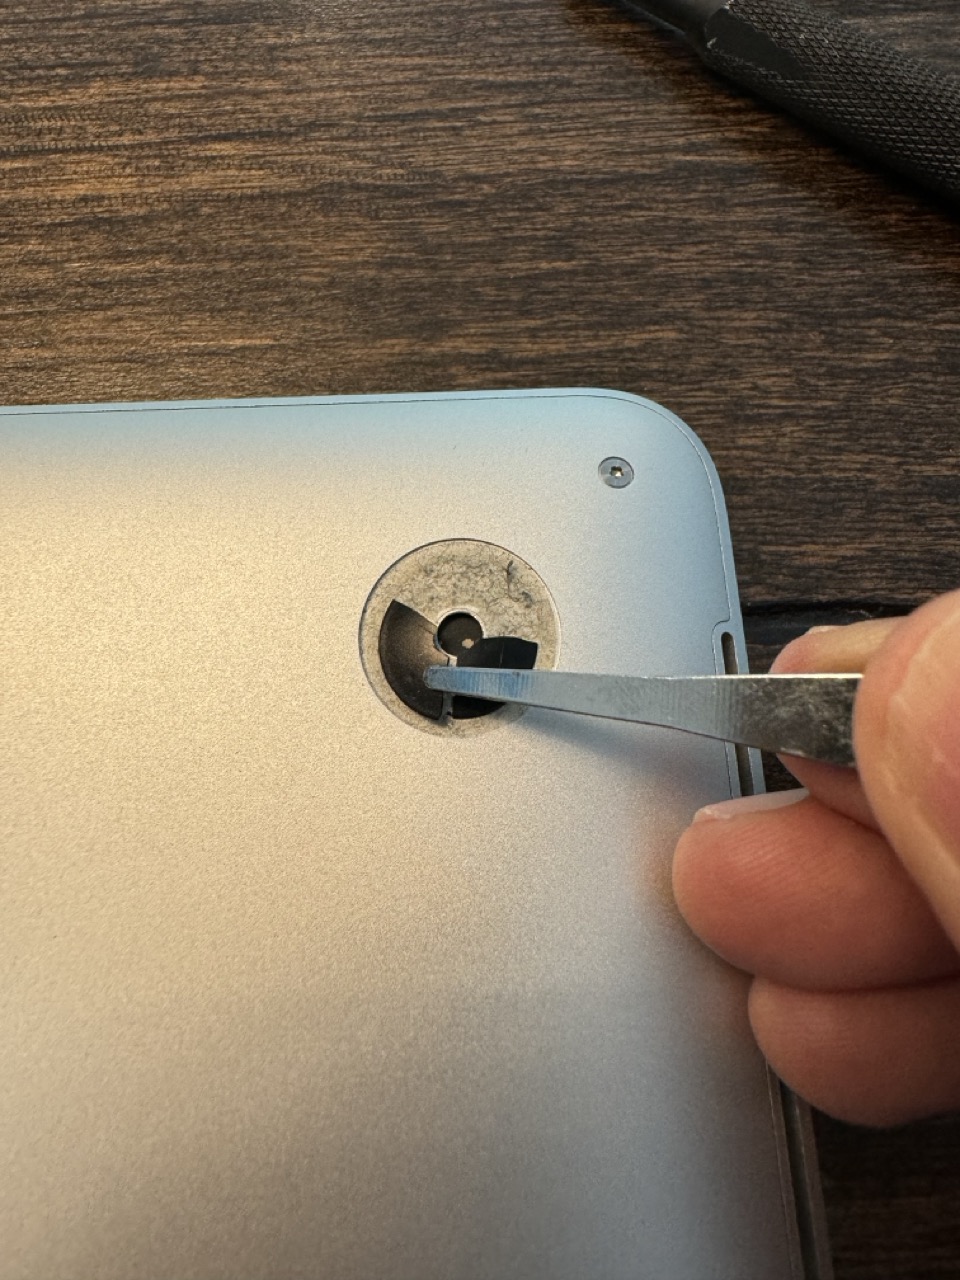
Next, using a combination of my tweezers and my nails, I gently cracked and separated the rubber feet. Underneath each rubber feet is a clear double-sided adhesive. I removed this as well.
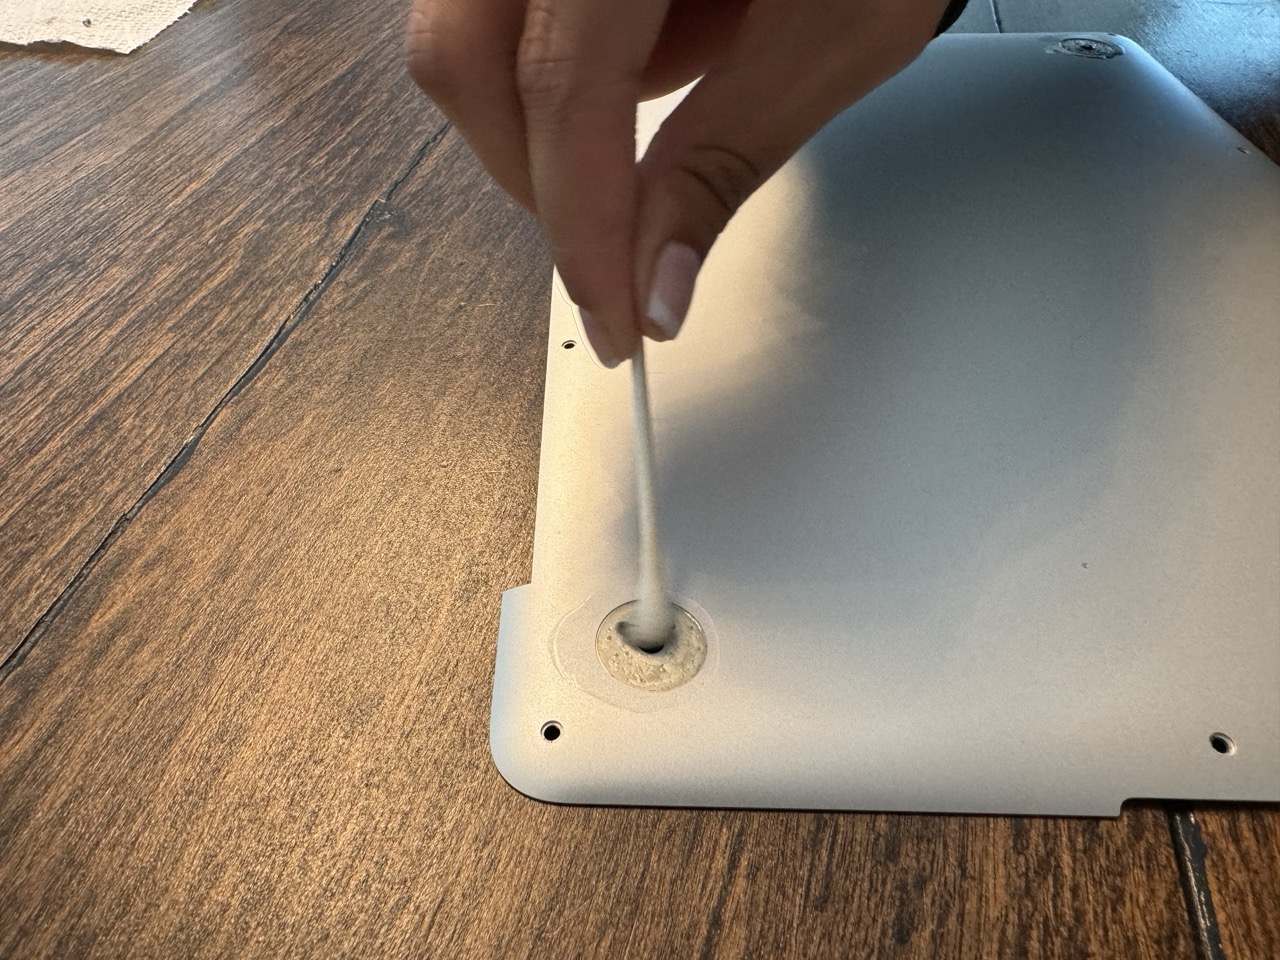
Underneath each rubber feet is a clear adhesive. Remove this and clean thoroughly underneath to insure that the new rubber feet will stick well.
After all the feet were removed, my daughter used the rubbing alcohol with Q-tips and a cloth to thoroughly remove any remaining residue. Assembling and aligning the new rubber feet was easy enough.
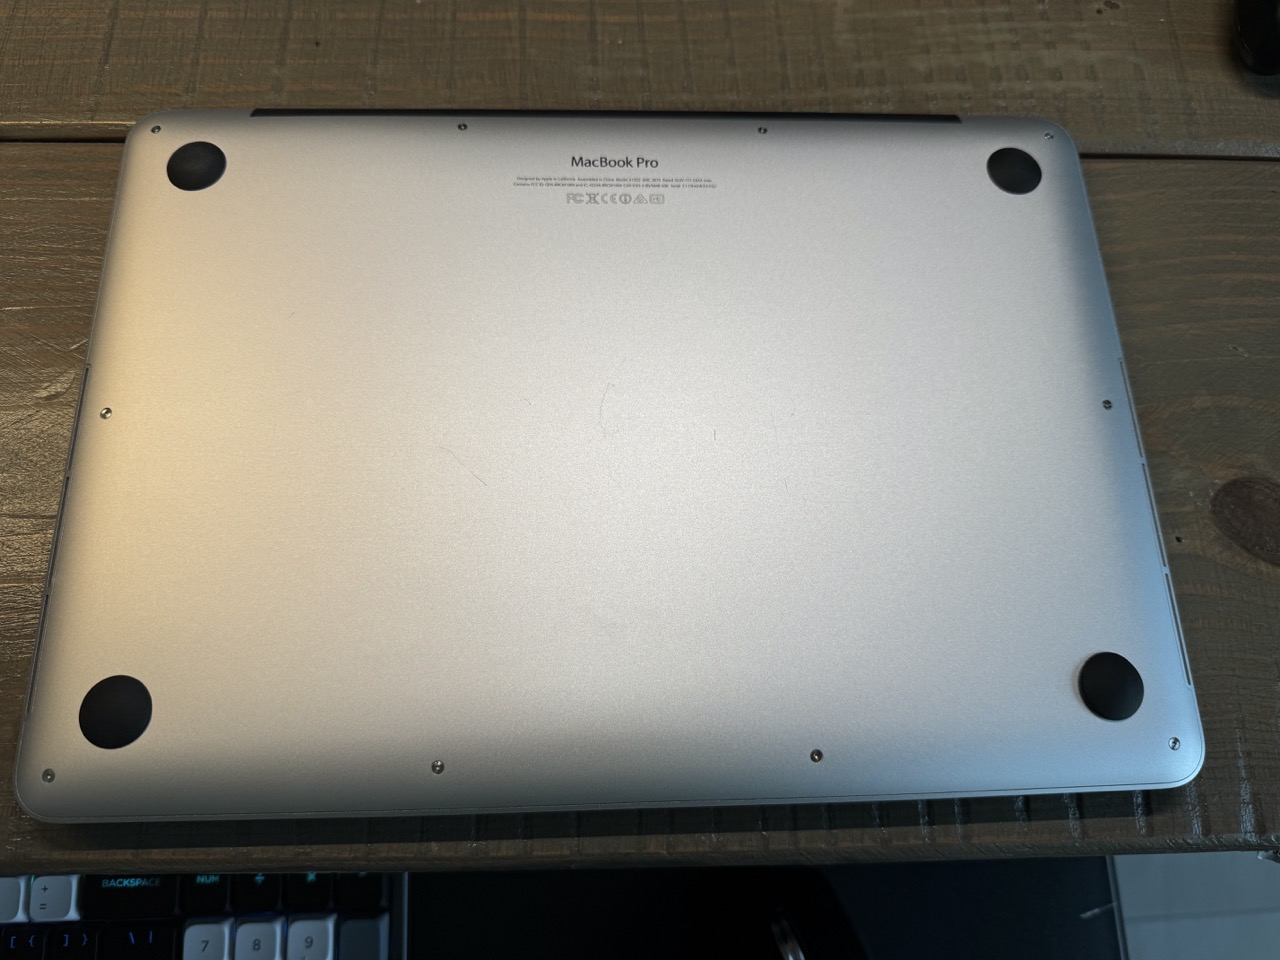
New rubber feet!
The newer ones raise the MacBook up higher by a small amount, allowing for better heat dissipation underneath the laptop. The bottom case had a small lining of dust on the inside. Both sides were wiped using a micro-fiber cloth.
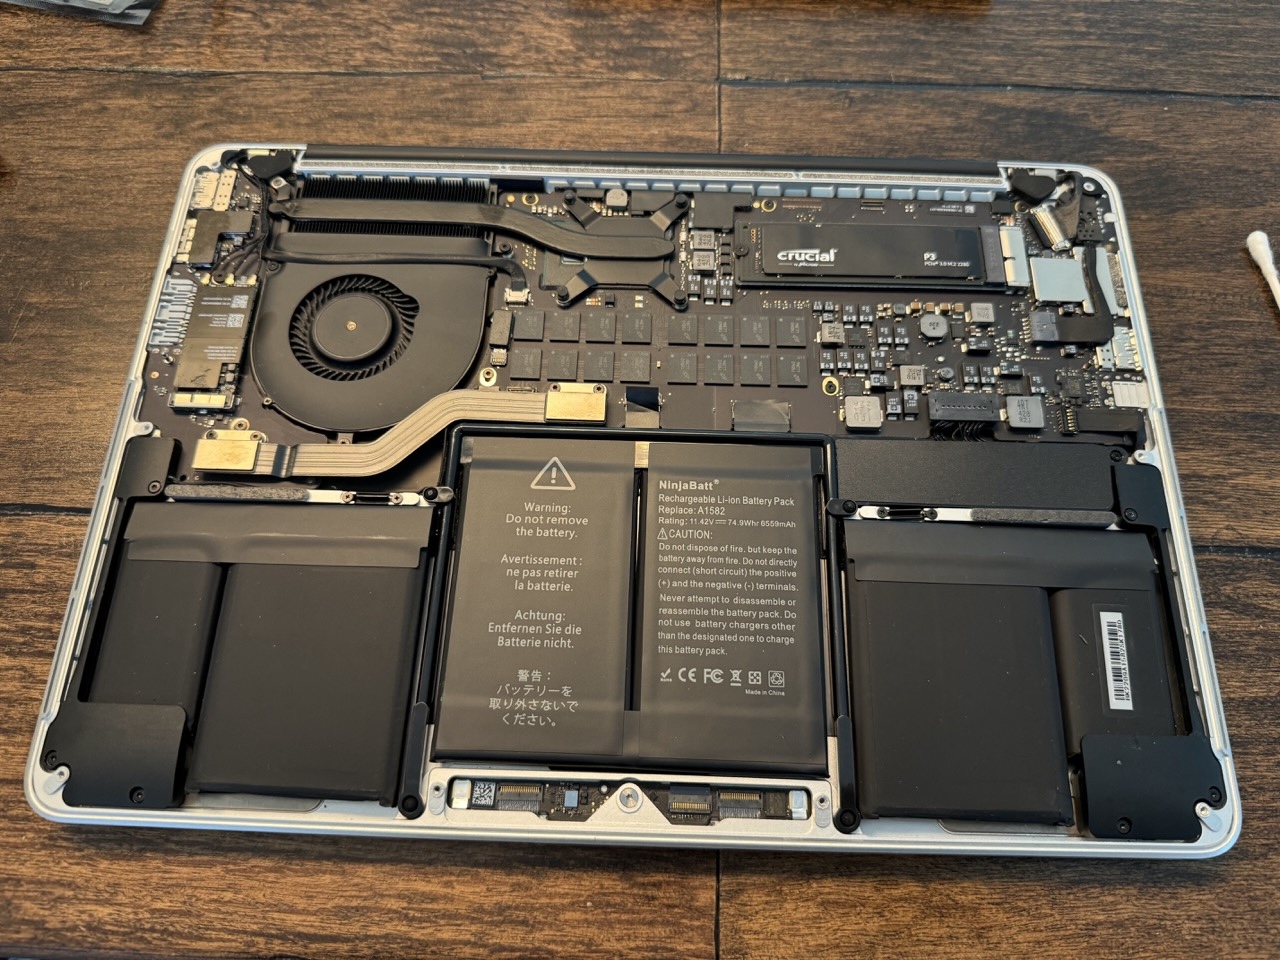
Next, we removed the bottom case, removing each screw and placing them in their corresponding location on a paper towel. (The two screws flanking the MacBook Pro label at the bottom of the case are a different size compared to the other screws.)
Unplug the battery so you don’t zap your computer’s logic board.
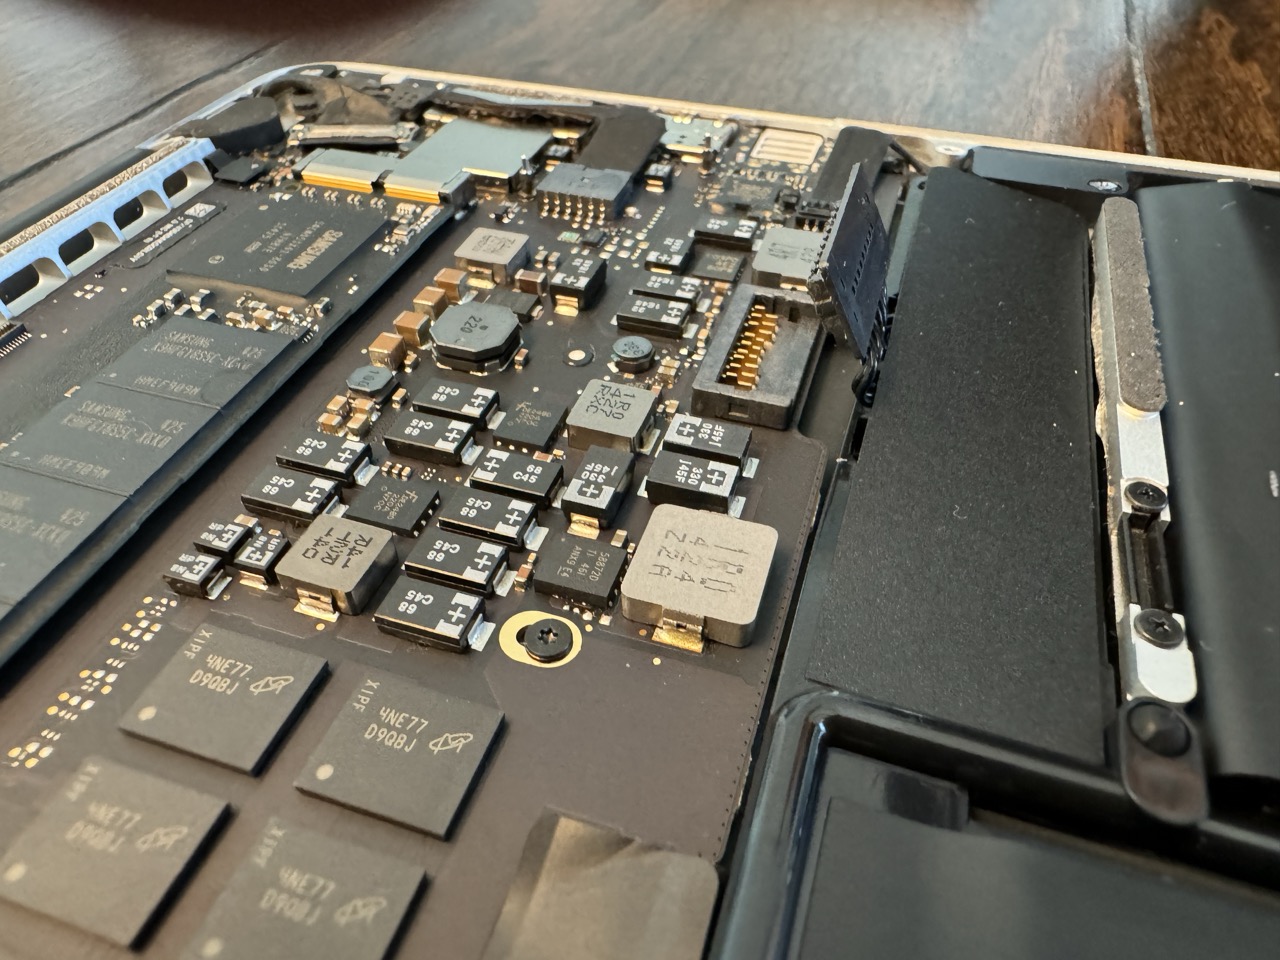
With the bottom case removed, the logic board is fully exposed. Before doing anything else, I disconnected the MacBook Pro’s battery, to prevent any electrical shorts.
That pitiful 256GB SSD. It must go.
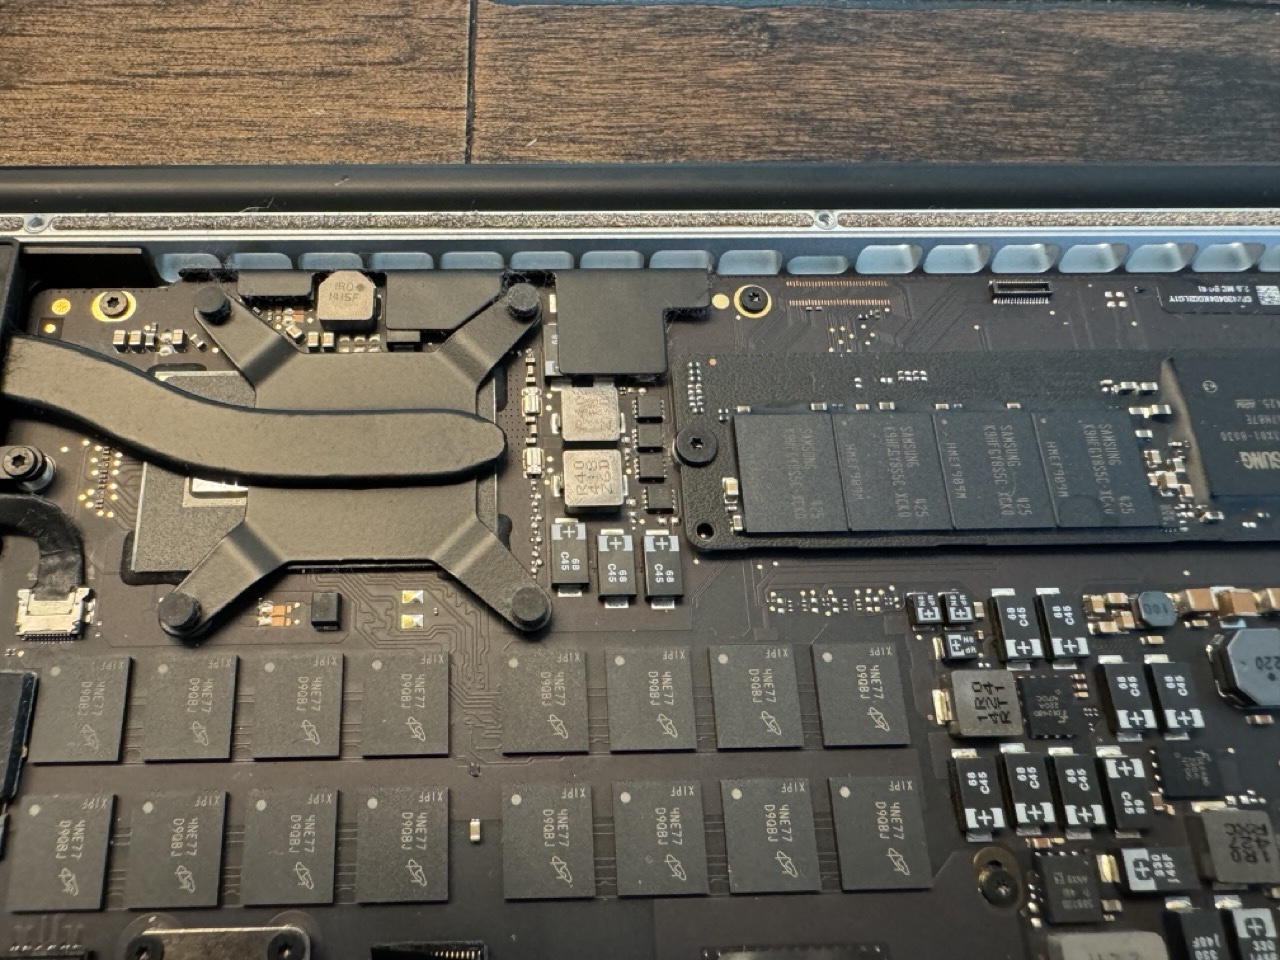
The included SSD in the MacBook Pro uses a proprietary connector. To make an off-the-shelf NVMe drive work within the MacBook Pro, an adapter is required. The Sintech model comes highly recommended as it offers a wider range of compatability across more NVMe storage brands. This adapter will take the NVMe pinout and convert it to match the connector on the MBP’s logic board. Removing the old SSD was easy; simply remove the screw holding the old storage device in place and gently slide it out. Placing the Crucial 1TB drive in the Sintech adapter was easy; it clicks into place.
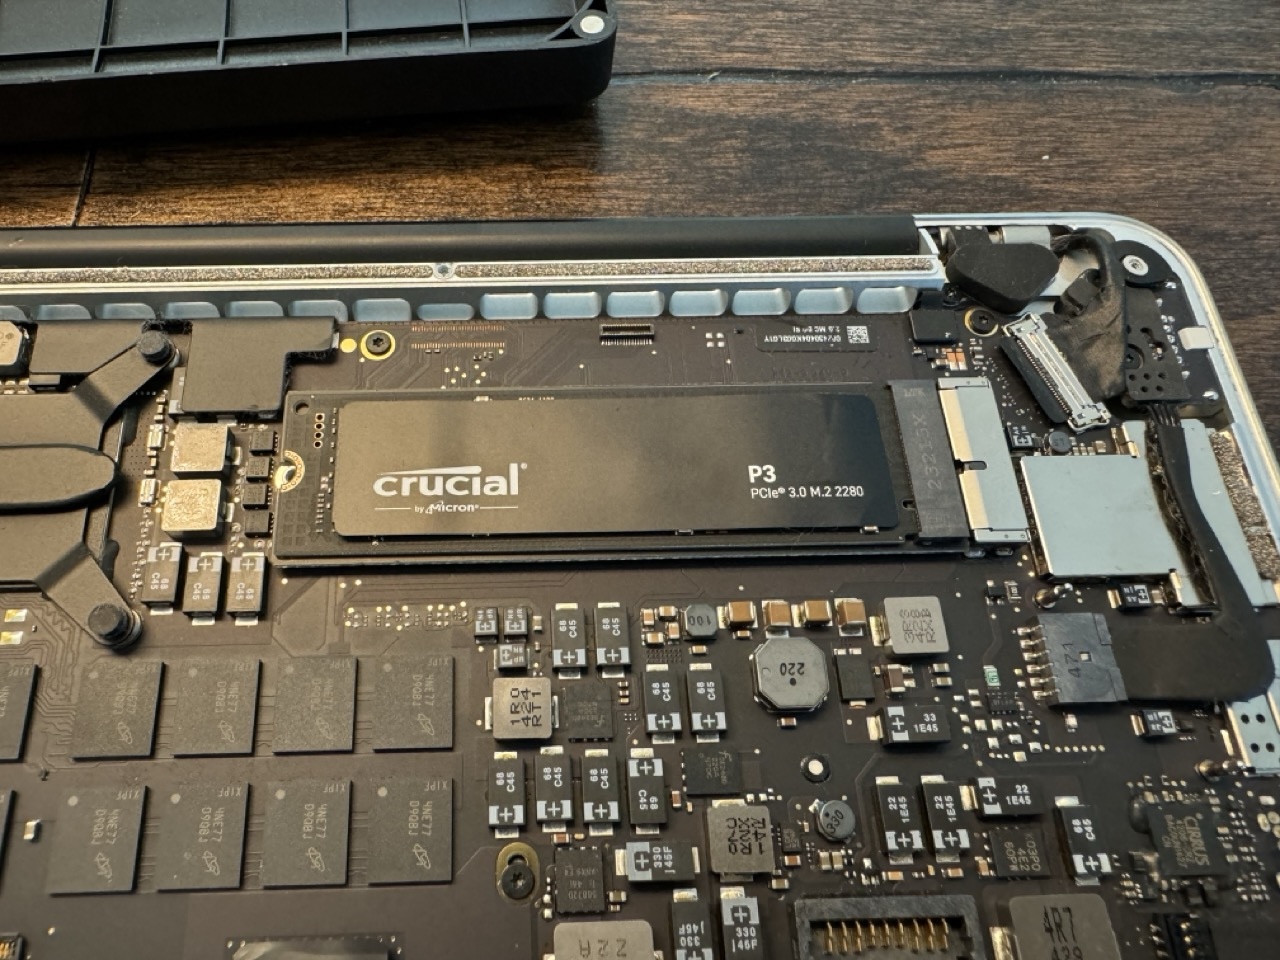
The Sintech adapter with the Crucial NVMe 1TB SSD added. Push them in and make sure you can see the screw hole. You’ll hear a snap.
Pro tip: Do NOT remove the sticker on the Crucial NVMe drive. It is affixed to the drive with conductive paste. Leaving the sticker on will not interfere with the drive’s operation.
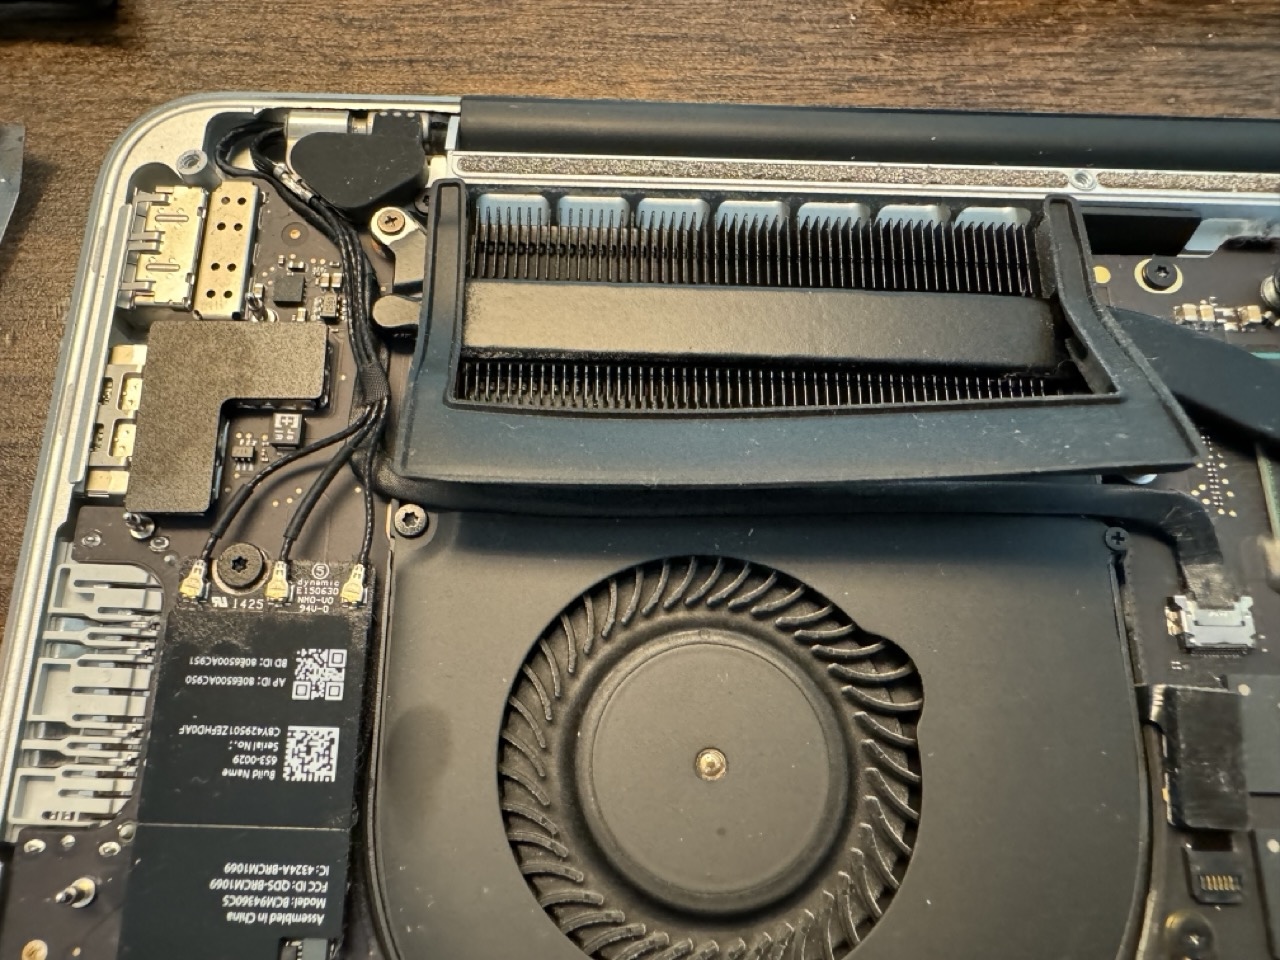
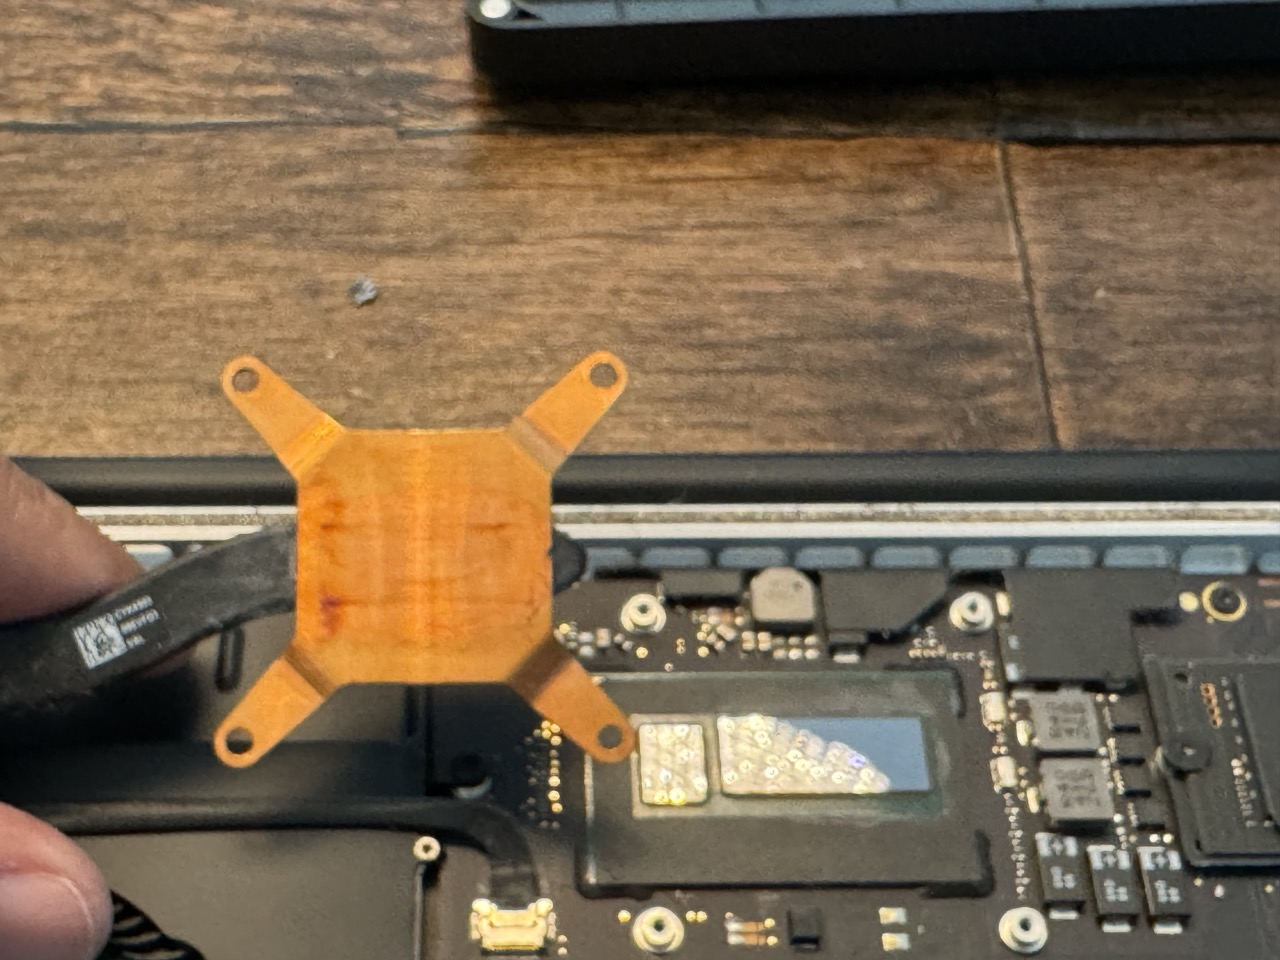
Remember this rubber sheath. It will bite me later.
Next up was removing the heatsink, which is held down by 5 screws. Before doing that, carefully remove the rubber sheath that sits above the heatsink. To access four of the screws near the CPU, you must first remove the rubber toppers.
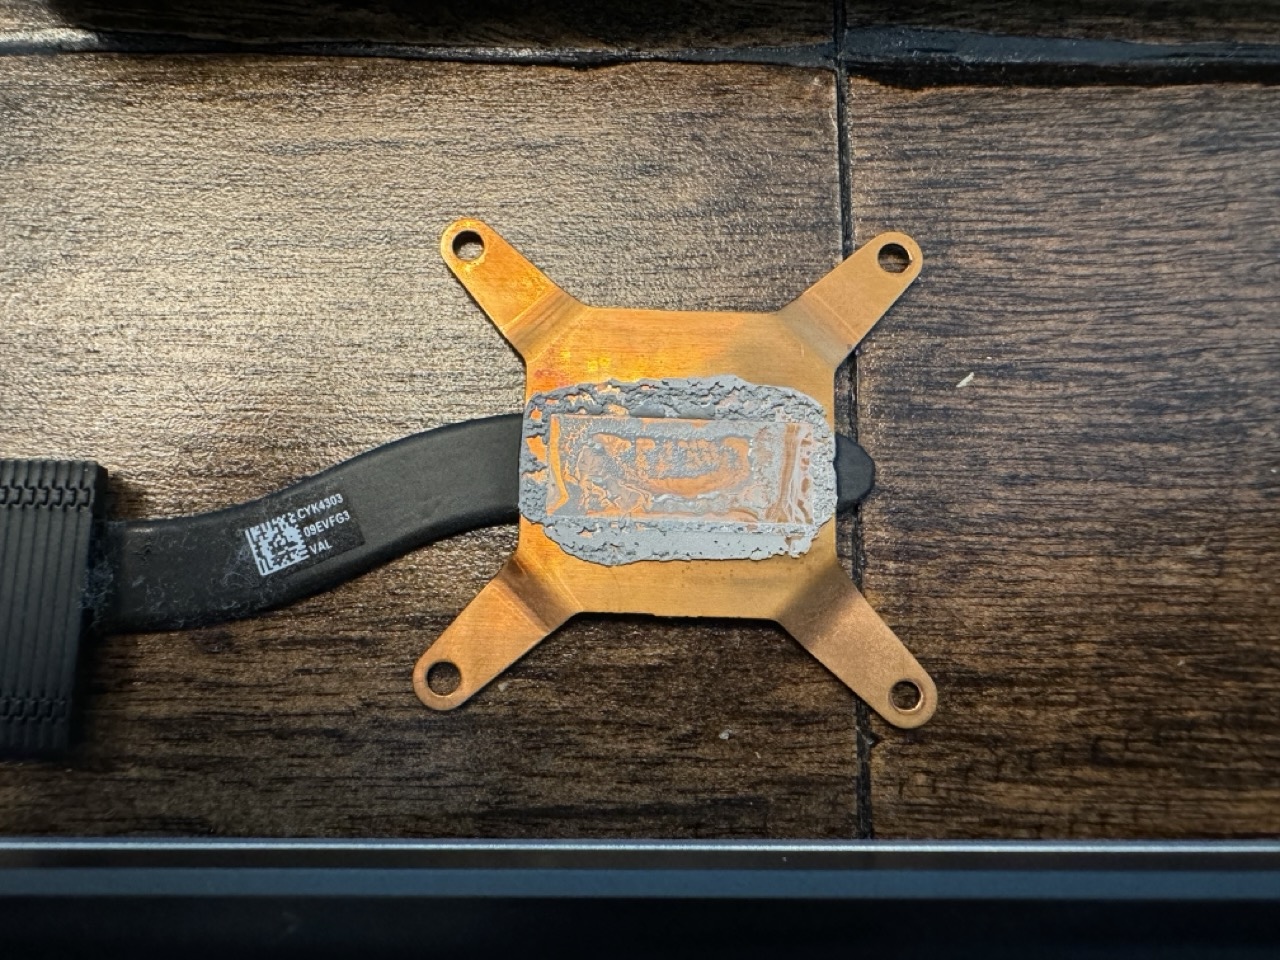
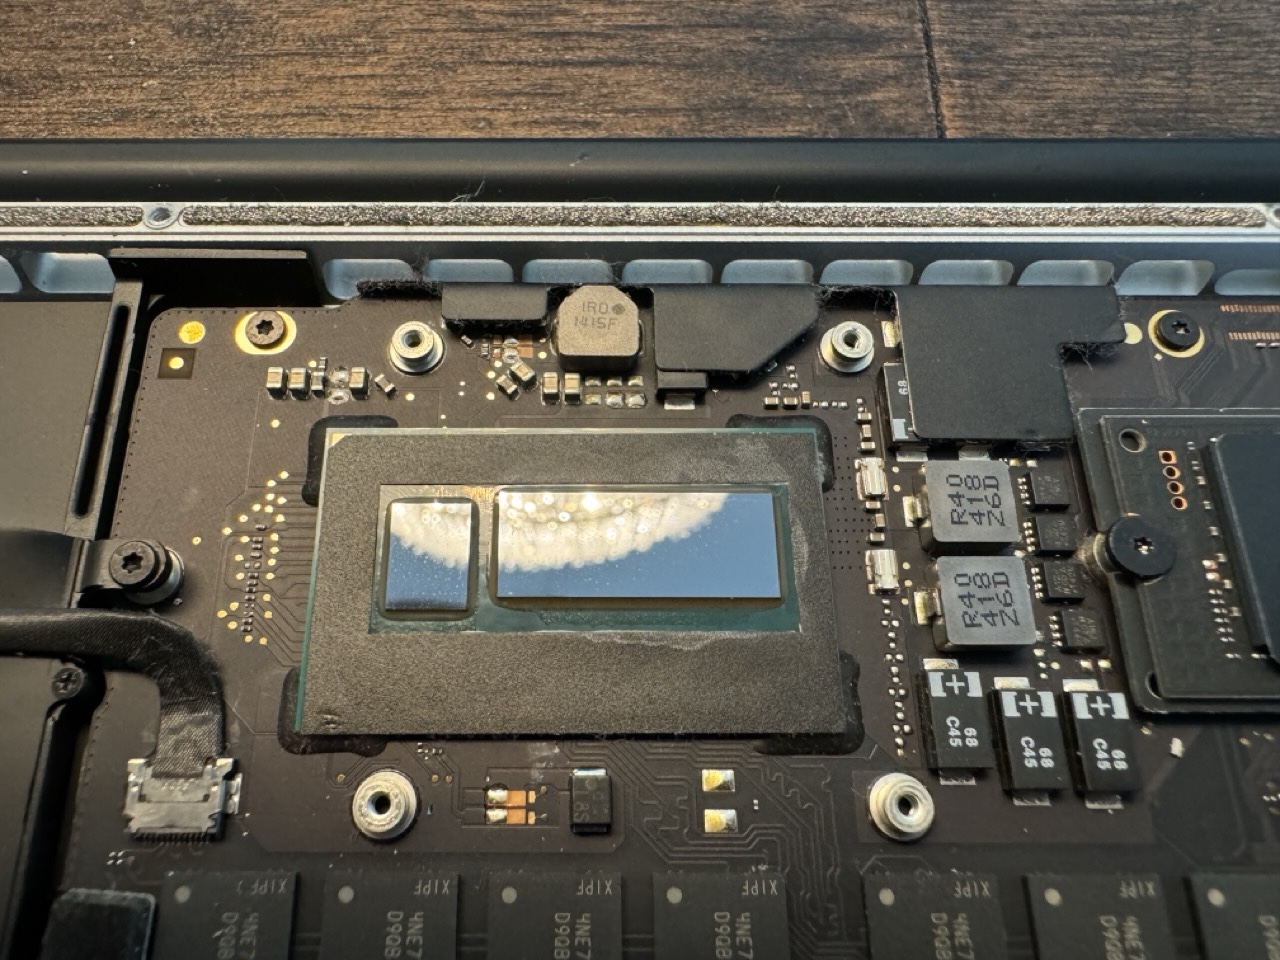
Detaching the heatsink revealed what was left of the original thermal paste. It looked dry and crusty. I’d say it was overdue for a cleaning.

The old, caky thermal paste on the CPU.
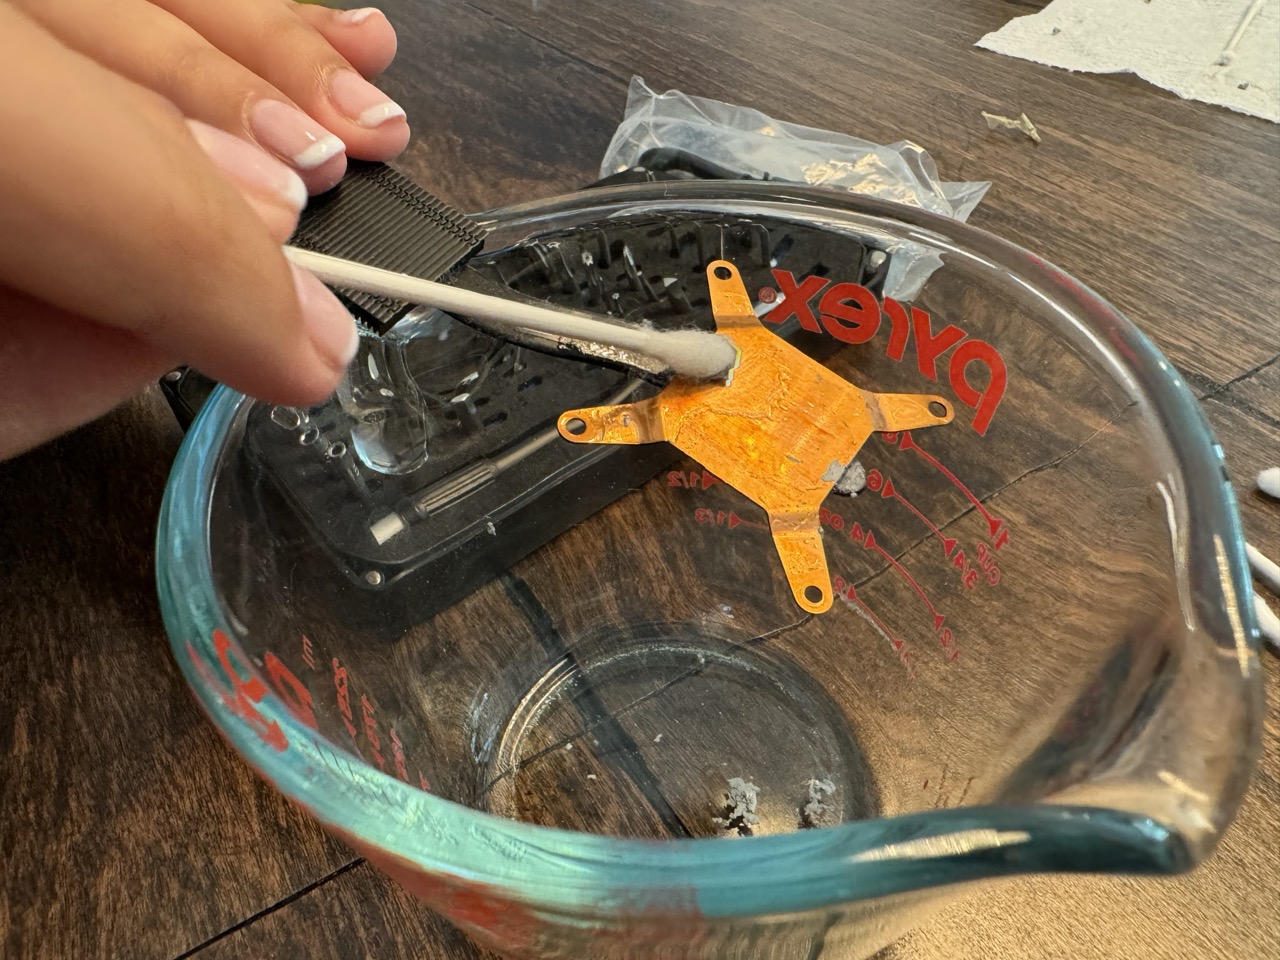
Using rubbing alcohol and Q-tips, my daughter and I were able to remove all remnants of the old thermal paste.
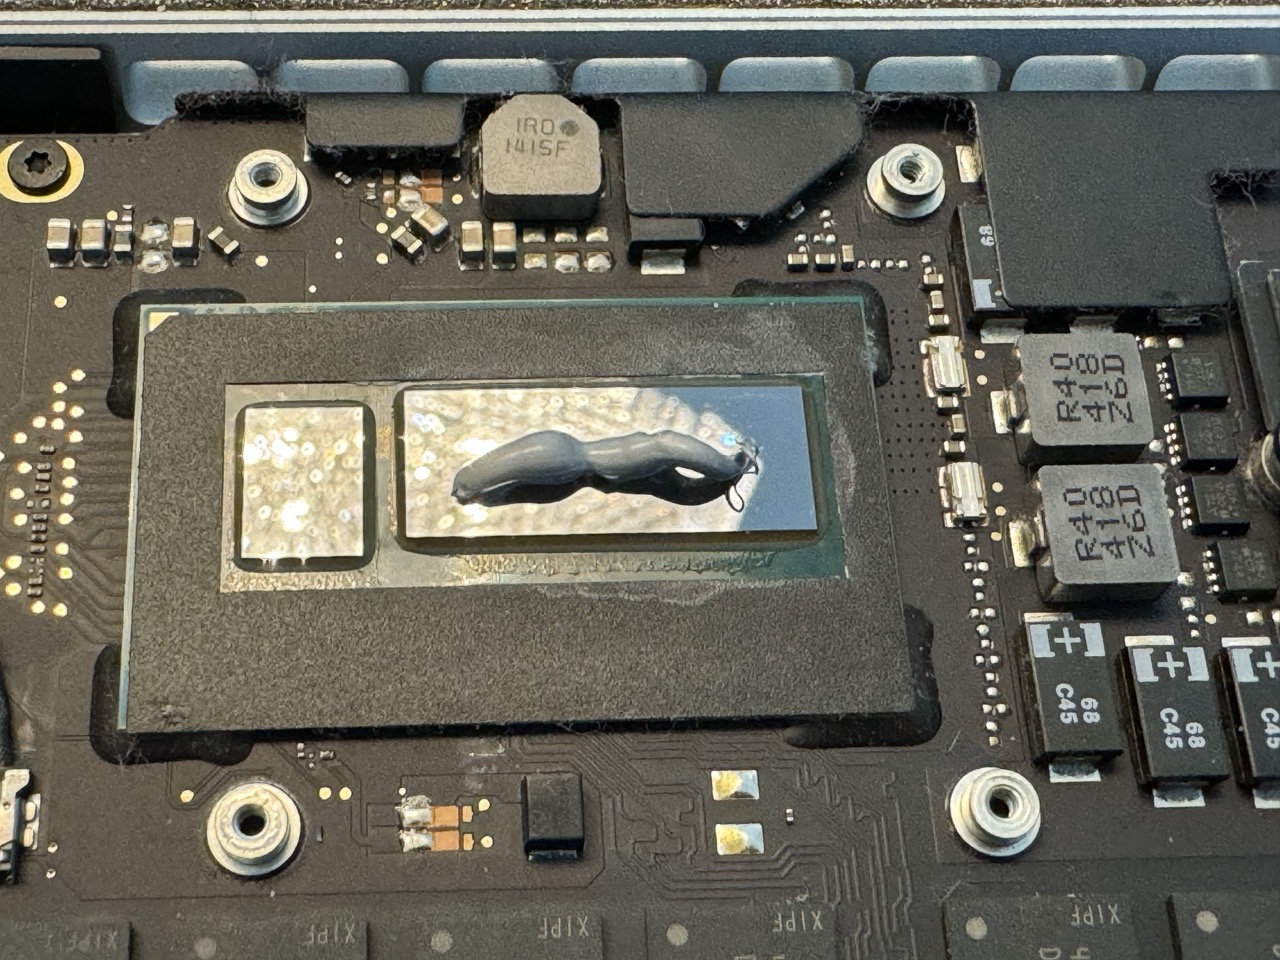
Fresh thermal paste added. Don’t judge me.
The new thermal paste was added on the CPU by way of the Artix syringe, after which I reattached the heatsink and affixed the four rubber toppers.
I forgot something. Do you see what’s missing?
With our tinkering complete, I reattached the battery cable, and put a few screws back in, to hold the bottom case, and fired up the Mac with a Mabox Linux USB stick. I expected a Mac chime, or at least a flash of some text on the screen.
Nada.
Did I somehow kill this MacBook Pro with my upgrades? In my moment of panic, that thought did cross my mind, until I realized I forgot to put the rubber sheath back over the heatsink.
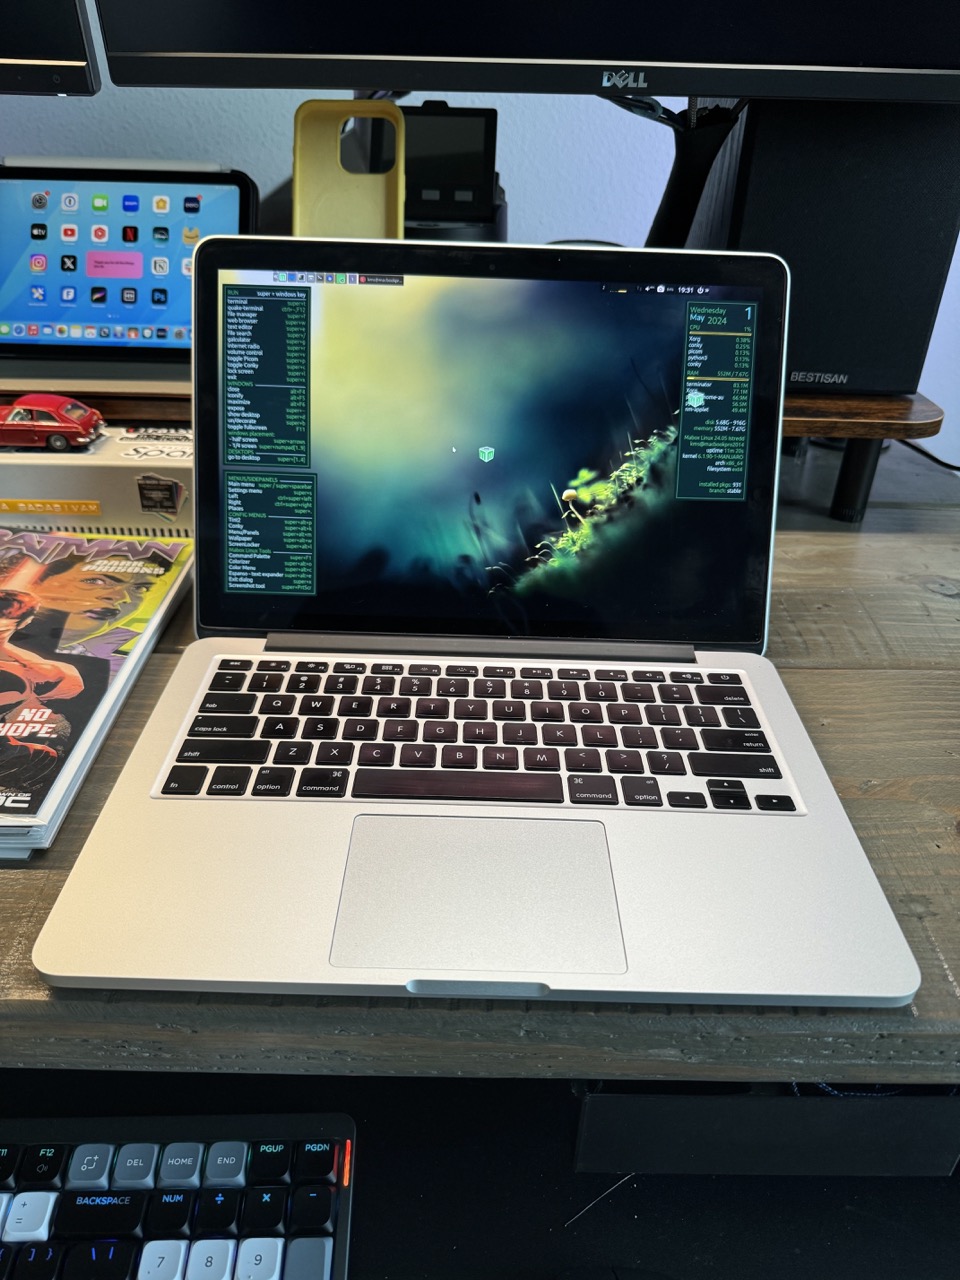
MaBox Linux installed. The upgraded MacBook Pro lives!
With the rubber sheath back in place, the MacBook booted up (still no chime) and loaded Mabox Linux from the attached USB thumb drive. The MacBook Pro lives once more. Now about Mabox Linux… Did I like it? That’s a story for next time…
-Krishna


June
May 30, 2024 at 2:02 pmHoly Cow
That is an extraordinary amount of tiny screws. I am very impressed with your observational skills as to what is under the hood of macbook pro laptop from 2014.
I like you humor as always: That pitiful 256GB SSD. It must go.
Thermal Paste was new.
I was not sure about what the rubber sheath looked like, but I understand immediately about unplugging the battery. Is this new operating system Mabox Linux, the only one that will work with this hardware?
Again,
Now I see Engineer I others 0. Thanks for educating us!