Building the Hackintosh Part 2: Installing Yosemite
I love hotrods.
Despite the fact that I’m ten thumbs when it comes to working on cars, I get the thrill from watching a souped-up vehicle get built and customized. There’s just something fascinating about taking stand-alone parts and assembling them into a fully functioning screamer. And that’s pretty much the feeling I had when I put together my first custom built PC, aka The RoBeast. A few weeks back, the RoBeast was running Windows 10 almost exclusively.
This weekend I received and installed a few key parts and took my geek skills to the next level. I now have my very own Hackintosh. The term Hackintosh (or FrankenMac) refers to any PC that can run OS X. The Hackintosh community are hotrodders in their own right, testing the limits of their skill and ingenuity and building souped-up computers that run OS X.
Everything I learned from building a Hacktinosh can be credited to one site, and one site alone: TonyMacx86.
Building a Hackintosh isn’t for everybody. It requires time, research, and patience. If you happen to be a geek who loves to test and learn new things, this might be a project worth undertaking. That being said, if you do your due diligence, you can wind up with a pretty sweet “ride” that dual boots between Mac and Windows operating systems.
I won’t bother to detail all the steps I took for this install, because I essentially followed the Installation Guide on TonyMac’s site. All the parts I selected for this build were chosen from known good builds (called Golden Builds because they have been proven to work). The process of making a PC into a Hackintosh involves several steps, and they must be followed to the letter. The journey to Hackintoshing begins by downloading OS X and installing it with custom drivers and other support files onto a bootable OS X thumb drive (dubbed UniBeast).
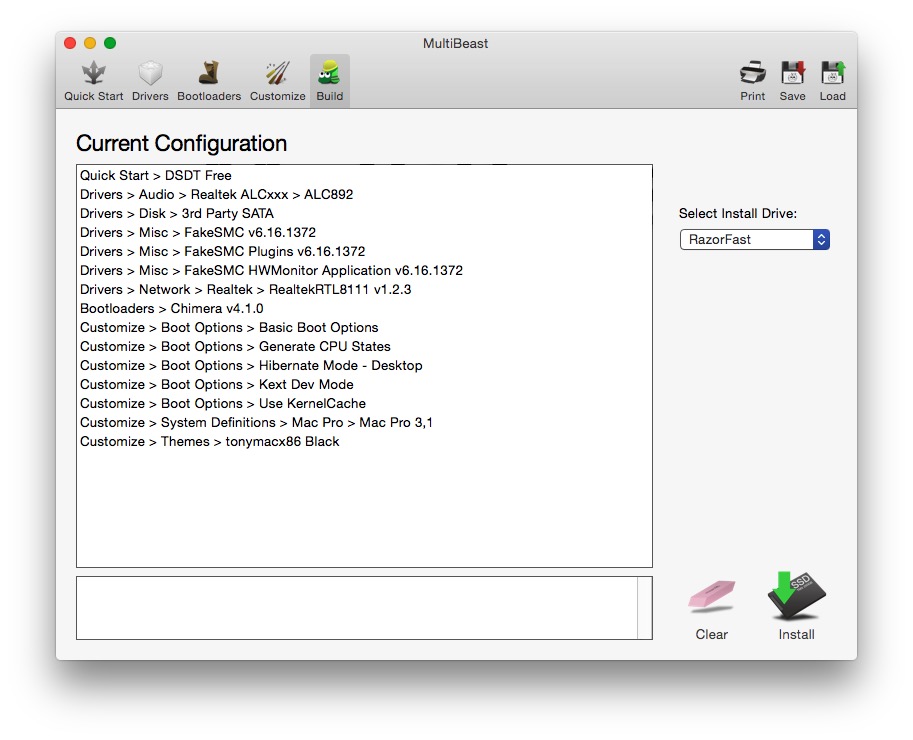
After appropriately configuring the BIOS (which control your PC’s motherboard, memory and CPU settings), boot your PC from UniBeast to install OS X. After OS X has been installed, it needs PC specific drivers to properly boot and run OS X. That’s where MultiBeast (a post-flight installation tool) comes in. Multibeast is user configurable and installs support for Audio, Network and Graphics. Both UniBeast and MultiBeast are available from TonyMacx86.
The trickiest part of the install was selecting the appropriate drivers and boot loaders for my specific setup. After three failed attempts (essentially making educated guesses on some of the settings), and three subsequent failed OS X installs, I finally found the magic settings that worked for my machine.
If you have a Windows drive along with your newly minted OS X drive, MultiBeast installs a boot loader that allows you to easily select between the two OS’s. I was able to get my new “MacBeast” to boot but I was running into problems when I attempted to restart or shutdown from OS X. The machine would freeze unexpectedly, forcing me to administer a hard reboot. The problem, as I soon found out, had to do with my Nvidia card. The fix was to install both the Nvidia CUDA and web drivers for OS X, available directly from Nvidia’s own website. With the CUDA and GPU drivers in place, I could properly shutdown and reboot the MacBeast.
I’ve had a few days with the MacBeast and it runs flawlessly. Outside of the lack of an Apple logo on the MacBeast, it runs every bit as good as a regular Mac. I have successfully tested Photoshop, Manga Studio and my Yiynova MSP19u tablet monitor on the MacBeast and all works as it should. Booting between Yosemite and Windows 10 is a breeze. In short, I have a much more powerful setup than my 8 year old Mac Pro – and the satisfaction that I was able to make everything work.
Now I know how those hotrodders feel. Next up: Benchmarks.
-Krishna


No comments yet. Be the first!